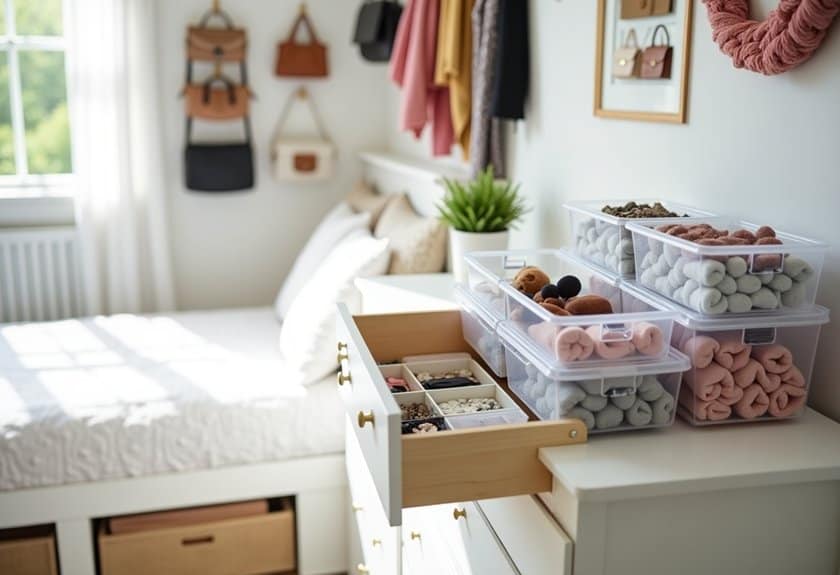
You might think organizing your bedroom requires expensive storage solutions from specialty stores, but I’ve discovered that’s simply not true. After transforming my own chaotic space with Dollar Tree finds, I’ve become convinced that smart organization is more about creativity than cash. From turning shower caddies into vertical storage to crafting custom drawer dividers, there’s a surprising world of budget-friendly possibilities waiting at your local dollar store. Let me show you how to maximize your space without minimizing your wallet.
Use Plastic Bins as Under-Bed Storage
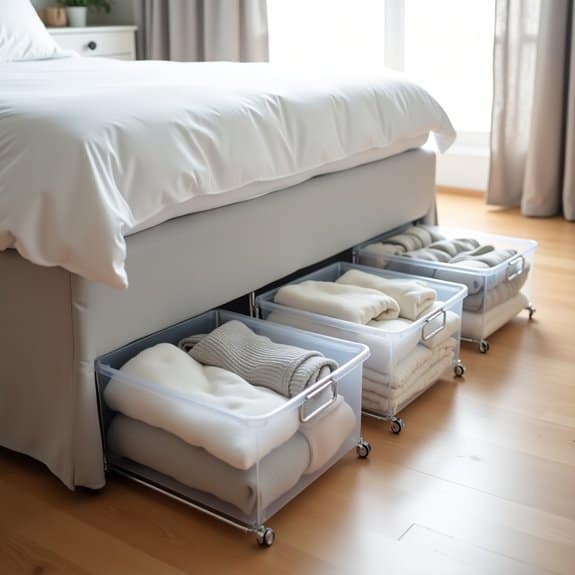
Under-bed storage represents one of the most underutilized spaces in the bedroom, yet it offers immense potential for organizing seasonal items, extra bedding, and rarely used possessions. This often-forgotten area can provide substantial storage space without taking up valuable floor real estate or creating visual clutter in your room.
Making use of plastic bins from Dollar Tree transforms this neglected space into an efficient storage solution that protects items from dust while keeping them easily accessible. The low profile of these containers makes them perfect for sliding under most bed frames, while their transparent nature allows for quick identification of contents.
Required Items:
- Dollar Tree plastic storage bins
- Measuring tape
- Label maker or markers
- Drawer pulls or handles (optional)
- Furniture risers (optional)
- Small wheel attachments (optional)
- Clear plastic bags for grouping items
Begin by measuring the height between your bed frame and floor to ensure proper bin fit. Sort items into categories such as seasonal clothing, extra bedding, or shoes. Place similar items together in clear plastic bags before placing them in the bins to prevent smaller items from getting scattered.
If needed, attach handles or wheels to the bins for easier access. Label each container clearly with its contents, using either a label maker or permanent marker on both the lid and side of the bin.
For maximum organization effectiveness, create a diagram or list noting which bins contain what items and their exact location under the bed. Consider positioning frequently accessed items near the foot or sides of the bed for easier reach. Maintain organized bins by periodically reviewing contents and purging unnecessary items to prevent overcrowding.
Additional tip: Consider using bed risers to create extra height clearance for larger bins, and place silica gel packets in bins containing fabric items to prevent moisture buildup. Season-specific items should be rotated to the front when needed, while maintaining a consistent organizational system throughout the year.
Create Drawer Dividers From Storage Baskets
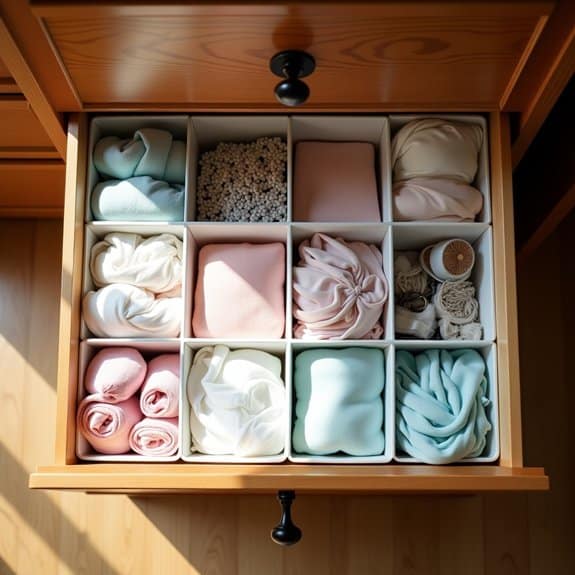
Drawer organization is crucial for maintaining order in bedroom storage spaces, particularly when dealing with smaller items like socks, underwear, accessories, or clothing that tends to become jumbled together. Without proper compartmentalization, drawers quickly become chaotic, making it difficult to find specific items and potentially damaging delicate materials.
Converting Dollar Tree storage baskets into drawer dividers presents an affordable solution that transforms cluttered drawers into well-organized storage spaces. This method is especially valuable for renters or those seeking temporary solutions, as these dividers can be easily removed and rearranged without permanent modifications to furniture.
Required Items:
- Dollar Tree plastic storage baskets
- Measuring tape
- Scissors
- Non-slip drawer liner (optional)
- Label maker or markers (optional)
- Clear adhesive hooks (optional)
Start by measuring the interior dimensions of your drawer, including height, width, and depth. Select appropriately sized storage baskets from Dollar Tree that will fit within these measurements, allowing for some space between containers. Remove any tags or labels from the baskets and clean them thoroughly.
Position the baskets within the drawer, creating a grid pattern that maximizes space utilization while maintaining easy access to items. For additional stability, line the drawer bottom with non-slip material before placing the baskets.
Consider designating specific baskets for different categories of items based on your needs. For instance, dedicate one basket to socks, another to undergarments, and others to accessories like scarves or belts. This categorization system helps maintain organization long-term and makes items easier to locate quickly.
Additional Tips: Enhance your drawer organization by adding small adhesive hooks inside the drawer walls to hang delicate items or create vertical storage space. Use clear baskets when possible to easily identify contents, or label each container for quick reference. Periodically assess the effectiveness of your basket arrangement and adjust as needed to accommodate changing storage needs or seasonal items.
DIY Jewelry Organization With Grid Containers
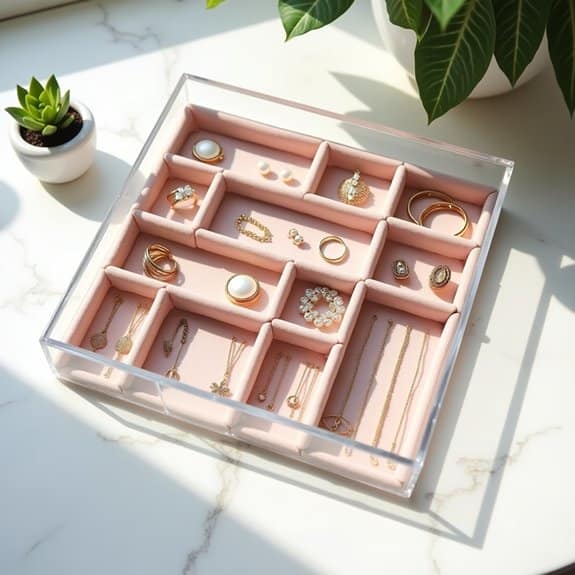
Keeping jewelry organized is essential for protecting delicate pieces from damage, preventing tangling, and making it easier to find exactly what you want to wear. Disorganized jewelry often leads to broken chains, lost earring backs, and frustrating mornings spent searching for matching pieces.
Grid containers from Dollar Tree offer an affordable and efficient solution for jewelry organization. These versatile containers, typically used for crafting supplies, can be transformed into custom jewelry storage that fits perfectly in drawers or on dressing tables, keeping everything visible and accessible.
Required Items:
- Plastic grid containers from Dollar Tree
- Felt or foam sheets
- Scissors
- Hot glue gun and glue sticks
- Measuring tape
- Pen or marker
- Clear adhesive hooks (optional)
- Small rubber bands (optional)
Begin by measuring your drawer or designated space and selecting appropriate grid containers to fit the area. Cut felt or foam sheets to line the bottom of each compartment, securing them with hot glue. This protective layer prevents jewelry from scratching and keeps pieces from sliding around.
Sort your jewelry by category (rings, earrings, necklaces, bracelets) and assign specific sections for each type. For necklaces, you can add small adhesive hooks to the sides of larger compartments to prevent tangling.
For optimal organization, dedicate separate sections for different metals or colors, keeping gold pieces separate from silver to prevent tarnishing. Use smaller compartments for stud earrings and rings, while reserving larger spaces for chunky bracelets and statement necklaces.
Consider creating a special section for frequently worn pieces to make daily selection easier.
Additional tip: Place silica gel packets in various compartments to prevent tarnishing, and periodically review your jewelry collection to remove pieces you no longer wear. This maintenance helps keep the system organized and makes room for new additions.
Consider taking photos of your organized layout to remember where everything belongs after cleaning or rearranging.
Transform Shower Caddies Into Wall Storage
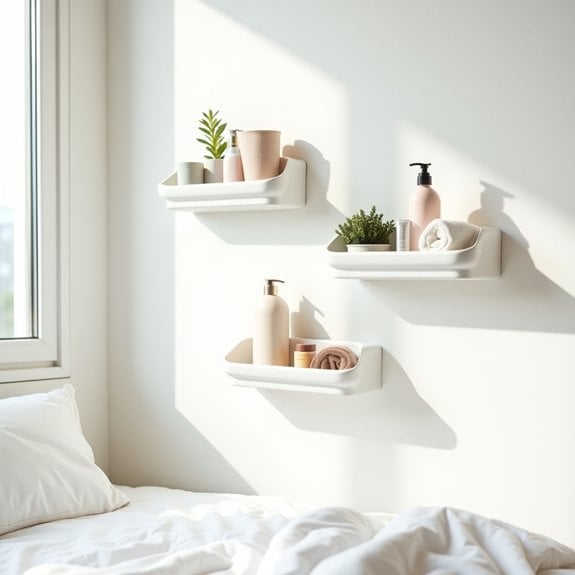
Maximizing vertical storage space in bedrooms is essential for maintaining order and creating a clutter-free environment. Wall storage solutions can help keep frequently used items accessible while freeing up valuable floor and surface space.
Shower caddies from Dollar Tree offer an affordable and versatile solution for creating custom wall storage. These lightweight yet sturdy organizers can be repurposed to hold everything from beauty products and accessories to school supplies and craft materials, making them perfect for bedrooms of all sizes.
Required Items:
- Dollar Tree shower caddies
- Command strips or mounting hooks
- Screwdriver and screws (if mounting directly to wall)
- Level
- Measuring tape
- Pencil
- Cleaning supplies
- Optional: spray paint
- Optional: decorative elements
Select appropriate locations for your shower caddies based on the items you plan to store and your room’s layout. Clean the wall surface thoroughly and mark mounting points with a pencil, using a level to ensure straight placement. If using Command strips, apply them to the back of the caddy according to package instructions. For permanent installation, secure the caddies to wall studs using screws. Space multiple caddies evenly for a cohesive look.
Consider painting the caddies to match your room’s decor or adding decorative elements like washi tape or stickers before mounting. Organize items by category within each caddy, placing heavier items at the bottom and lighter ones toward the top. Use small containers or dividers within the caddies to separate smaller items and prevent them from falling through the holes.
Maintain the organization system by regularly cleaning the caddies and evaluating stored items. Rotate seasonal items as needed and adjust the arrangement if certain items prove difficult to access. For added stability, avoid overloading the caddies and distribute weight evenly across multiple units rather than concentrating heavy items in one area.
Make Custom Closet Organizers With Bins
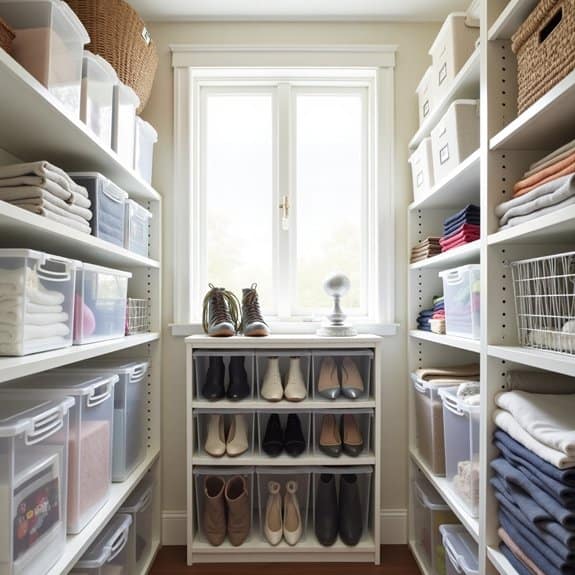
A well-organized closet is essential for maintaining order in your bedroom and streamlining your daily routine. When clothes, accessories, and other items are properly sorted and stored, you can easily locate what you need and maximize your available space, turning a cluttered closet into an efficient storage solution.
Creating custom closet organizers using Dollar Tree bins offers an affordable way to transform your closet space without expensive organization systems. This budget-friendly approach allows you to customize storage solutions to your specific needs while maintaining a cohesive and attractive appearance.
Required Items:
- Plastic storage bins (various sizes)
- Label maker or labels
- Measuring tape
- Scissors
- Command hooks or adhesive strips
- Clear storage boxes
- Shelf liner
- Wire baskets
- Hanging organizers
- Storage containers with lids
Start by measuring your closet space and determining specific zones for different categories of items. Sort your belongings into groups: clothing, accessories, shoes, and seasonal items. Select appropriately sized bins for each category, ensuring they fit your closet’s dimensions.
Position larger bins on the floor or bottom shelf for heavier items, and use smaller containers for accessories and delicate items.
Install shelf liner on existing shelves to prevent bins from sliding and create a clean foundation. Arrange bins systematically, placing frequently used items at eye level and seasonal items in higher or lower spaces. Use clear containers for items you need to identify quickly, and incorporate hanging organizers for additional vertical storage.
Secure any wall-mounted bins with Command hooks or adhesive strips for added stability.
Additional Tips: Implement a color-coding system using different colored bins or labels to quickly identify contents. Regularly reassess your organization system and adjust bin placement based on usage patterns.
Consider using stackable containers to maximize vertical space, and always leave some empty space for future items or seasonal rotation. Clean bins regularly and replace any damaged containers to maintain an organized and visually appealing closet system.
Maximize Vertical Space With Command Hooks
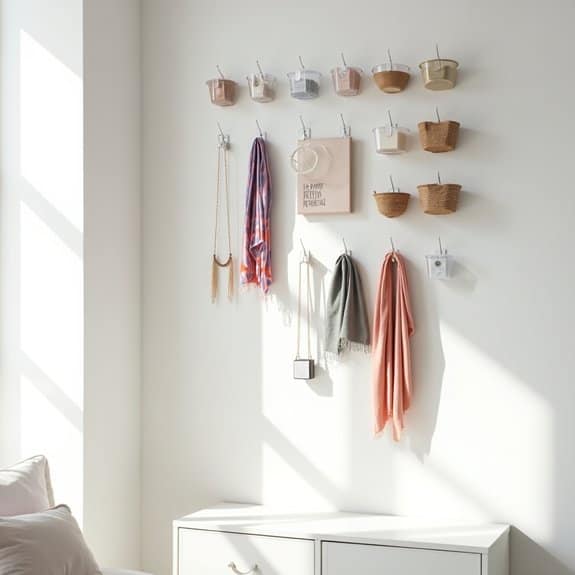
Making the most of vertical space in your bedroom is crucial for maximizing storage and maintaining a clutter-free environment. Wall space often goes underutilized, yet it offers countless opportunities for organizing everything from accessories to daily essentials without taking up precious floor space.
Command hooks from Dollar Tree provide an affordable solution for vertical organization, allowing you to create custom storage solutions that work for your specific needs. These adhesive hooks can transform empty wall space into functional storage areas while being completely removable and damage-free, making them perfect for both homeowners and renters.
Required Items:
- Command hooks (various sizes)
- Measuring tape
- Pencil
- Level
- Clean cloth
- Rubbing alcohol
- Storage containers or baskets (optional)
- Decorative containers (optional)
- Small command strips (optional)
Start by cleaning the wall surfaces thoroughly with rubbing alcohol and allowing them to dry completely. Map out your organization system by measuring and marking hook placement with a pencil, ensuring proper spacing and alignment.
Consider grouping hooks based on their intended purpose – longer items like scarves might need more space between hooks than smaller items like jewelry.
Follow the package instructions carefully when installing the hooks, paying special attention to weight limits and proper adhesive application. Create zones for different categories of items: install hooks at varying heights for long necklaces, configure hook patterns for handbags, or set up rows for belts and scarves.
For smaller items, consider hanging lightweight baskets or containers from larger hooks to create contained storage spaces.
Additional Tip: To maximize the effectiveness of your vertical storage system, rotate items seasonally and regularly assess what you’re storing. Remove items that haven’t been used in several months, and adjust hook placement as needed.
Consider using clear containers for smaller items to maintain visibility and prevent forgotten items from collecting dust. Label zones clearly to maintain organization and make it easier to return items to their designated spots.
Sort Small Items With Ice Cube Trays
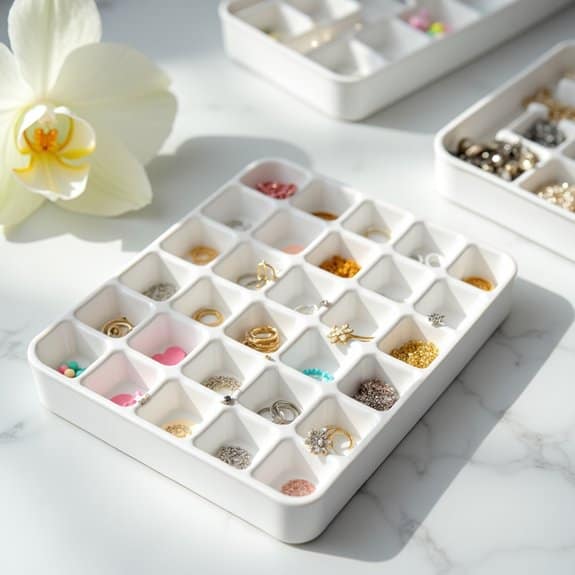
Small bedroom items like jewelry, hair accessories, and craft supplies often create clutter and frustration when scattered throughout drawers and surfaces.
These tiny objects can easily become tangled, lost, or damaged without proper organization, leading to wasted time searching and unnecessary replacements.
Ice cube trays from Dollar Tree offer an affordable and practical solution for organizing these small items. Their compartmentalized design naturally creates separate spaces for different categories, while their shallow depth makes items easily visible and accessible.
This simple organizing hack transforms cluttered spaces into systematic storage solutions.
Required Items:
- Plastic ice cube trays
- Label maker or tape
- Scissors
- Cleaning cloth
- Small items to organize
- Drawer or shelf space
- Measuring tape
Start by cleaning the ice cube trays thoroughly with soap and water, ensuring they’re completely dry before use.
Measure your drawer or shelf space to determine how many trays will fit, then arrange them in the designated area.
Sort your small items by category, such as earrings, rings, bobby pins, or craft beads. Place each category in its own compartment, being careful not to overflow the spaces.
Consider using multiple trays for different types of items, such as one for jewelry and another for office supplies.
To maximize this organization system, label each section clearly, either on the tray itself or on the drawer edge.
Consider stacking trays if vertical space allows, but ensure items remain visible and accessible.
Regularly assess the contents and adjust the arrangement as needed, removing items that are no longer used or reorganizing based on frequency of use.
This system works best when maintained consistently and updated as your storage needs change.
Build a Bedside Charging Station
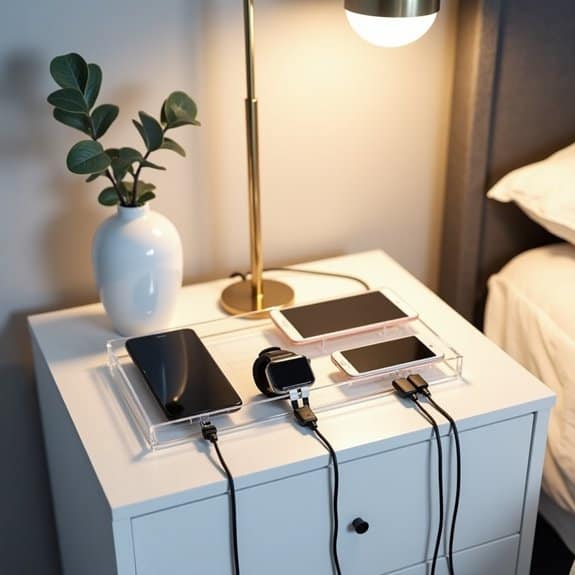
A well-organized charging station is essential in today’s digital world, where most people rely on multiple devices throughout the day. Having your devices organized and charging efficiently beside your bed not only prevents tangled cords and misplaced electronics but also ensures you wake up to fully charged devices ready for use.
Creating a dedicated charging station from Dollar Tree items offers an affordable solution to eliminate bedside clutter while maintaining easy access to your devices. This organization system helps establish a proper spot for each device and prevents the common frustration of searching for charging cables in the dark.
Required Items:
- Plastic desk organizer
- Command hooks
- Cable clips
- Small plastic bins
- Rubber bands
- Label maker or stickers
- Power strip
- Double-sided tape
- Scissors
- Wire ties
Start by positioning your power strip in a convenient location near your bedside table, ensuring it can accommodate all your charging needs. Secure the plastic desk organizer to your bedside table using double-sided tape or command strips, positioning it where it’s easily accessible.
Install cable clips along the back or side of your nightstand to guide cords neatly from the power strip to the organizer. Create designated spaces within the desk organizer for each device using small plastic bins as dividers. Label each section clearly to maintain organization.
Thread charging cables through the cable clips, securing them with wire ties to prevent tangling, and position the charging ends in their designated spaces within the organizer. For optimal results, consider implementing a cable management system using color-coded labels or rubber bands to identify different cables quickly.
Position frequently used devices at the front of the organizer, and consider adding a small LED light strip (also available at Dollar Tree) to illuminate the charging station at night. Regular maintenance of cable organization and periodic cleaning will help maintain the system’s efficiency and longevity.
Organize Scarves and Belts With Tension Rods
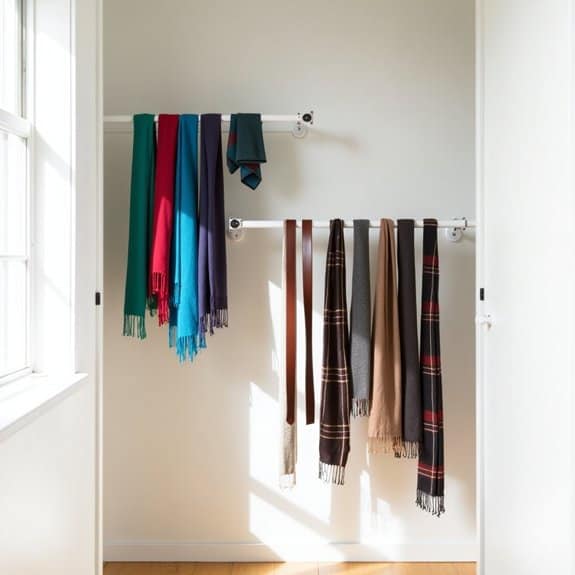
Scarves and belts often become tangled messes in drawers or get lost in the depths of closets, making it frustrating to find the right accessory when needed. A disorganized collection of these accessories not only wastes valuable time during outfit selection but can also lead to unnecessary wear and tear on the items themselves.
Using tension rods from Dollar Tree provides an affordable and efficient solution for organizing scarves and belts. This simple yet effective method keeps accessories visible, easily accessible, and wrinkle-free while maximizing vertical space in closets or on walls.
Required Items:
- 2-3 tension rods
- Measuring tape
- Pencil
- Level
- Wall anchors (if mounting to drywall)
- Screwdriver
- Command hooks (optional)
Install the tension rods horizontally between closet walls or mount them directly to the wall using brackets. Space the rods approximately 12-15 inches apart vertically to accommodate different lengths of scarves and belts. For closet installation, ensure the rods are secure by testing their stability before hanging items.
When mounting to walls, use appropriate anchors to support the weight of the accessories.
Thread scarves through the rods by folding them in half and pulling the loose ends through the loop, creating a secure knot. For belts, simply hang them over the rod, organizing them by color, style, or frequency of use. Consider installing the highest rod at eye level for easy visibility and access.
Additional Tips: Label each rod section by category (silk scarves, winter scarves, dress belts, etc.) to maintain organization. Place frequently used items in the most accessible spots.
For delicate scarves, consider using shower curtain rings attached to the tension rod to prevent snags and provide easier movement. Clean and inspect the rods periodically to ensure they remain secure and dust-free.
Label Everything With Chalkboard Tags

Labeling items in your bedroom creates a systematic approach to organization that eliminates guesswork and saves valuable time. When everything has a clear, visible label, you can quickly locate items and maintain an organized space without constantly searching through multiple containers or drawers.
Chalkboard tags from Dollar Tree offer an affordable and versatile solution for labeling bedroom items. These reusable tags allow you to update labels as your organization needs change, making them perfect for seasonal rotations or lifestyle adjustments. Their classic black surface with white lettering adds a stylish touch to any storage solution.
Required Items:
- Dollar Tree chalkboard tags
- Chalk markers or regular chalk
- String or twine
- Scissors
- Clean cloth
- Storage containers or boxes
- Small hooks or adhesive hangers
- Hole punch (if tags don’t have pre-made holes)
Start by cleaning the chalkboard surface of each tag with a slightly damp cloth and allowing them to dry completely. Write clear, legible labels using chalk markers for a more permanent solution or regular chalk if you plan to change labels frequently.
For containers and boxes, attach tags using the pre-made holes and string, ensuring they hang at visible angles. For drawers or shelves, consider using adhesive hangers to mount tags directly on surfaces where they’re easily visible but won’t interfere with functionality.
When labeling, use broad categories for larger spaces (like “Winter Accessories” or “Reading Materials”) and specific labels for smaller containers (like “Scarves” or “Journals”). Group similar items together and ensure tags are consistently placed in the same position on all containers for a cohesive look. Remember to leave some tags blank for future use or reorganization.
Additional Tips: Keep a few extra tags and chalk markers on hand for quick updates or additions to your system. Photograph your organized spaces with their labels to remember your system if items get moved around. Consider using different colored chalk markers for different categories or seasons, and always test markers on a small corner of a tag first to ensure they can be erased if needed.

