You don’t need a huge budget or professional skills to transform your cluttered spaces into organized havens. I’ve tackled plenty of storage challenges in my own home, and I’ve discovered some incredibly clever DIY solutions that won’t break the bank. From simple under-bed organizers made from recycled materials to impressive rolling garage carts, there’s a perfect project waiting for your skill level and budget. Let’s explore nine creative storage solutions that’ll help you reclaim your space!
Under-Bed Storage Solutions Using Recycled Materials
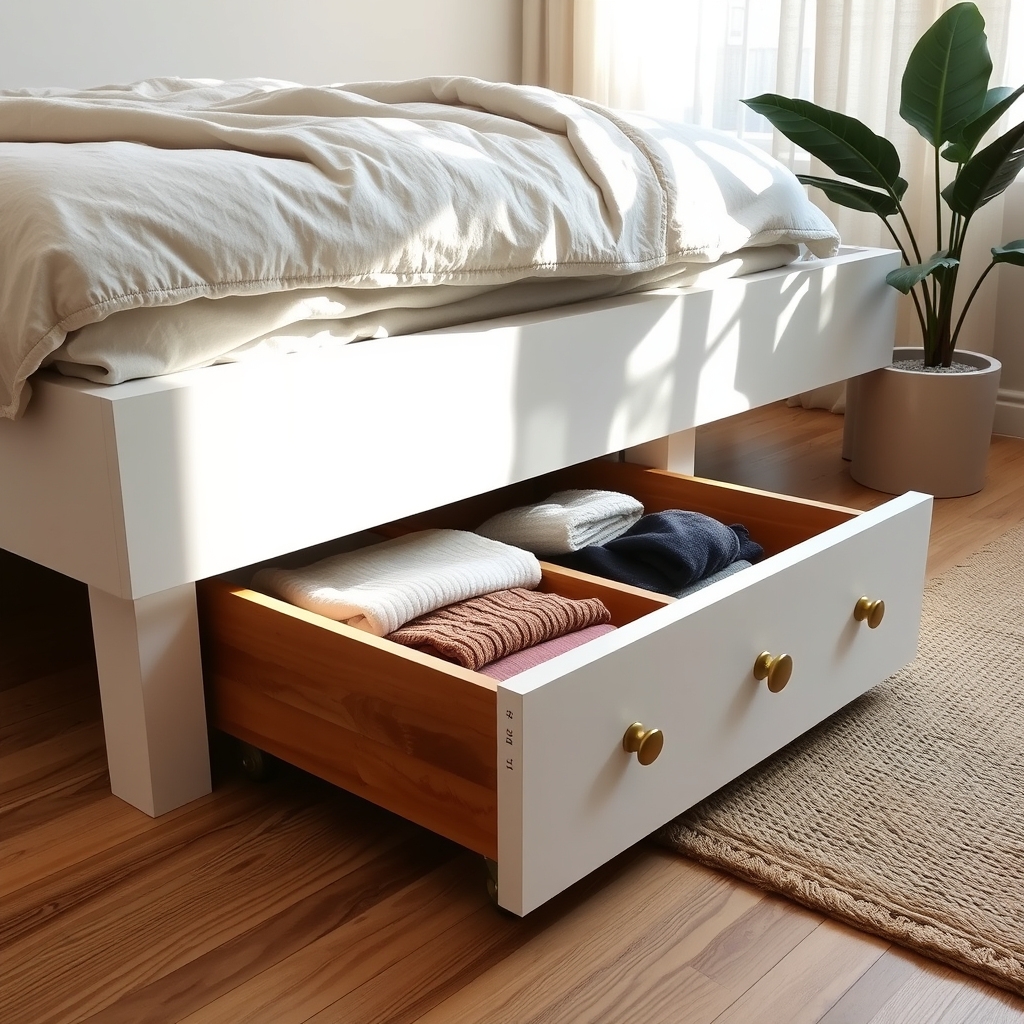
Making use of under-bed space represents one of the most overlooked opportunities for additional storage in the home. This often-wasted area can provide valuable square footage for storing seasonal items, extra bedding, or clothing, effectively expanding your storage capacity without taking up visible living space.
Recycling materials for under-bed storage not only helps the environment but also saves money while creating custom solutions that fit your specific needs. Old dresser drawers, wooden crates, and cardboard boxes can be transformed into practical storage units that slide smoothly under your bed while keeping contents dust-free and organized.
Required Materials:
- Old dresser drawers or wooden crates
- Caster wheels
- Sandpaper
- Wood paint or sealant
- Screws and drill
- Measuring tape
- Heavy-duty fabric or canvas
- Drawer pulls or handles
- Weather stripping
- Wood glue
- Basic cleaning supplies
Start by measuring the height between your bed frame and floor, subtracting one inch for clearance. Clean and sand your chosen containers, removing any rough edges or old paint. Install caster wheels on the bottom corners of each container, ensuring they’re securely attached and spin freely.
Apply weather stripping around the top edges to create a dust-proof seal. For wooden containers, apply a fresh coat of paint or sealant to protect against moisture and wear. Install handles or drawer pulls on the front for easy access.
If using cardboard boxes, reinforce them by covering with heavy-duty fabric or canvas, securing the material with strong adhesive. Create dividers inside the containers using spare cardboard or wood pieces to separate different items and maintain organization.
To maximize these storage solutions, label each container clearly and create a master list of contents. Position frequently-used items toward the foot of the bed for easier access, and consider using vacuum storage bags inside the containers to compress soft items like bedding or seasonal clothing.
Regular maintenance, including periodic cleaning and wheel checks, will ensure your under-bed storage system remains functional and efficient for years to come.
Vertical Wall Organization With Pegboards
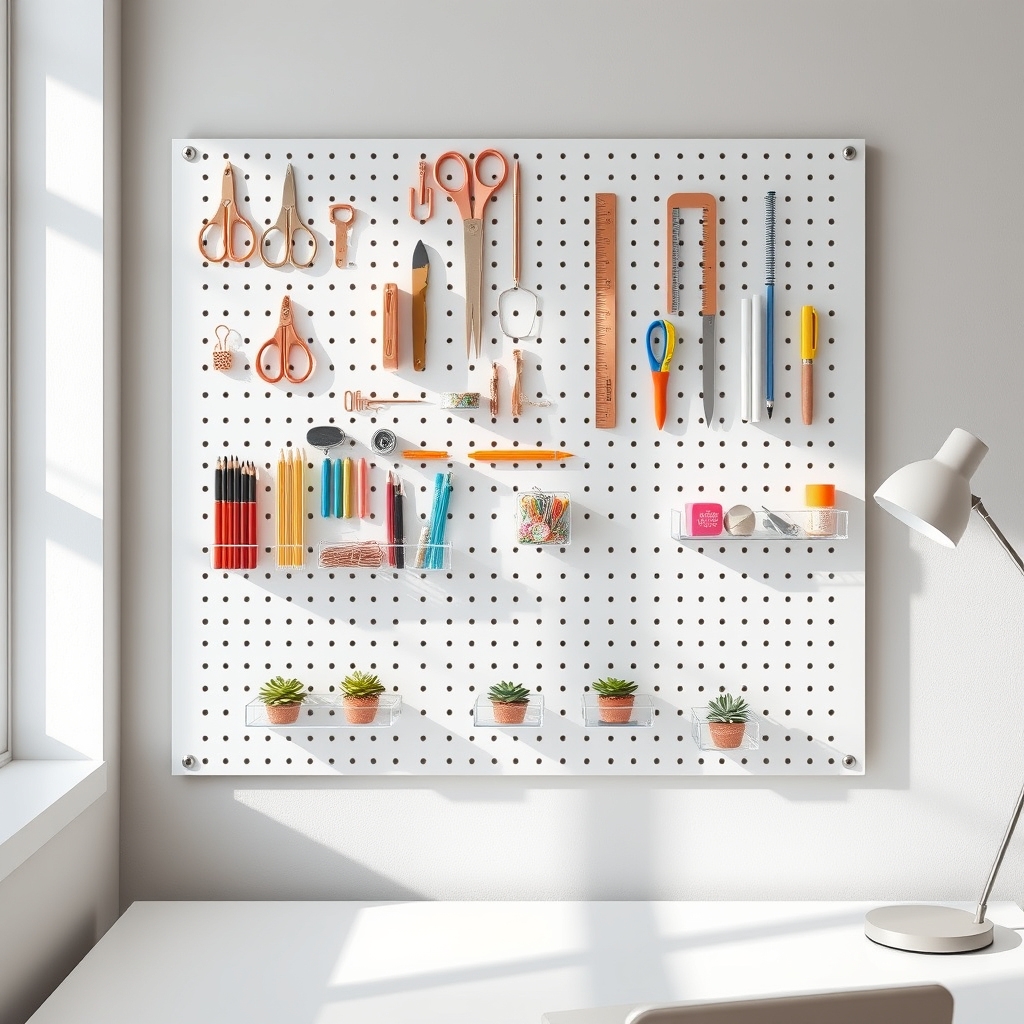
Vertical wall storage has become increasingly essential in modern homes where floor space is at a premium. Pegboards offer a versatile and customizable solution that transforms blank walls into functional storage areas, making tools, accessories, and everyday items easily accessible while keeping them organized and visible.
Pegboards are particularly effective in garages, craft rooms, home offices, and kitchens, where quick access to frequently used items is crucial. This organization system not only maximizes vertical space but also creates an aesthetically pleasing display that can be modified as storage needs change.
Required Materials:
- Pegboard panels
- Wall anchors and screws
- Spacers or furring strips
- Pegboard hooks (various sizes)
- Level
- Drill
- Pencil
- Measuring tape
- Hammer
- Storage bins and baskets (pegboard compatible)
- Wire clips
- Tool holders
Begin by measuring your wall space and cutting the pegboard to size if necessary. Install furring strips on the wall first, spacing them 16 inches apart to align with wall studs. These strips create essential space behind the pegboard for hook insertion.
Mount the pegboard to the furring strips using screws and wall anchors, ensuring it’s level. Before adding hooks, plan your layout by drawing an outline of larger items directly on the pegboard.
For optimal organization, group similar items together and position frequently used items at eye level. Install various hooks, tool holders, and storage bins according to your planned layout. Consider using color-coded zones for different categories of items, and leave some empty space for future additions.
To maintain the effectiveness of your pegboard organization, regularly assess the arrangement and adjust as needed. Use pegboard bins for smaller items that might get lost, and consider adding labels to maintain order.
For heavier items, double up on hooks or use specialized weight-bearing brackets. Remember to periodically check that all hooks and mounting hardware remain secure, especially in high-use areas.
Custom Floating Shelves From Reclaimed Wood
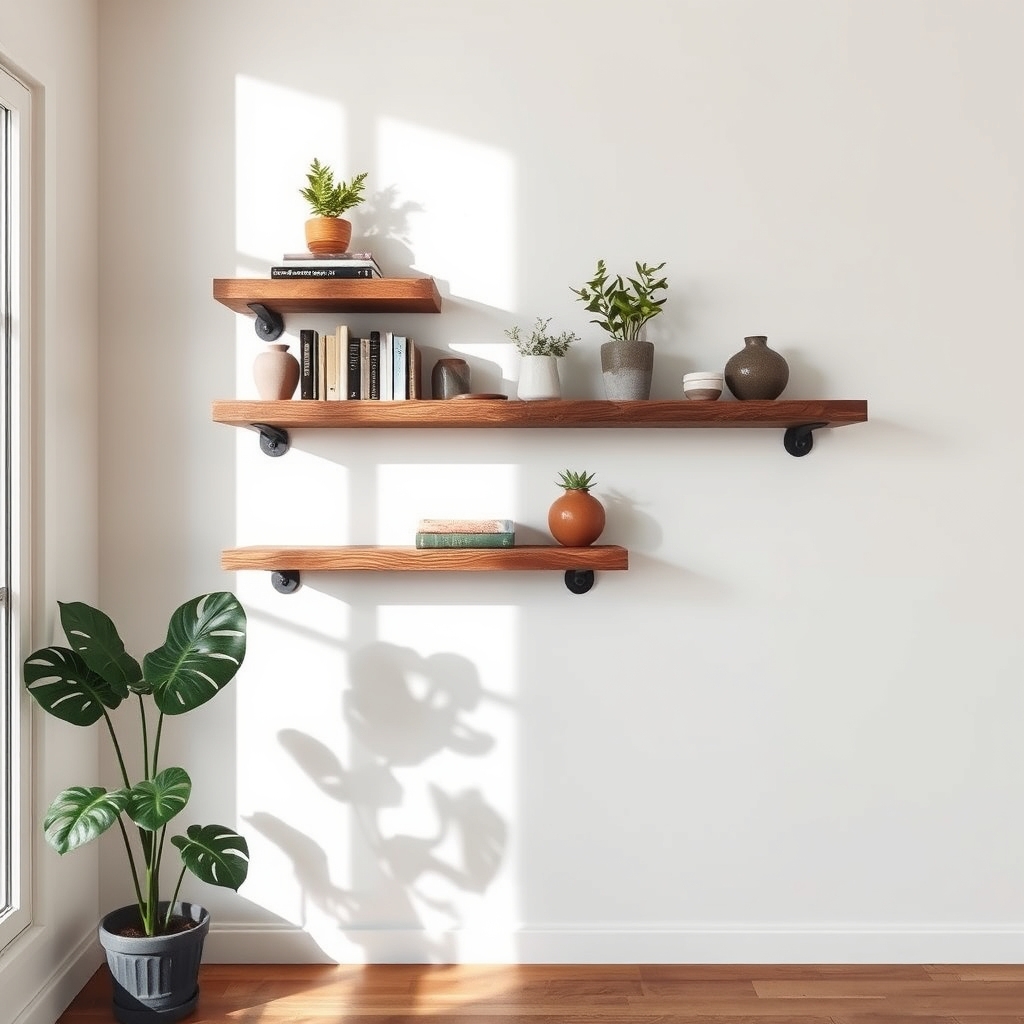
Floating shelves made from reclaimed wood add character and functionality to any living space while promoting sustainable design practices. These versatile storage solutions appear to “float” on walls, creating a clean, modern aesthetic that works in any room, from living areas to home offices.
Repurposing reclaimed wood not only reduces environmental impact but also brings unique textures and patinas into your home. Each piece tells a story through its weathered appearance, making your storage solution both practical and visually compelling.
Required Materials and Tools:
- Reclaimed wood planks
- Level
- Measuring tape
- Pencil
- Drill and drill bits
- Wall anchors
- Mounting brackets
- Screws
- Sandpaper (various grits)
- Wood sealer or finish
- Safety goggles
- Dust mask
- Work gloves
- Stud finder
Begin by carefully selecting and preparing your reclaimed wood. Sand the surfaces progressively using different grits of sandpaper, starting with coarse and moving to fine, until you achieve the desired smoothness while maintaining the wood’s character.
Clean thoroughly to remove dust and apply wood sealer or finish according to manufacturer instructions.
For installation, locate and mark wall studs using a stud finder. Measure and mark your desired shelf locations, ensuring they’re level. Install mounting brackets securely into studs or using appropriate wall anchors.
If the wood is thick enough, create hidden channels in the back of the shelves to accommodate the brackets. Attach the shelves to the mounted brackets, ensuring they’re firmly secured.
Additional Tips:
Consider the weight capacity of both your mounting hardware and the wall structure when planning shelf placement. Pre-drill holes to prevent wood splitting, and always work with properly dried wood to prevent warping.
Leave adequate space between shelves for items you plan to display, and consider installing a small lip or groove if you’re storing round objects that might roll off.
Door-Mounted Storage Rack Systems
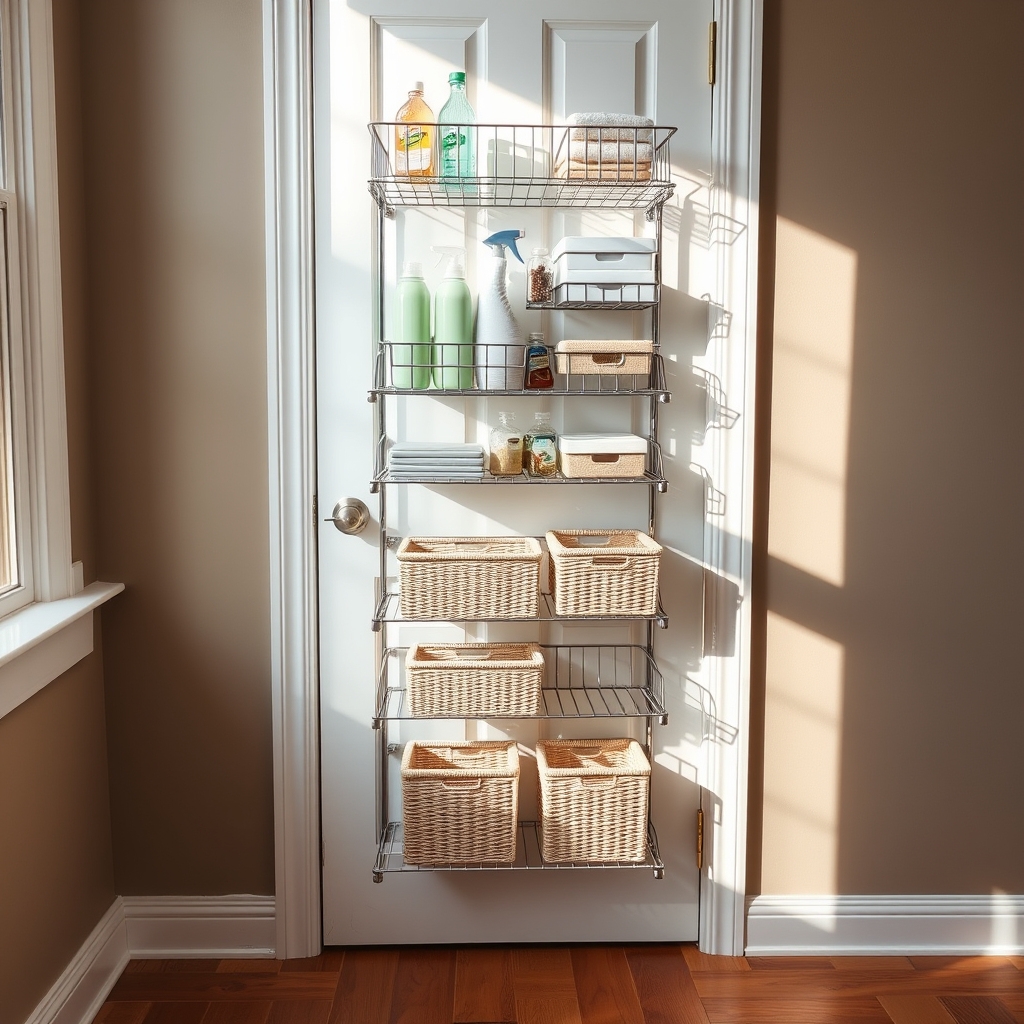
Making the most of vertical space is crucial in any home, and door-mounted storage systems offer an often-overlooked solution for maximizing storage capacity. These systems transform unused door surfaces into valuable storage real estate, perfect for organizing everything from pantry items to cleaning supplies.
Door-mounted storage racks are particularly effective in small spaces where traditional shelving or cabinets aren’t practical. They provide easy access to frequently used items while keeping them organized and visible, eliminating the need to dig through drawers or reach into deep cabinets.
Required Items:
- Over-the-door hanging rack system
- Measuring tape
- Pencil
- Level
- Screwdriver
- Wall anchors (if mounting directly to door)
- Mounting brackets
- Command strips or door hooks (optional)
- Basket organizers
- Label maker
- Rubber door bumpers
Installation and organization requires careful planning and execution. First, measure the door’s dimensions and choose an appropriately sized rack system that won’t interfere with door closure. Install the rack following manufacturer instructions, ensuring it’s level and secure. If mounting directly to the door rather than using over-door hooks, use appropriate anchors to prevent damage.
Once mounted, organize items by category, placing frequently used items at eye level and heavier items near the bottom for stability. Use basket organizers to group similar items together and prevent smaller objects from falling through the rack’s gaps.
Consider the door’s swing radius to ensure items won’t hit walls or fixtures when opening and closing. To protect both the door and walls, install rubber bumpers where the rack might make contact with surfaces.
Label each section clearly to maintain organization over time, and regularly assess the weight distribution to prevent strain on the mounting system. Periodically check and tighten all mounting hardware to ensure continued stability and safety.
Cardboard Box Drawer Organizers
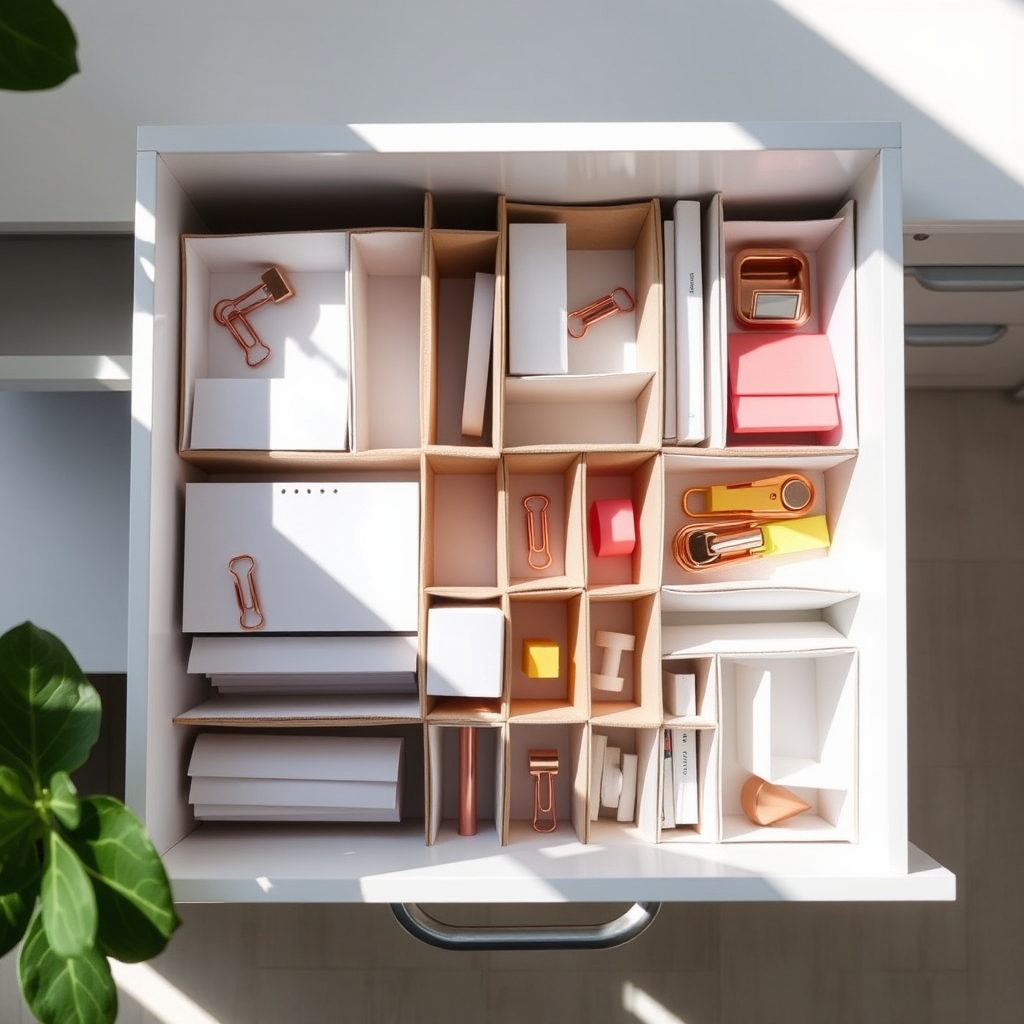
Drawer organization is a fundamental aspect of maintaining an orderly and efficient home. When drawers become cluttered, finding essential items becomes frustrating and time-consuming, leading to unnecessary stress and wasted minutes searching for what you need.
Creating custom drawer organizers from cardboard boxes offers an eco-friendly and cost-effective solution to drawer chaos. This project transforms ordinary cardboard boxes into tailored compartments that maximize drawer space while keeping items neatly categorized and easily accessible.
Required Materials:
- Cardboard boxes of various sizes
- Scissors or utility knife
- Ruler or measuring tape
- Pencil
- Strong tape
- Contact paper or decorative paper (optional)
- Glue (optional)
- Clear nail polish (optional, for reinforcement)
Cut your cardboard boxes to match your drawer dimensions, ensuring they fit snugly without sliding around. Measure the height of your drawer and trim the boxes accordingly, leaving them slightly shorter than the drawer height for easy access.
Create a configuration that accommodates your items by arranging different-sized boxes within the drawer space. For additional durability, reinforce the corners with tape and cover the boxes with contact paper or decorative paper if desired.
For optimal results, categorize items before placing them in the newly created compartments. Group similar items together and assign them to appropriately sized sections. Consider the frequency of use when determining placement, keeping frequently accessed items toward the front of the drawer.
To maintain the longevity of your cardboard organizers, avoid overloading compartments and periodically check for wear and tear. Consider coating exposed edges with clear nail polish to prevent fraying, and rotate items occasionally to distribute weight evenly across the organizers.
Regular maintenance and occasional adjustments will ensure your DIY drawer organization system remains effective and durable over time.
Hidden Storage Ottoman Makeover
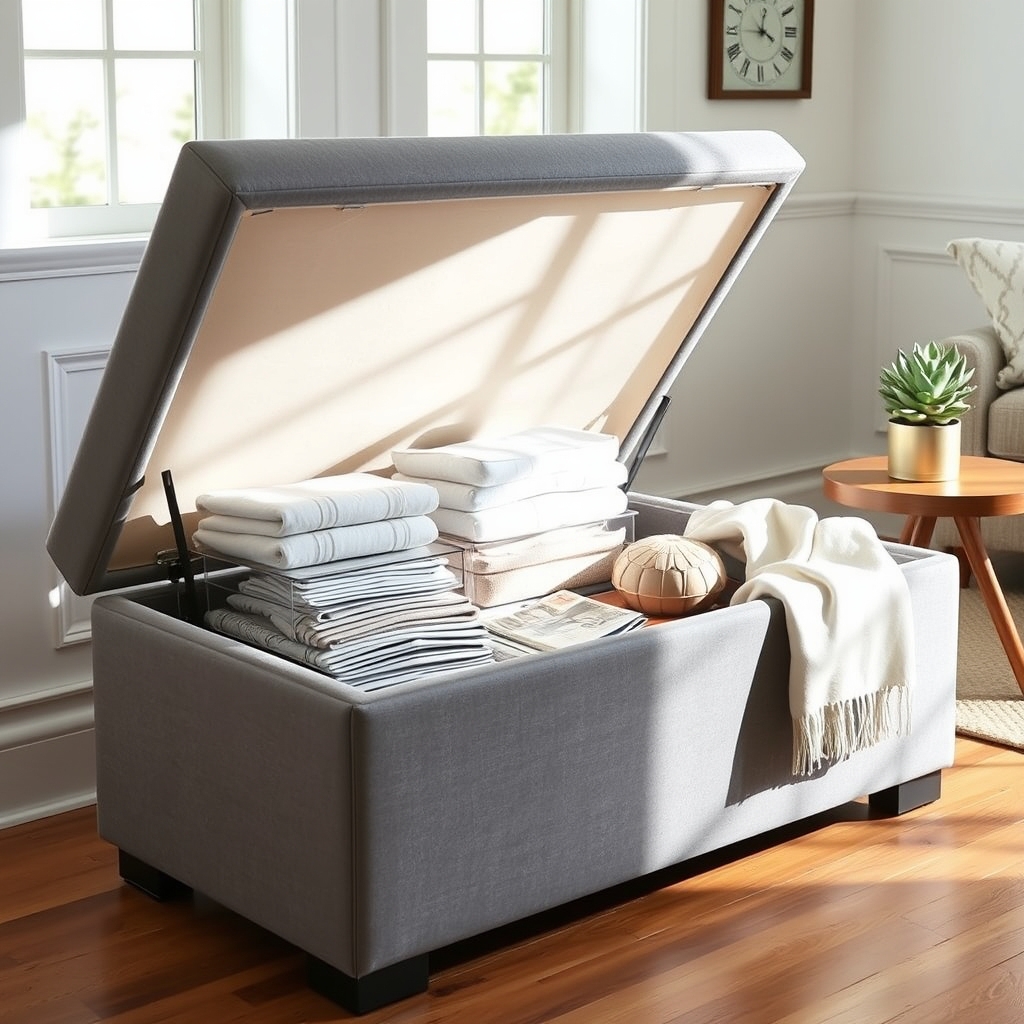
A storage ottoman serves as both a functional seating piece and a clever storage solution, making it an invaluable addition to any living space. When properly organized, it can hide away everyday items while maintaining easy accessibility and preventing clutter from accumulating in visible areas of your room.
Transforming an ordinary ottoman into an organized storage powerhouse helps maximize limited space and creates a seamless look in your home. A well-organized storage ottoman can house anything from extra throw blankets and pillows to magazines, books, or children’s toys, all while maintaining its dual purpose as comfortable seating.
Required Items:
- Storage ottoman
- Small storage containers or baskets
- Drawer organizers or dividers
- Labels or label maker
- Measuring tape
- Shelf liner (non-slip)
- Clear plastic bins (if needed)
- Fabric storage bags
- Vacuum storage bags (optional)
The organization process begins with completely emptying the ottoman and measuring its interior dimensions. Line the bottom with non-slip shelf liner to protect the interior and prevent items from sliding.
Divide the space into zones using appropriately sized containers or baskets that fit the ottoman’s dimensions. For frequently accessed items, position them toward the front or top of the storage space.
Create a logical arrangement by grouping similar items together. Use drawer organizers or dividers to separate smaller items and prevent them from becoming jumbled. If storing fabric items like blankets or seasonal décor, consider using vacuum storage bags to maximize space.
Label all containers clearly to maintain the organization system long-term.
Success Tip: Implement a regular maintenance schedule by reviewing the ottoman’s contents every three months. Remove items that haven’t been used, reorganize any disheveled areas, and adjust the storage system as needed.
Consider using clear containers to easily identify contents, and always keep frequently used items most accessible to prevent disrupting the established organization.
Built-In Window Seat Storage Bench
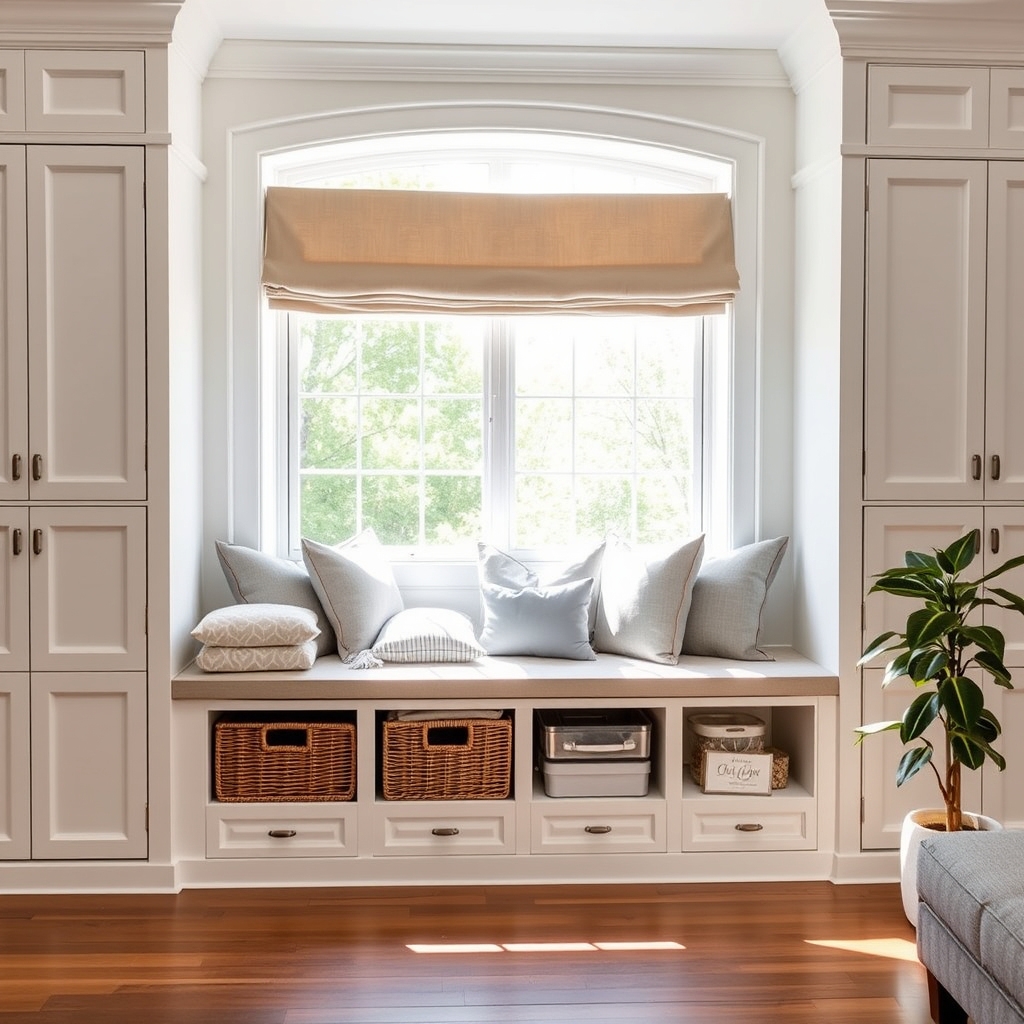
A built-in window seat storage bench combines aesthetic appeal with practical storage solutions, transforming an often underutilized space into a multi-functional area. This feature adds character to any room while providing valuable storage space for items ranging from seasonal decor to everyday essentials.
When properly organized, a window seat storage bench can significantly reduce clutter in other areas of your home while creating an inviting seating area. The key to maximizing this space lies in thoughtful planning and systematic organization that considers both accessibility and preservation of stored items.
Required Items:
- Storage bins or baskets
- Labels and label maker
- Drawer dividers or organizers
- Moisture-absorbing packets
- Cloth storage bags
- Clear plastic containers
- Measuring tape
- Shelf liner
- Vacuum bags (for bulky items)
- Inventory list template
Start by measuring the interior space of your window seat storage compartment and divide it into zones based on the items you plan to store. Install shelf liner along the bottom to protect against moisture and dust.
Sort items into categories such as seasonal items, reading materials, games, or extra linens. Use appropriately sized storage containers that maximize vertical space while allowing easy access.
For frequently accessed items, position them toward the front of the storage area using easy-to-remove bins or baskets. Implement a labeling system that clearly identifies contents, and consider using clear containers for better visibility.
Store seasonal items in vacuum-sealed bags at the back of the space, and use moisture-absorbing packets to protect against dampness near the window area.
Create and maintain an inventory list of stored items, updating it regularly as contents change. Consider installing hinges with hydraulic lifts for easier access, and use drawer dividers or smaller containers to prevent items from shifting.
Rotate seasonal items twice yearly, and regularly inspect stored items for any signs of moisture or damage to maintain their condition and longevity.
Rolling Garage Storage Cart
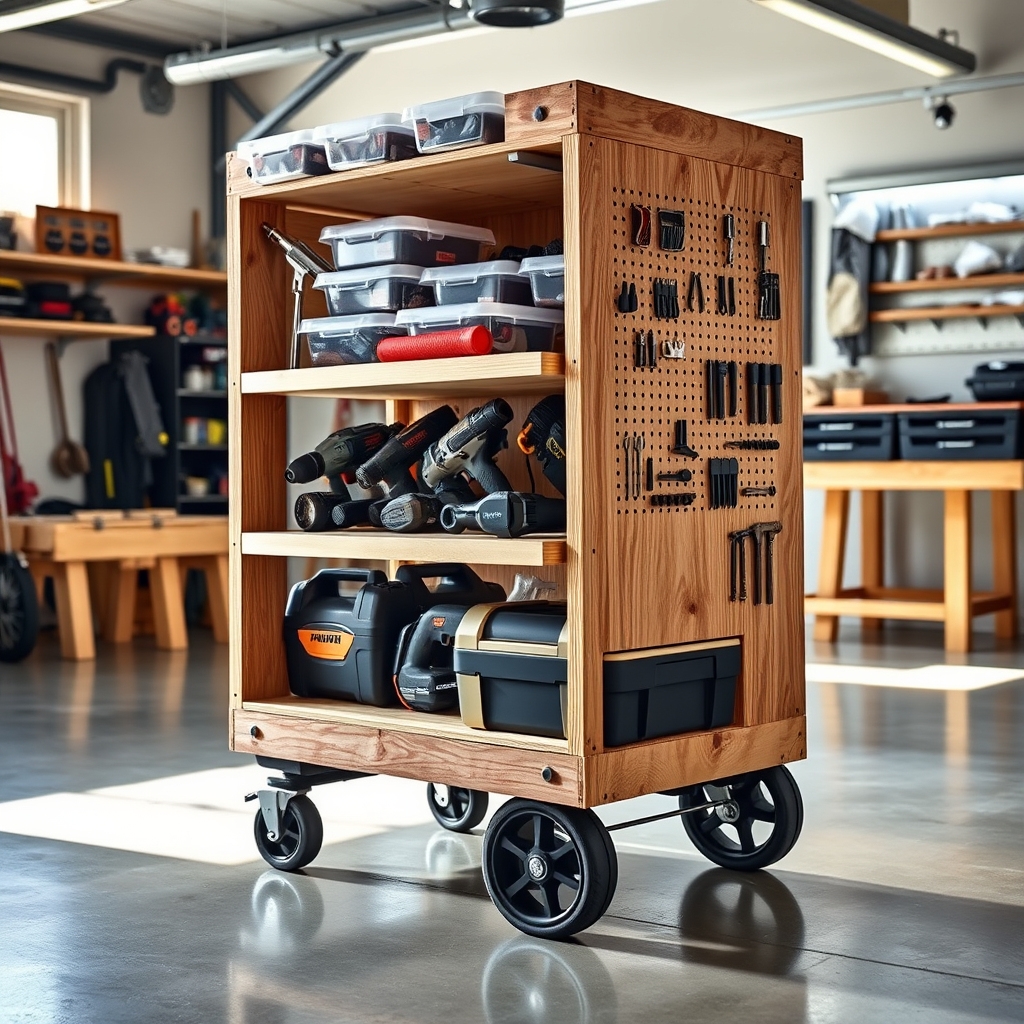
A well-organized garage storage system is essential for maintaining tools, equipment, and supplies while maximizing available space. A rolling garage storage cart offers the perfect solution by combining mobility with organized storage, allowing you to move heavy items easily and access them when needed.
The versatility of a rolling storage cart transforms garage organization from a static system into a dynamic workspace. This mobile solution particularly benefits DIY enthusiasts, homeowners with multiple projects, and those who need to frequently reconfigure their garage space for different activities.
Required Materials:
- 3/4″ plywood sheets
- 4 heavy-duty caster wheels (at least 3″ diameter)
- 2×4 lumber
- Wood screws (1-5/8″ and 2-1/2″)
- Construction adhesive
- Pegboard
- Hook assortment
- Paint or wood finish
- Door handles
- Basic tools (drill, saw, measuring tape, level)
Construction begins with building the cart’s frame using 2x4s to create a sturdy base approximately 2′ x 4′. Attach caster wheels at each corner, ensuring they’re rated for the intended weight capacity.
Build up the vertical supports, maintaining a height of about 5′, and secure pegboard panels to create the sides. Add horizontal shelving at various heights using plywood cut to size, incorporating a mix of open shelving and enclosed storage areas with doors for versatility.
Install handles on both ends of the cart for easy maneuverability. Focus on creating designated zones within the cart: frequently used tools at waist height, heavier items on lower shelves, and lighter, less-used items on top.
Utilize pegboard hooks and small bins to maximize vertical storage space and keep smaller items organized and easily accessible. Paint or finish the cart to protect the wood and maintain a clean appearance.
Additional Tips: Consider adding a power strip and small LED light to the cart for improved functionality. Install rubber bumpers on corners to protect walls and other surfaces.
Use non-slip shelf liner on each level to prevent items from shifting during movement, and label all storage areas clearly for quick identification. Regular maintenance of the caster wheels will ensure smooth operation and longevity of your rolling storage solution.
Space-Saving Closet Organization System
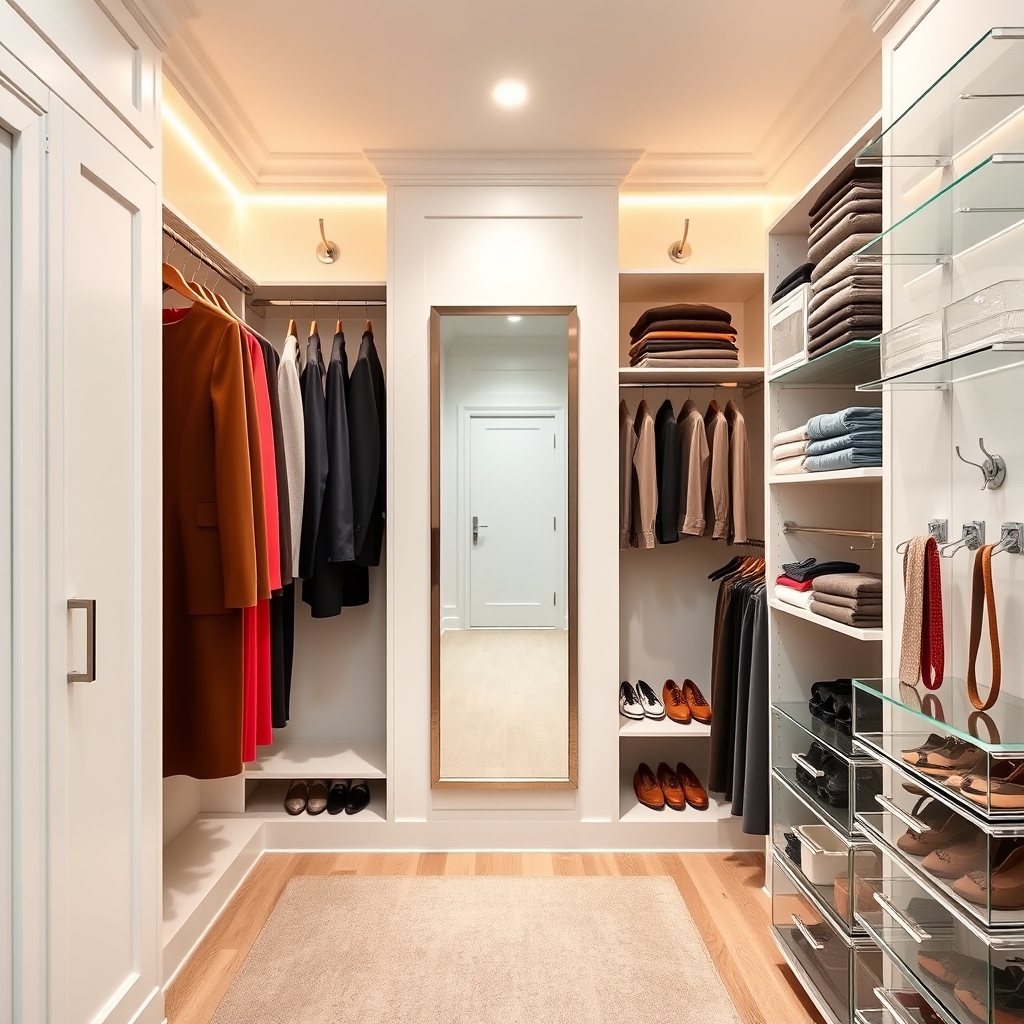
A well-organized closet serves as the foundation for an efficient daily routine, eliminating the stress of searching for clothes and accessories while maximizing available space. When properly structured, even a modest-sized closet can accommodate an extensive wardrobe while maintaining accessibility and visual appeal.
The key to successful closet organization lies in creating designated zones for different items while utilizing vertical space effectively. This systematic approach not only makes it easier to locate items but also helps maintain organization long-term, preventing the gradual descent into chaos that many closets experience.
Required Items:
- Measuring tape
- Level
- Screwdriver
- Adjustable closet rods
- Shelf brackets
- Wire shelving or solid shelving
- Storage bins
- Drawer organizers
- Hanging organizers
- Clothing hangers (uniform style)
- Labels
- Command hooks
- Storage boxes
- Shoe racks
Start by removing everything from the closet and sorting items into categories: frequently worn clothes, seasonal items, accessories, and shoes. Measure the closet dimensions and sketch a plan that maximizes vertical space using double hanging rods where possible. Install the main closet rod at standard height (66 inches) and add a second rod below (around 34 inches) for shorter items.
Mount adjustable shelving units along the sides for folded clothes and storage boxes. Create specific zones within the closet: everyday wear at eye level, seasonal items in high storage, shoes in designated racks or clear boxes at the bottom. Implement drawer organizers for smaller items and accessories. Install hooks on empty wall space for belts, scarves, or bags.
Group similar clothing items together and arrange them by color for easy identification. For optimal organization maintenance, implement the “one-in-one-out” rule to prevent overcrowding, and regularly review items every three months. Store seasonal items in vacuum-sealed bags to maximize space, and use slim, uniform hangers to maintain consistency and prevent clothing damage.
Consider installing motion-sensor lighting to improve visibility and make the space more functional during early morning or late evening use.


