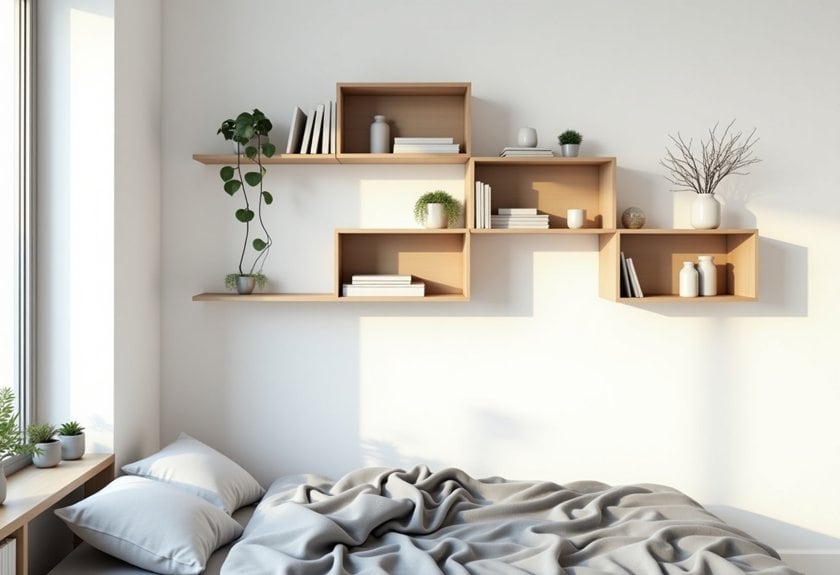
You’ve probably glanced at your bedroom walls lately and thought, “There’s got to be a better way to organize this space!” I felt the same way until I discovered some game-changing wall organization ideas that’ll transform your room into a modern sanctuary. From floating shelves with secret compartments to vertical gardens that double as storage, these solutions aren’t just functional – they’re conversation starters! Let me share the 12 creative approaches that’ll revolutionize your bedroom’s organization and style.
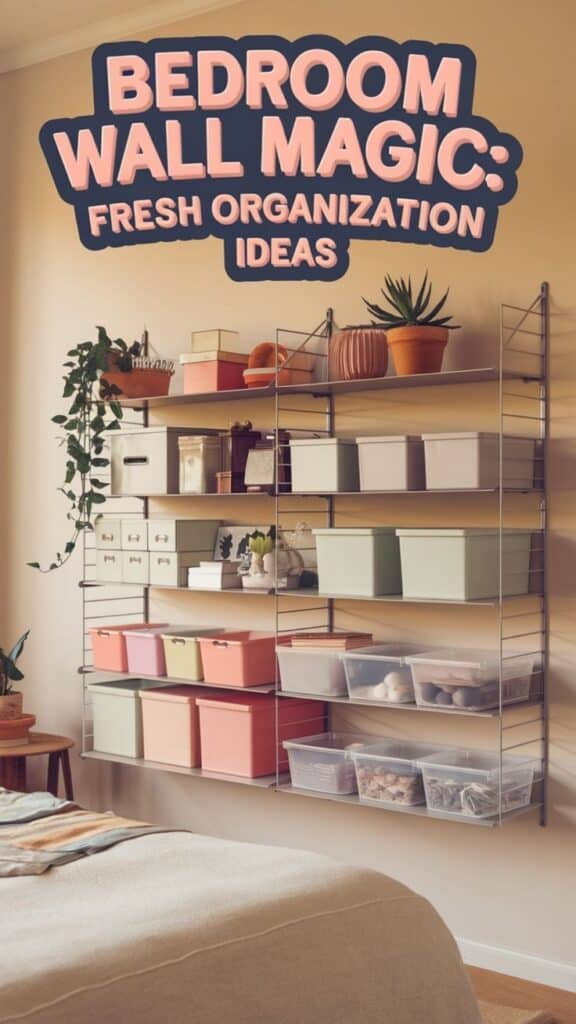
Floating Shelves With Hidden Storage
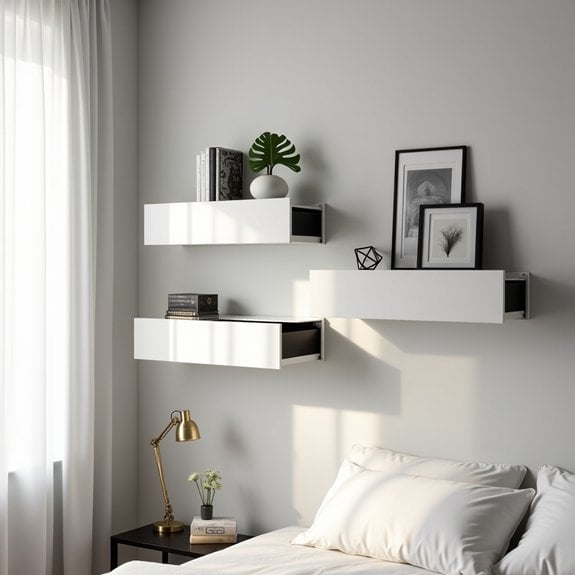
Maximizing vertical space with floating shelves that include hidden storage compartments represents one of the most efficient ways to organize bedroom walls while maintaining a clean, minimalist aesthetic.
These dual-purpose shelving solutions provide both display areas for decorative items and concealed storage for personal belongings that you’d rather keep out of sight. The combination of visible and hidden storage makes floating shelves particularly valuable in smaller bedrooms where floor space is limited.
By incorporating hidden compartments into floating shelves, you can store everything from personal documents to small electronics while showcasing books, plants, and artwork on the visible portions.
Required Items:
- Floating shelves with built-in storage compartments
- Wall anchors and mounting hardware
- Stud finder
- Level
- Drill and drill bits
- Measuring tape
- Pencil
- Storage containers or organizers
- Labels (optional)
- Cleaning supplies
Start by determining the optimal placement for your floating shelves using the stud finder to locate wall supports. Measure and mark your intended shelf locations, ensuring they’re level and properly spaced.
Install the shelves according to manufacturer specifications, using appropriate wall anchors for items that can’t be mounted directly into studs. Once mounted, organize the hidden storage compartments by category, keeping frequently used items in easily accessible locations.
Consider using small containers or dividers within the hidden compartments to maintain organization. For items stored in the concealed areas, implement a labeling system that’s visible only when the compartment is opened.
Before displaying items on the visible shelf surfaces, group them by size, color, or purpose to create an aesthetically pleasing arrangement. Leave some negative space between objects to prevent a cluttered appearance and maintain easy access to hidden storage areas.
Additional Tips: Regularly audit both visible and hidden storage areas to prevent accumulation of unnecessary items. Consider installing LED strip lighting beneath the shelves to illuminate both display areas and hidden compartments.
When organizing hidden storage, place heavier items closer to the mounting brackets for better weight distribution and increased shelf stability. Clean both visible and hidden areas regularly to maintain organization and prevent dust buildup.
Minimalist Pegboard Systems
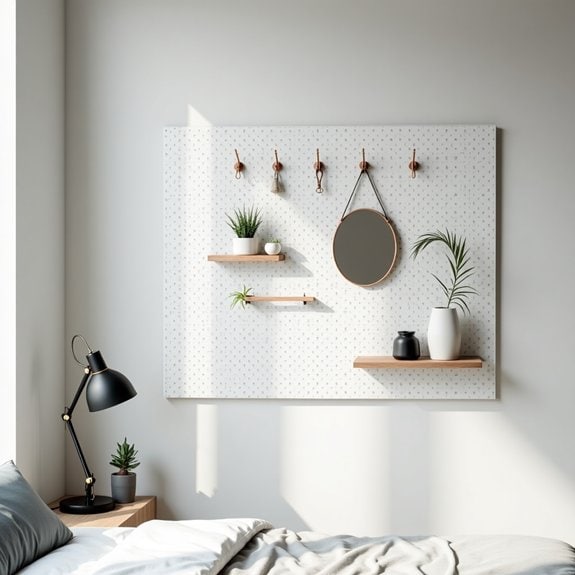
A well-organized pegboard system transforms bedroom walls into functional storage spaces while maintaining a clean, minimalist aesthetic. By utilizing vertical space effectively, pegboards free up valuable floor and surface areas while keeping essential items visible and easily accessible.
Modern minimalist pegboards have evolved beyond their workshop origins to become sleek organizational solutions that complement contemporary bedroom design. These versatile systems allow for frequent reconfiguration of storage layouts without damaging walls, making them ideal for both renters and homeowners seeking adaptable storage solutions.
Required Items:
- Pegboard panel (wood or metal)
- Wall mounting hardware
- Wall anchors
- Level
- Drill
- Screwdriver
- Measuring tape
- Pencil
- Assorted pegboard hooks
- Shelving brackets
- Small baskets or containers
- Spacers or furring strips
Install the pegboard by first determining optimal placement, ensuring it’s accessible yet not intrusive to daily movement. Create spacing between the wall and pegboard using furring strips or spacers to allow hook insertion. Mount the pegboard securely using appropriate wall anchors and hardware, checking for level alignment throughout installation.
Once mounted, begin arranging hooks and accessories in a grid-like pattern, maintaining consistent spacing for visual harmony. Before adding items, plan zones based on frequency of use and item categories. Position frequently accessed items at eye level, with heavier objects mounted directly into wall studs for additional support.
Group similar items together, such as accessories, tools, or decorative elements, while maintaining negative space between groupings to preserve the minimalist aesthetic. For optimal organization, rotate items seasonally and reassess the layout every few months.
Consider using clear containers to maintain visibility while containing smaller items, and implement a “one in, one out” rule to prevent cluttering the system. Label hooks or zones discretely to maintain organization without compromising the minimalist appearance, and regularly dust both the board and stored items to maintain a clean, organized look.
Magnetic Wall Strips for Metal Accessories
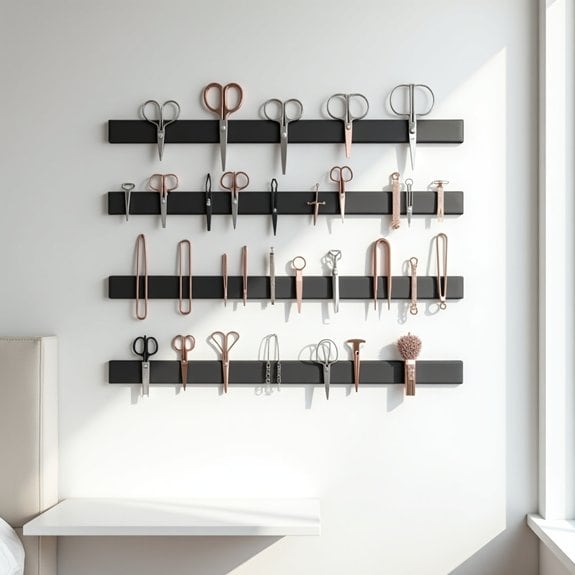
Organizing metal accessories using magnetic wall strips offers a practical and visually appealing storage solution that transforms cluttered surfaces into organized displays. By utilizing vertical wall space, these magnetic strips create easy access to frequently used items while keeping them visible and tangle-free.
When metal accessories are properly organized on magnetic strips, not only does it save valuable drawer and counter space, but it also helps prevent damage and loss of small items. This system works particularly well for makeup tools, hair accessories, scissors, clips, and other metal items that tend to get lost in traditional storage solutions.
Required Items:
- Heavy-duty magnetic strips
- Mounting hardware (screws and anchors)
- Level
- Pencil
- Drill
- Screwdriver
- Measuring tape
- Cleaning supplies
- Command strips (optional alternative)
Installation and organization begins with selecting an accessible wall space and measuring the area where the magnetic strips will be mounted. Clean the wall surface thoroughly and mark the mounting points with a pencil, using a level to ensure straight alignment.
Install the magnetic strips according to manufacturer instructions, typically using screws and wall anchors for maximum stability. Once mounted, test the magnetic strength before organizing items.
Sort metal accessories by category and frequency of use before placing them on the strips. Position frequently used items at eye level and arrange similar items together. Create deliberate spacing between items to prevent overcrowding and maintain a clean aesthetic.
Consider using multiple strips at different heights to accommodate various sizes of accessories. For optimal organization, rotate items seasonally and regularly clean both the magnetic strips and accessories to maintain magnetic strength.
Install strips away from electronic devices and credit cards to prevent magnetic interference. Consider adding small labels beneath different sections to maintain organization systems, and periodically assess which items are frequently used to adjust their positioning accordingly.
Vertical Garden Storage Solutions
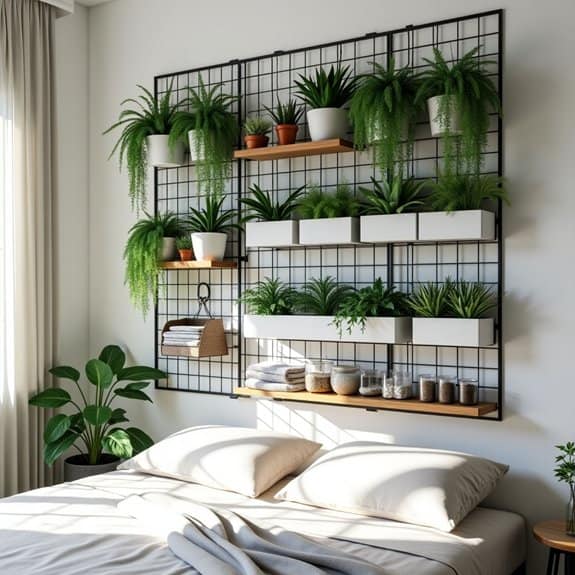
Creating a vertical garden storage system in your bedroom transforms unutilized wall space into a functional and aesthetically pleasing organizational solution. By incorporating plant life with storage, you can maximize your room’s potential while bringing nature indoors, which has been proven to reduce stress and improve air quality.
Vertical garden storage combines the practical aspects of wall organization with the therapeutic benefits of indoor plants. This innovative approach allows you to store everyday items while maintaining a connection to nature, making your bedroom feel more like a personal sanctuary rather than just a storage space.
Required Items:
- Wall-mounted grid panels or pegboards
- Plant holders or pocket planters
- Mounting brackets and screws
- Wall anchors
- Storage hooks and containers
- Small indoor plants
- Drill and drill bits
- Level
- Measuring tape
- Pencil
- Plant care supplies
- Moisture-resistant backing (optional)
Installation begins with measuring your wall space and marking the installation points for your grid system or pegboard. Ensure all mounting points align with wall studs or use appropriate wall anchors for secure installation.
Once the base structure is mounted, arrange your storage components strategically, placing heavier items at the bottom and lighter ones toward the top. Install plant holders at varying heights, considering each plant’s light requirements and growth patterns. Create designated zones: one for practical storage (hooks for accessories, shelves for books) and another for your green elements.
Add plants gradually, starting with hardy, low-maintenance varieties that thrive in indoor conditions. Position moisture-loving plants away from items that could be damaged by water, and ensure proper drainage systems are in place to protect your wall.
Install storage containers and hooks around your plants to create a balanced, functional design that serves both organizational and aesthetic purposes.
Additional Tips: Rotate plants periodically to ensure even growth and maintain consistent moisture levels. Use clear containers for frequently accessed items and opaque ones for seasonal storage.
Consider installing LED grow lights if your bedroom lacks natural light, and implement a regular maintenance schedule for both plants and organization systems. This will help prevent overcrowding and ensure your vertical garden storage solution remains effective and visually appealing year-round.
Modular Wall Grid Systems
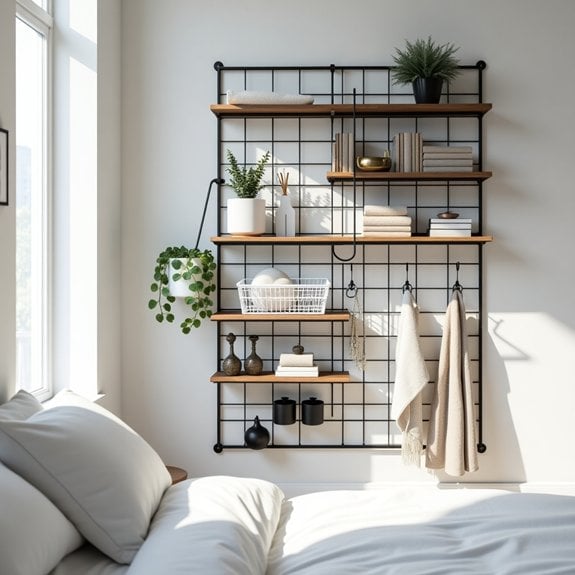
A well-organized modular wall grid system transforms any bedroom wall into a versatile storage and display solution, maximizing vertical space while maintaining a clean, contemporary aesthetic. These customizable systems allow for endless configurations, making them perfect for adapting to changing storage needs and personal style preferences.
The beauty of wall grid systems lies in their flexibility and functionality. Unlike traditional shelving or pegboards, modular grids can be easily reconfigured without leaving multiple holes in the wall, and their open design creates a sense of lightness while providing substantial storage capacity.
Required Items:
- Metal or wire grid panels
- Wall anchors and screws
- Level
- Pencil
- Drill
- Measuring tape
- Grid clips or connectors
- S-hooks
- Hanging baskets
- Wire shelves
- Storage bins
- Cable ties
Installing and organizing a modular wall grid system starts with careful planning and measurement. Mark the desired location on the wall, ensuring the grid will be level and properly anchored into wall studs or using appropriate wall anchors.
Mount the base grid panels according to manufacturer specifications, connecting multiple panels if needed for larger installations. Once secured, begin adding accessories like shelves, baskets, and hooks in a logical arrangement, keeping frequently used items at eye level and creating designated zones for different categories of items.
Consider weight distribution when arranging items, placing heavier objects closer to mounting points and lighter items toward the edges. Group similar items together, using hanging baskets for smaller objects, shelves for books or display items, and hooks for bags or accessories.
Maintain clear pathways between storage zones to ensure easy access to all items. To maximize the effectiveness of your modular grid system, rotate seasonal items, regularly assess the functionality of your arrangement, and keep some grid spaces open for flexibility.
Use clear storage containers to maintain visibility of contents, and label everything to establish a sustainable organization system. Consider adding small LED lights to illuminate specific sections, making it easier to locate items while creating ambient lighting for your bedroom.
Multi-functional Mirror Storage Units
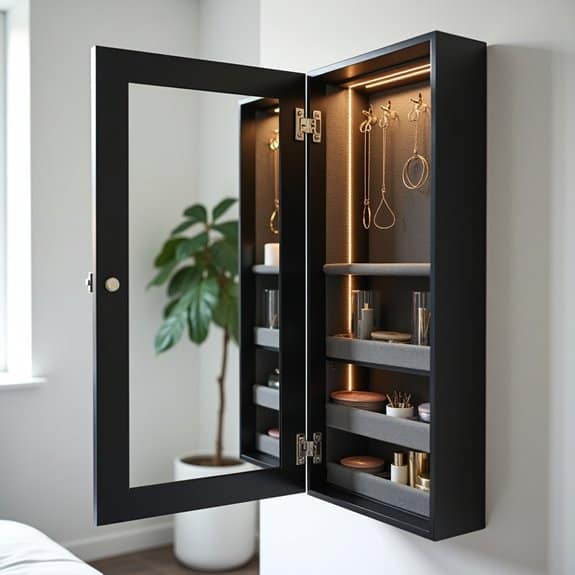
Multi-functional mirror storage units represent a brilliant solution for maximizing bedroom wall space while maintaining style and functionality. These versatile pieces combine the essential element of a mirror with smart storage capabilities, eliminating the need for additional furniture pieces and helping to keep the room feeling spacious and uncluttered.
The key to successful mirror storage organization lies in selecting units that complement your existing décor while providing adequate storage for your specific needs. Whether mounted on the wall or standing freely, these units can store jewelry, cosmetics, accessories, and even small clothing items, all while maintaining a sleek, organized appearance that enhances your bedroom’s aesthetic.
Required Items:
- Multi-functional mirror storage unit
- Wall mounting hardware
- Level
- Drill and drill bits
- Screwdriver
- Storage containers or organizers
- Adhesive hooks
- Clear bins or trays
- Measuring tape
- Pencil
- Cleaning supplies
To organize your mirror storage unit effectively, start by thoroughly cleaning both the mirror and storage compartments. Install the unit at an appropriate height, typically around eye level, ensuring it’s properly secured to the wall using the correct mounting hardware.
Categorize items by type and frequency of use, placing frequently accessed items at eye level and less-used items in lower or higher compartments. Utilize small containers or organizers within the storage spaces to prevent items from becoming jumbled or disorganized.
For jewelry and accessories, implement a system where necklaces hang individually to prevent tangling, rings nest in dedicated slots or small dishes, and earrings are paired together in clear compartments.
Cosmetics should be arranged by category (face, eyes, lips) and positioned so labels are visible. Consider using clear acrylic organizers within larger compartments to maintain order and maximize space efficiency.
To maintain the organization system long-term, implement a monthly review process to remove unused items, clean surfaces, and reorganize as needed.
Consider adding LED lighting strips around the mirror or within compartments to improve visibility, and use moisture-absorbing packets in enclosed spaces to protect stored items. Label compartments discretely to maintain the unit’s aesthetic while ensuring everything returns to its designated spot after use.
Mounted Jewelry Display Organizers
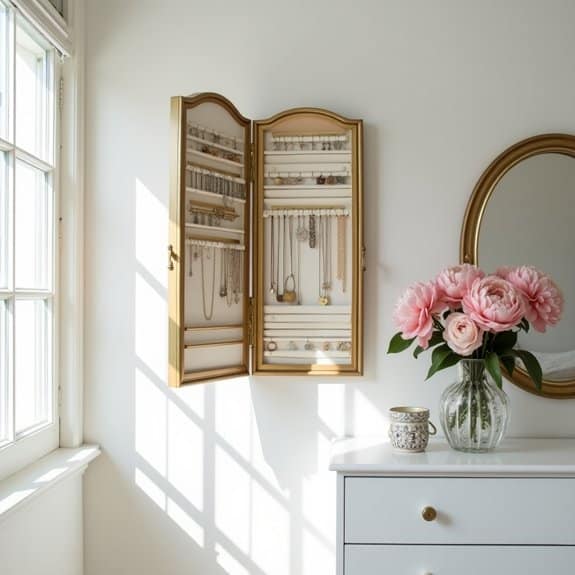
Organizing jewelry on your bedroom wall serves multiple purposes – it transforms your accessories into an artistic display while keeping them tangle-free and easily accessible. A well-organized jewelry wall not only prevents damage to delicate pieces but also allows you to see your entire collection at a glance, making outfit coordination effortless and ensuring you actually wear the pieces you own.
Wall-mounted jewelry organization is particularly beneficial for those with limited drawer or counter space, utilizing vertical space that often goes unused. This solution also helps protect valuable pieces from dust, prevents loss of small items, and reduces the time spent searching for specific accessories during your morning routine.
Required Items:
- Wall-mounted jewelry organizer or rack
- Wall anchors and screws
- Level
- Pencil
- Drill
- Measuring tape
- Hammer
- Picture hanging hooks
- Decorative hooks or knobs
- Jewelry organizer inserts or trays
- Command strips (optional)
Select a wall space that’s easily accessible and visible, ideally near your dressing area or full-length mirror. Measure the space carefully and mark the installation points with a pencil, using a level to ensure straight alignment. Install wall anchors if necessary, then mount your chosen organizer securely.
Arrange your jewelry by category – hang necklaces on longer hooks to prevent tangling, group bracelets together, and use smaller hooks or specialized compartments for earrings and rings. Consider installing multiple organizers at different heights to accommodate various jewelry lengths and styles.
For maximum organization success, implement a system where frequently worn pieces are placed at eye level, while special occasion items can be stored higher or lower. Clean your jewelry before displaying it, and consider using felt-lined organizers to prevent scratching on delicate pieces.
Rotate your collection seasonally to keep your display fresh and ensure all pieces receive equal wear. Remember to position your organizer away from direct sunlight to prevent metal tarnishing and gem fading.
Wall-Mounted Desk and Storage Combos
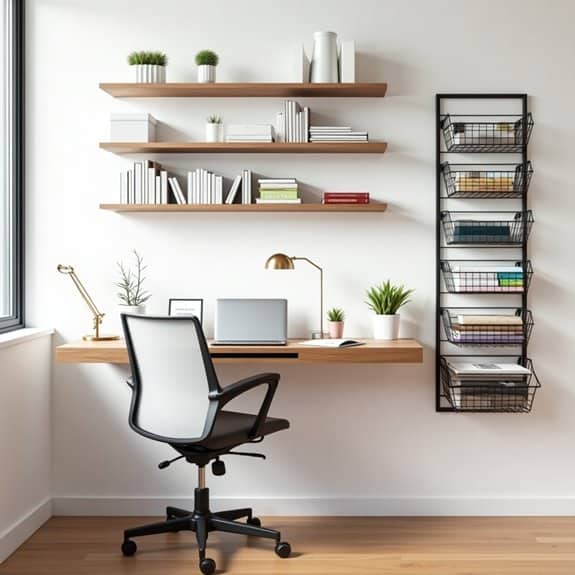
A well-organized wall-mounted desk and storage combination can transform any bedroom into a functional workspace while maximizing floor space. This versatile solution is particularly valuable in smaller rooms where every square foot counts, allowing you to create a dedicated work area without sacrificing precious floor real estate.
Installing a wall-mounted desk with integrated storage offers the perfect balance between productivity and organization. The vertical space utilization provides ample storage for office supplies, books, and personal items while maintaining a clean, clutter-free environment that promotes focus and efficiency.
Required Items:
- Wall-mounted desk
- Floating shelves
- Wall brackets and anchors
- Storage containers or baskets
- Cable management solutions
- Wall-mounted organizers
- Level
- Stud finder
- Drill and screwdriver
- Measuring tape
- Pencil
- Wall anchors rated for heavy loads
Start by selecting the ideal location for your wall-mounted desk, ensuring it’s near an electrical outlet and receives adequate lighting. Use a stud finder to locate wall studs and mark their positions. Install the desk brackets securely into the studs, following manufacturer specifications for weight capacity and height recommendations.
Position storage components around the desk area in a logical arrangement, with frequently used items within arm’s reach and less-used items stored higher up. Mount floating shelves above or beside the desk to create additional storage space. Organize items by category, using containers or baskets to group similar items together.
Implement a cable management system to keep wires tidy and prevent them from cluttering the workspace. Consider installing a wall-mounted bulletin board or magnetic strip for important papers and notes.
For optimal organization, incorporate a combination of open and closed storage solutions. Reserve eye-level shelving for daily essentials and decorative items, while using higher shelves for long-term storage. Maintain clear zones for different activities, such as a dedicated spot for laptop work and another for writing or crafting.
Regularly assess and adjust the organization system to ensure it continues to meet your needs efficiently.
Fabric Wall Organizer Pockets
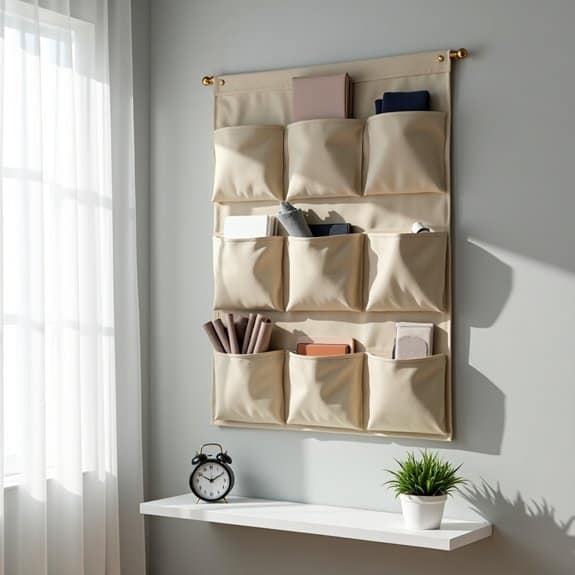
Fabric wall organizer pockets represent a versatile and space-saving solution for bedrooms of any size. These hanging organizers transform vertical wall space into functional storage areas, keeping essential items within easy reach while maintaining a tidy appearance.
Maximizing vertical storage through fabric wall organizers not only frees up valuable floor and drawer space but also creates an organized system for daily essentials, accessories, and frequently used items. The soft fabric construction makes these organizers particularly suitable for bedrooms, adding a decorative element while maintaining practicality.
Required Items:
- Fabric wall organizer with multiple pockets
- Wall mounting hardware (screws, anchors, hooks)
- Level
- Pencil
- Drill
- Measuring tape
- Stud finder
- Scissors
- Labels (optional)
- Command strips (alternative mounting option)
Start by selecting an accessible wall space near your daily preparation area. Measure the dimensions of your fabric organizer and use a pencil to mark the mounting points, ensuring they’re level. If using screws, locate wall studs with a stud finder for secure attachment. Install mounting hardware according to the organizer’s specifications, ensuring it can support the weight when fully loaded.
Sort items by category before placing them in the pockets. Designate specific pockets for different purposes – top pockets for frequently used items, middle pockets for daily accessories, and lower pockets for less-used items. Consider transparent pockets for better visibility or add labels for easy identification.
Additional Tips: Rotate items seasonally to maintain relevance and prevent overcrowding. Clean the fabric organizer regularly to prevent dust accumulation, and periodically review pocket contents to remove unnecessary items. Consider using smaller containers within larger pockets to prevent small items from getting lost, and avoid overloading pockets to maintain the organizer’s shape and wall mounting integrity.
Custom Built-in Wall Niches
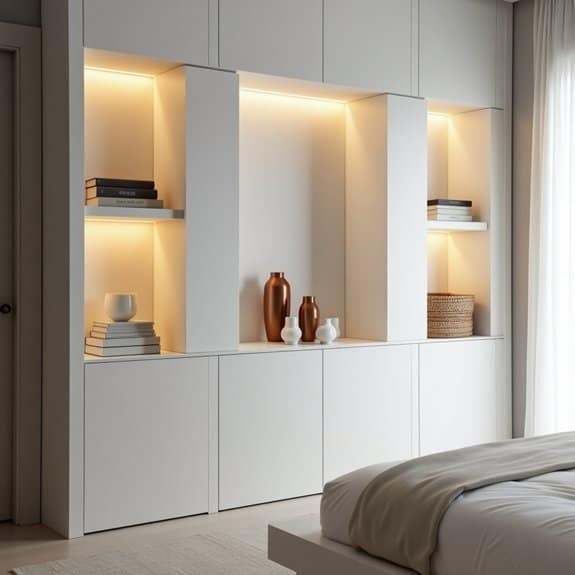
Custom built-in wall niches represent a sophisticated storage solution that maximizes vertical space while adding architectural interest to any bedroom. These recessed compartments transform previously unused wall space into functional storage areas that can house everything from books to decorative items, effectively reducing clutter and creating an organized, visually appealing environment.
When properly organized, wall niches serve as both practical storage and aesthetic focal points, allowing for a personalized display of cherished items while maintaining a clean, organized appearance. The key to successful wall niche organization lies in creating a balanced arrangement that combines functionality with visual appeal.
Required Items:
- Measuring tape
- Level
- Small storage containers or baskets
- LED strip lights or puck lights
- Glass or wooden shelving inserts
- Decorative brackets (if needed)
- Dust cloth
- Glass cleaner
- Small hooks or mounting hardware
- Clear shelf dividers
Start by thoroughly cleaning the niches and measuring each compartment’s dimensions. Plan your organization strategy by grouping similar items together and determining which items will be displayed versus stored.
Install any additional shelving or lighting elements to enhance functionality and visibility. Consider using small containers or baskets for smaller items to maintain a cohesive look while maximizing storage capacity.
For decorative items, arrange them using the rule of thirds, placing larger items toward the back and smaller ones in front. Maintain adequate space between objects to prevent a cluttered appearance. If storing practical items, use coordinating containers that fit the niche dimensions perfectly, and label them clearly if they’re not transparent.
Additional Tips: Rotate displayed items seasonally to prevent dust accumulation and maintain visual interest. Use adjustable lighting to highlight specific areas and create ambiance. Consider installing mirrors in some niches to reflect light and create the illusion of more space.
Remember to leave some negative space in each niche to prevent an overcrowded appearance and maintain a serene bedroom atmosphere.
Hanging Rod Systems for Accessories
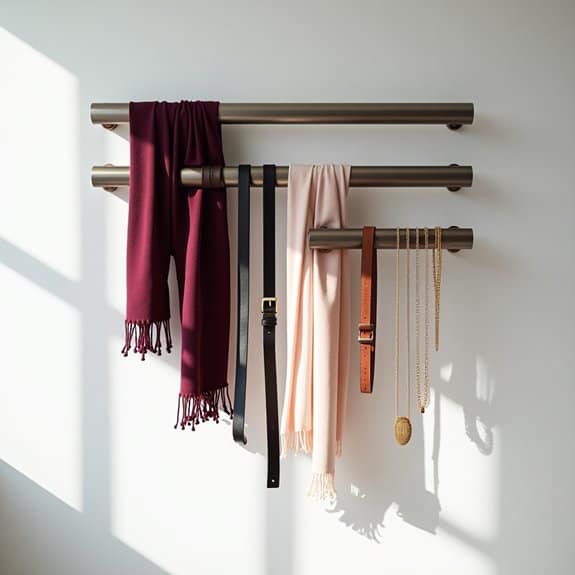
A well-organized accessory collection not only preserves your belongings but also transforms them into an attractive display while maximizing vertical wall space.
Hanging rod systems provide an efficient solution for storing and showcasing accessories like scarves, belts, ties, and jewelry, preventing tangles and making items easily accessible.
Installing a hanging rod system eliminates the frustration of searching through drawers or boxes for accessories, while also serving as a visual reminder of your available options when getting dressed.
This organization method can save valuable drawer space and reduce clutter, creating a more serene bedroom environment.
Required Items:
- Wall-mounted hanging rods
- Wall anchors and screws
- Power drill
- Level
- Measuring tape
- Pencil
- Hooks (various sizes)
- Hangers with clips
- S-hooks
- Command strips (optional)
Begin by measuring your wall space and determining the optimal height for your hanging rods.
Install the first rod at eye level, using wall anchors for security.
Space additional rods 12-18 inches apart vertically if installing multiple levels.
Ensure each rod is level before securing it completely.
Once mounted, sort accessories by category and length.
Hang longer items like scarves and belts on the upper rods, and shorter items like ties or jewelry on lower rods.
Use specialized hooks or hangers with clips to prevent items from sliding.
Group similar items together by color or style to create an organized visual display.
Consider installing clear dividers or using differently colored hooks to separate categories.
For delicate items like silk scarves or special occasion accessories, use padded hangers or fabric-covered clips to prevent damage.
To maintain the system’s effectiveness, establish a “one in, one out” rule when adding new accessories, and periodically review items to remove those rarely worn.
Consider seasonal rotation of accessories, storing off-season items elsewhere to prevent overcrowding.
Label hooks or sections if needed, and always return items to their designated spots after use to maintain organization.
Wire Mesh Wall Storage Panels
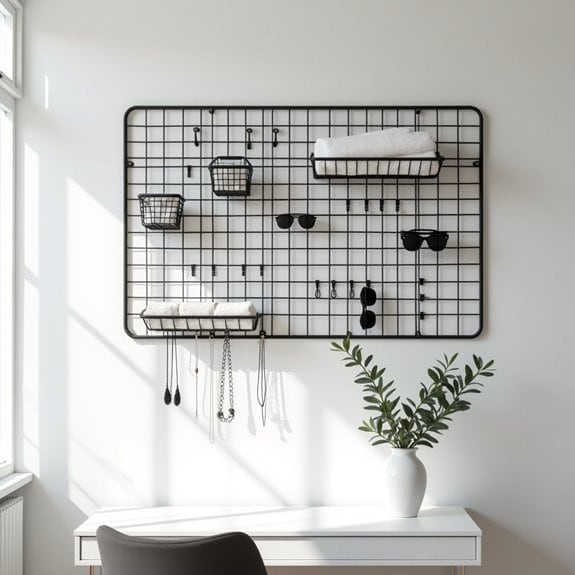
Wall storage space is often underutilized in bedrooms, where vertical real estate can provide valuable organizational solutions. Wire mesh wall storage panels offer a versatile and modern approach to keeping items visible, accessible, and neatly arranged while maximizing available wall space.
These customizable panels can transform a cluttered bedroom into an efficient storage system, perfect for everything from jewelry and accessories to office supplies and decorative items. The open design allows for easy viewing of contents while maintaining a clean, industrial-chic aesthetic that works well in contemporary bedroom designs.
Required Items:
- Wire mesh grid panels
- Wall anchors and screws
- Level
- Pencil
- Drill
- S-hooks
- Baskets designed for grid systems
- Clips and hooks
- Wire cutters (if customization needed)
- Measuring tape
- Small zip ties
Installation and organization begins with measuring your wall space and marking where the panels will hang. Secure the panels to the wall using appropriate anchors, ensuring they’re level and can support the weight of your items.
Once mounted, arrange your storage accessories – hooks, baskets, and clips – in a configuration that makes sense for your items. Group similar items together, placing frequently used objects at eye level and heavier items toward the bottom of the panel for stability.
Consider creating zones on your panels: one area for jewelry and accessories, another for craft supplies, and perhaps a section for daily essentials. The beauty of wire mesh panels lies in their flexibility – you can easily reconfigure your setup as your storage needs change.
Additional Tips: Paint your wire mesh panels to match your room’s color scheme, or use them as a creative backdrop for photos and artwork. Install LED strip lighting behind the panels for both ambiance and visibility.
Keep some open space on the panels for future items, and regularly assess your organization system to ensure it continues to meet your needs efficiently.

