Just like Marie Kondo’s spark of joy transformed millions of cluttered homes, your bedroom closet holds untapped potential for organization and serenity. You’re probably familiar with that frustrating morning routine of rummaging through cramped hangers and mismatched shoes – but it doesn’t have to be this way! I’ve discovered 12 game-changing ideas that’ll turn your closet chaos into an Instagram-worthy space where everything has its place. Get ready to revolutionize your storage solution game.
Install a Double-Rod Hanging System
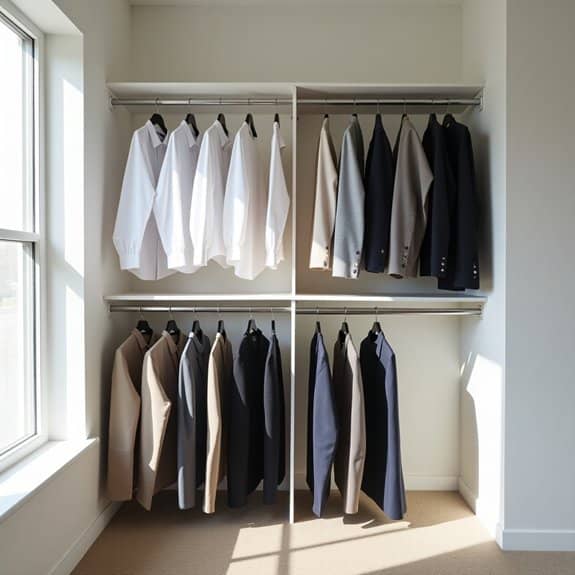
A double-rod hanging system is a game-changing solution that instantly doubles your closet’s hanging capacity. By utilizing vertical space more efficiently, this system allows you to maximize storage in even the smallest closets, creating designated areas for different types of clothing while maintaining easy accessibility.
Installing a double-rod system transforms your closet’s functionality by separating clothing by length. The upper rod typically accommodates shorter items like shirts, jackets, and folded pants, while the lower rod works perfectly for longer items such as dresses and full-length garments. This separation creates a clear visual organization system and prevents clothes from becoming crushed or wrinkled.
Required Items:
- Measuring tape
- Level
- Drill
- Screwdriver
- Wall anchors
- Mounting brackets
- Support poles
- Closet rods (2)
- Rod holders
- Screws
- Pencil
- Stud finder
Start by measuring your closet’s width and height, marking the desired positions for both rods. The upper rod should be mounted approximately 80-84 inches from the floor, while the lower rod should be positioned 40-42 inches from the floor.
Using a stud finder, locate and mark wall studs for secure mounting. Install the mounting brackets into the studs or use wall anchors for additional support. Attach the support poles and ensure they’re perfectly level before securing the rod holders. Finally, insert both closet rods into the holders and test their stability by gently applying pressure.
For optimal results, maintain at least 3 feet of space between the two rods to prevent clothing from overlapping. Consider installing the double-rod system on only one side of the closet if you need to accommodate longer items like formal dresses or coats.
Remember to factor in the height of your hangers and clothing when determining rod placement, and always use appropriate weight-rated hardware based on your anticipated storage needs.
Create a Dedicated Shoe Storage Zone
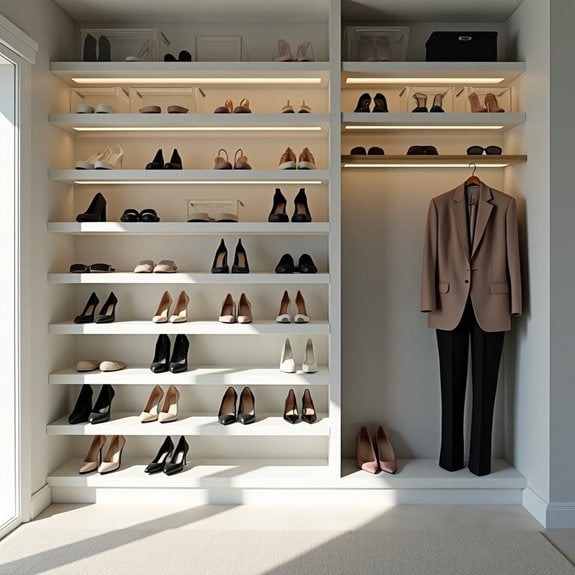
A well-organized shoe storage zone is essential for maintaining order in your closet and protecting your footwear investment. When shoes are scattered or stacked haphazardly, they can become damaged, lose their shape, and create unnecessary clutter that makes getting dressed more stressful and time-consuming.
Creating a dedicated shoe storage zone not only preserves your footwear but also maximizes vertical space in your closet while keeping pairs easily accessible. This systematic approach to shoe storage can save valuable morning time and help you make better use of your entire shoe collection.
Required Items:
- Shoe rack or shelving unit
- Clear shoe boxes
- Shoe organizers (hanging or over-door)
- Label maker or labels
- Measuring tape
- Dust bags for delicate shoes
- Boot shapers
- Shoe trees
- Cleaning supplies
Start by measuring your designated shoe storage area and selecting appropriate storage solutions that fit your space and shoe collection size. Remove all shoes from their current location and sort them by category (formal, casual, athletic) and frequency of use. Clean each pair thoroughly before organizing.
Install your chosen storage system, ensuring proper spacing between shelves to accommodate different heel heights and boot lengths. Position frequently worn shoes at eye level for easy access, with special occasion footwear stored on higher shelves. Store boots with shapers to maintain their shape, and use shoe trees for leather shoes. Place delicate shoes in clear boxes to protect them from dust while keeping them visible.
For seasonal rotation, consider using higher shelves or separate storage for off-season footwear. To maintain your organized shoe zone, implement a one-in-one-out rule when purchasing new shoes. Clean shoes before returning them to storage, and regularly assess your collection for items that need repair or should be donated.
Consider using dehumidifiers or cedar blocks in your shoe storage area to prevent moisture damage and maintain freshness. Rotate shoes periodically to ensure even wear and prevent dust accumulation in rarely-used pairs.
Maximize Corner Spaces With Rotating Shelves
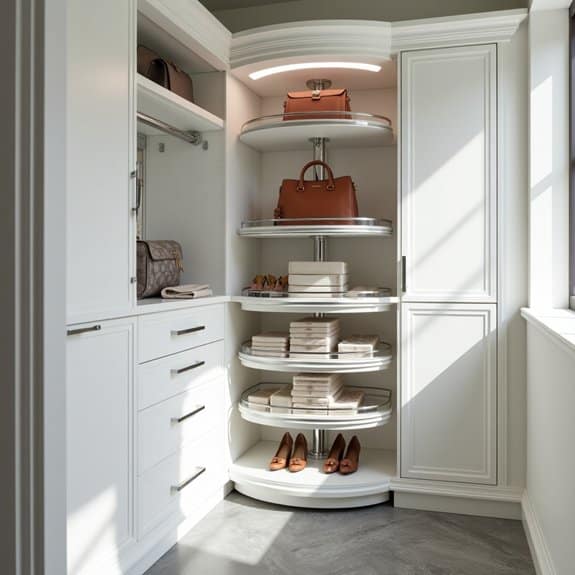
Corner spaces in closets often become dead zones where items get lost or forgotten, wasting valuable storage potential. Rotating shelves, also known as lazy Susans, transform these awkward angles into accessible, efficient storage areas that make every inch count.
Installing rotating shelves in closet corners creates a dynamic storage solution that brings items from the back into easy reach with a simple spin. This organization method is particularly valuable in walk-in closets where deep corners can otherwise become catch-alls for rarely-used items.
Required Items:
- Rotating shelf mechanism (lazy Susan hardware)
- Circular or pie-shaped shelves
- Mounting brackets
- Power drill
- Screwdriver
- Level
- Measuring tape
- Pencil
- Wall anchors
- Screws
- Corner braces
Start by measuring your corner space carefully, accounting for both width and depth to determine the maximum size rotating shelf that will fit.
Install the mounting bracket according to manufacturer specifications, ensuring it’s perfectly level and secured to wall studs or using appropriate wall anchors. Attach the rotating mechanism to the bracket, then secure the shelves to the rotating base, making sure weight is evenly distributed.
For optimal organization, divide the rotating shelves into zones based on item type or frequency of use. Place frequently accessed items toward the front of each shelf section, with less-used items toward the back.
Consider using small containers or dividers on the shelves to prevent items from shifting during rotation.
Additional Tip: Incorporate clear bins or baskets that fit the curved shape of the rotating shelves to create contained zones for smaller items. Label these containers clearly and implement a regular maintenance schedule to prevent the rotating shelves from becoming overcrowded or unbalanced, which could affect their smooth operation.
Implement Color-Coding for Easy Navigation
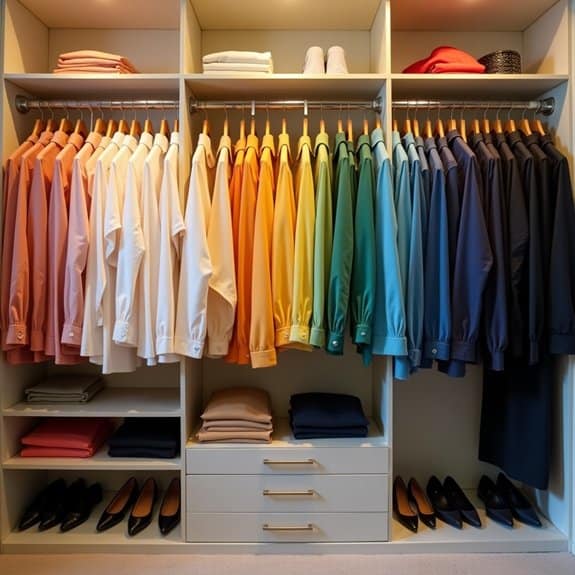
Color-coding your closet is a game-changing organizational strategy that transforms how you interact with your wardrobe daily. By arranging clothes by color, you create a visually appealing system that makes finding specific items effortless and reduces the time spent searching through your closet.
This systematic approach not only streamlines your morning routine but also helps maintain order long-term. Color-coding makes it immediately apparent when items are out of place and creates a natural flow that’s intuitive to maintain, while also making it easier to identify gaps in your wardrobe or notice when you have too many items in a particular color family.
Required Items:
- Hangers (uniform style)
- Color wheel or reference chart
- Garment sorting bins
- Labels or tags
- Storage boxes
- Closet rod dividers
- Notepad and pen
- Clear storage containers
Start by removing all clothing items from your closet and sorting them into color groups. Begin with white, moving through neutrals (beige, gray, brown), then progress through the color spectrum: red, orange, yellow, green, blue, purple, and finally black. For multi-colored items, choose the dominant color as the determining factor.
Once sorted, arrange items within each color group by shade intensity, from lightest to darkest. Install your clothes back into the closet, starting with whites on one end and progressing through the color spectrum to black on the opposite end. Within each color section, organize by garment type – shirts, pants, dresses, etc. This creates sub-categories that make locating specific items even easier.
Use closet rod dividers to clearly separate different color sections and maintain boundaries between groups.
Additional Tips: Consider seasonal rotation when implementing your color system by keeping current-season items at eye level and moving off-season pieces to higher or lower spaces while maintaining the color scheme. Photograph your organized closet for reference, and spend five minutes each evening ensuring items return to their designated color zones. This helps maintain the system and prevents the need for major reorganization sessions in the future.
Add Built-in Drawer Organizers
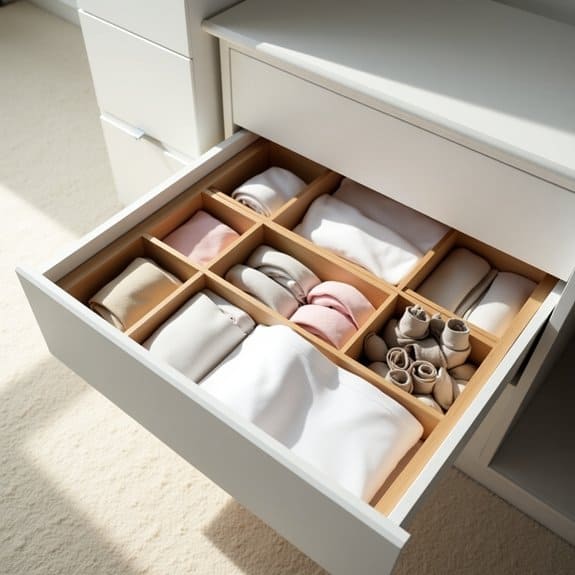
Built-in drawer organizers are essential components for maintaining order in your closet space. Without proper compartmentalization, drawers quickly become chaotic catch-alls where items get lost, wrinkled, or forgotten. A well-organized drawer system saves time during daily routines and helps protect your belongings from unnecessary wear and tear.
Installing drawer organizers transforms messy, undefined spaces into efficient storage solutions that keep everything visible and accessible. Whether storing accessories, undergarments, or folded clothing, customized compartments ensure items stay neatly separated and easy to locate. This systematic approach to drawer organization can significantly reduce stress and streamline your daily dressing routine.
Required Items:
- Measuring tape
- Built-in drawer organizers (wooden, plastic, or fabric)
- Drawer liner
- Scissors
- Pencil and paper
- Label maker (optional)
- Small containers or boxes
- Cleaning supplies
The organization process starts with emptying the drawer completely and measuring its interior dimensions. Select appropriate-sized organizers that maximize the available space while accommodating your specific items. Install drawer liners first to prevent sliding and protect the drawer bottom. Position the organizers, ensuring they fit snugly without gaps.
Consider creating a layout plan that places frequently used items in easily accessible spots. Sort items by category and assign specific compartments for each group. Fold clothing using consistent methods to maintain uniform heights and maximize visibility. For smaller items like accessories or undergarments, subdivide spaces further using small containers that fit within the larger organizer sections. This creates a hierarchy of organization that keeps everything in its designated spot.
Additional Tip: Review and adjust your drawer organization system every few months. This allows you to fine-tune the layout based on changing needs and seasons. Consider using clear organizers for better visibility, and implement a one-in-one-out rule to prevent overcrowding. Regular maintenance ensures the system continues to function efficiently and prevents reverting to disorganized habits.
Mount Over-the-Door Storage Solutions
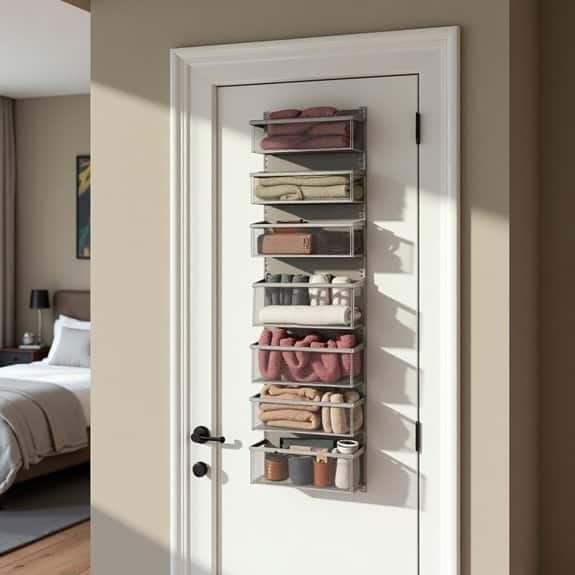
Over-the-door storage solutions represent one of the most underutilized spaces in any closet or room. This often-overlooked vertical space can dramatically increase your storage capacity without taking up valuable floor space or requiring permanent modifications to your closet structure.
Making use of over-the-door storage allows you to organize frequently used items for quick access while keeping them out of sight. This storage method is particularly valuable for small spaces, rental properties, or when you need to maximize storage without making permanent changes to your living space.
Required Items:
- Over-the-door hanging rack or organizer
- Measuring tape
- Level
- Screwdriver
- Door bumpers or protective pads
- Storage bins or baskets (if using a rack system)
- Command strips or mounting hardware (if additional security is needed)
- Door reinforcement plates (optional)
Start by measuring your door’s width and thickness to ensure proper fit of your over-the-door storage solution. Remove the organizer from its packaging and adjust the hanging brackets to fit your door’s thickness.
Place protective pads where the organizer makes contact with the door to prevent scratching or damage. If your organizer includes stabilizing hardware, install it according to manufacturer instructions to prevent swinging or door damage.
For maximum efficiency, organize items by category and frequency of use. Place frequently accessed items at eye level, with heavier items toward the bottom to maintain stability. If using clear storage bins or pockets, label them clearly to maintain organization.
Consider weight limits and distribute items evenly to prevent strain on the door or storage unit.
Additional Tips: Regularly check the hanging brackets and door for signs of wear or stress. Consider using door reinforcement plates if storing heavier items. Clean the door surface before installation to ensure proper grip, and periodically tighten any loose screws or hardware.
When closing the door, do so gently to prevent items from shifting or falling. Remember to factor in door clearance when placing items in the organizer to ensure the door can still close properly.
Utilize Clear Storage Bins for Seasonal Items
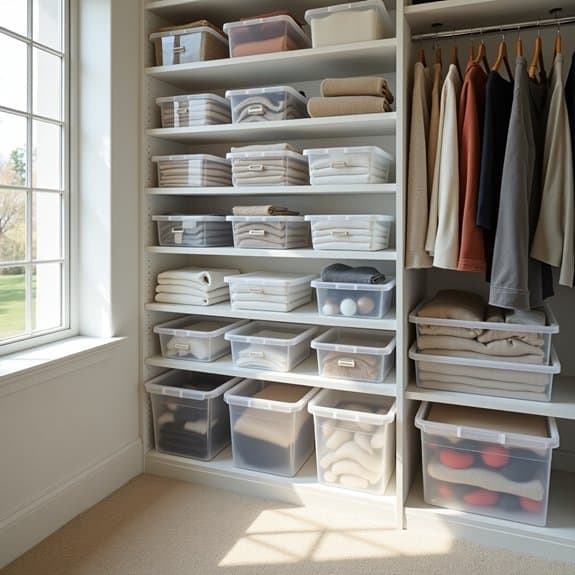
Organizing seasonal items in clear storage bins is a game-changing approach to closet management that transforms cluttered spaces into easily accessible storage solutions. By implementing this system, you can quickly identify and rotate seasonal clothing, accessories, and gear without the frustration of searching through multiple unmarked containers.
The use of clear storage bins specifically addresses the common challenge of storing off-season items while maintaining visibility and protecting contents from dust, moisture, and pests. This method not only maximizes vertical storage space but also creates a systematic approach to seasonal transitions, making it easier to maintain an organized closet throughout the year.
Required Items:
- Clear plastic storage bins with secure lids
- Labels or label maker
- Storage space measuring tape
- Vacuum storage bags
- Mothballs or cedar blocks
- Clean cloth for wiping bins
- Inventory sheets
- Marker or pen
- Silica gel packets
Start by sorting seasonal items into categories such as winter coats, summer swimwear, holiday decorations, or sports equipment. Clean each item thoroughly before storage and ensure everything is completely dry to prevent mold growth.
Select appropriately sized clear bins for each category, considering the available storage space and the volume of items to be stored. Pack items strategically by placing heavier items at the bottom and using vacuum storage bags for soft goods to maximize space.
Label each bin clearly with its contents and the season on multiple sides, including a detailed inventory list inside. Stack bins systematically, keeping the most frequently needed items in easily accessible locations, and arrange them so labels are visible.
For optimal long-term storage success, inspect bins quarterly for any signs of moisture or damage, and maintain an updated inventory system. Consider using shelf liner beneath bins stored on the floor, and rotate items seasonally to ensure proper air circulation.
Adding moisture absorbers or cedar blocks will help preserve items in long-term storage while keeping them fresh for their next use.
Design a Custom Jewelry Organization Station
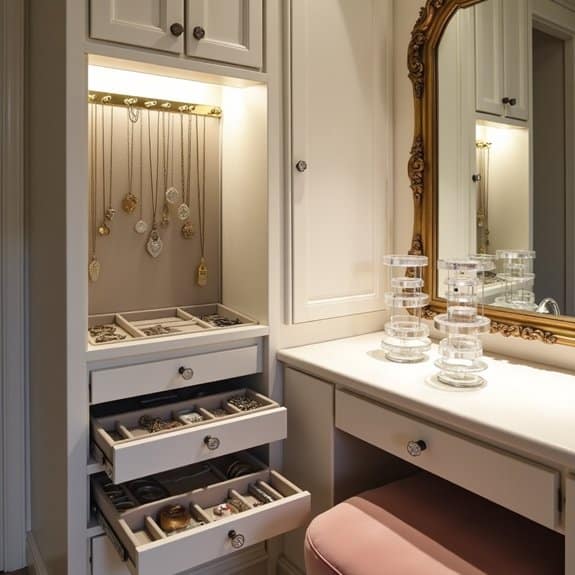
A well-organized jewelry station transforms the daily routine of selecting and storing precious accessories from a potentially frustrating task into an effortless experience. When jewelry is properly organized, it not only prevents tangling and damage but also allows you to see your entire collection at a glance, making outfit coordination simpler and ensuring you make the most of your accessories.
Creating a custom jewelry organization station within your closet space provides a dedicated area that keeps valuable pieces secure while maintaining their condition. This systematic approach to jewelry storage can save time during morning preparations and help extend the life of your favorite pieces by preventing common issues like tarnishing, scratching, or misplacement.
Required Items:
- Velvet-lined drawer inserts
- Hanging jewelry organizer
- Clear acrylic stands
- Wall-mounted hooks
- Stackable jewelry boxes
- Ring holders
- Necklace hooks
- Drawer dividers
- Small fabric pouches
- Anti-tarnish strips
Start by assessing your jewelry collection and categorizing pieces by type: necklaces, bracelets, rings, and earrings. Install wall-mounted hooks or a hanging organizer on an empty closet wall for longer necklaces to prevent tangling.
Utilize drawer space by inserting velvet-lined trays with specific compartments for different types of jewelry. Position stackable jewelry boxes on a dedicated shelf, using clear acrylic stands to create levels and improve visibility.
For frequently worn pieces, create an easily accessible section using a combination of standing ring holders and bracelet displays. Incorporate anti-tarnish strips in enclosed storage areas to protect precious metals.
Ensure all storage solutions allow for proper air circulation while protecting items from dust and humidity. Consider implementing a rotation system where seasonal or special occasion pieces are stored in fabric pouches at the back of the organization station, while everyday pieces remain at the front for easy access.
Label storage compartments clearly and create a maintenance schedule to regularly clean both the jewelry and the organization systems, ensuring your custom station remains functional and efficient over time.
Install Motion-Sensor Lighting
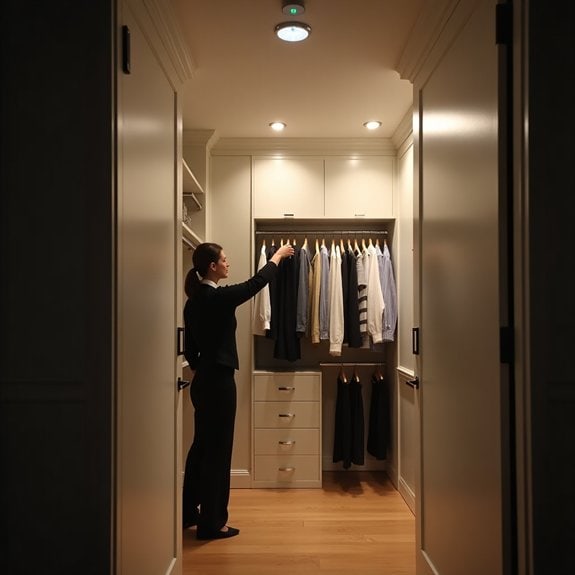
Proper lighting in your closet is essential for efficiently locating items and creating a more functional storage space. Traditional pull-chain lights or manual switches can be inconvenient, especially when your hands are full of clothes or accessories, making motion-sensor lighting an ideal solution for modern closet organization.
Motion-sensor lighting not only adds convenience but also contributes to energy efficiency by automatically turning off when the space isn’t in use. This hands-free lighting solution can transform a dark, difficult-to-navigate closet into a well-lit, accessible space that makes daily routines smoother and more enjoyable.
Required Items:
- Motion sensor light fixture
- Wire strippers
- Screwdriver
- Wire nuts
- Electrical tape
- Voltage tester
- Mounting brackets
- Screws and anchors
- Safety glasses
- Work gloves
The installation process begins with turning off power to the closet at the circuit breaker and confirming the absence of electricity using a voltage tester. Remove the existing light fixture, if present, and install the mounting bracket according to the manufacturer’s specifications.
Connect the wires from the motion sensor light to the corresponding house wires, typically matching black to black (hot), white to white (neutral), and green or copper to green (ground). Secure all connections with wire nuts and electrical tape.
Once the wiring is complete, carefully tuck all wires into the electrical box and mount the light fixture to the bracket. Most motion sensor lights allow for sensitivity and timer adjustments – set these according to your preferences.
Test the fixture by restoring power and walking into the closet space to ensure proper activation. For optimal performance, position the sensor to face the closet entrance and adjust the detection zone to avoid false triggers from adjacent rooms or hallway traffic.
Consider installing multiple motion sensor lights in larger closets or walk-ins to eliminate shadows and ensure comprehensive coverage. Regular cleaning of the sensor lens and periodic testing of the motion detection will maintain optimal functionality and extend the life of your lighting system.
Create a Folding Station With Pull-Out Surfaces
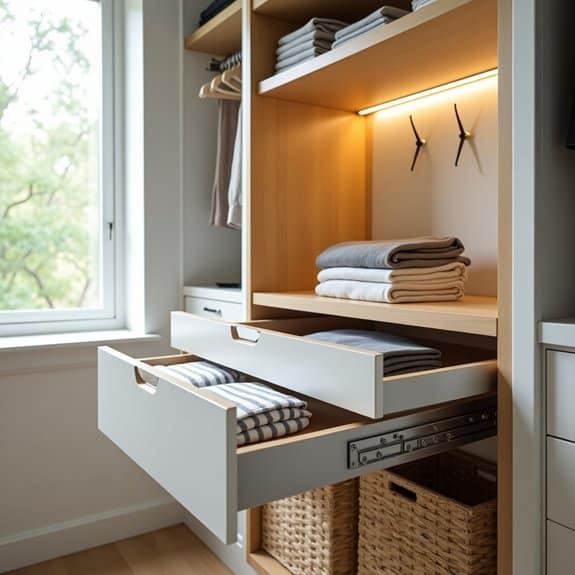
A dedicated folding station transforms the tedious task of laundry into a streamlined, efficient process. Having a designated space with pull-out surfaces eliminates the need to transport clothes to other areas of the home and prevents the dreaded pile-up of unfolded laundry on beds or chairs.
Pull-out surfaces maximize space efficiency by remaining hidden when not in use while providing ample work area when needed. This ergonomic solution reduces strain on your back and ensures consistency in folding, resulting in neater stacks of clothing that maintain their organization longer in drawers and on shelves.
Required Items:
- Pull-out shelf brackets
- Laminated shelving material
- Mounting hardware
- Level
- Drill and drill bits
- Screwdriver
- Measuring tape
- Pencil
- Stud finder
- Non-slip shelf liner
- Wood screws
Install the folding station by first locating wall studs using a stud finder and marking their positions. Measure and mark the desired height for your pull-out surfaces, typically 36-40 inches from the floor for optimal ergonomics.
Mount the pull-out brackets securely into the studs, ensuring they’re level and can support the weight of both the surface and clothing. Cut laminated shelving to size and attach it firmly to the brackets, testing the sliding mechanism for smooth operation.
For optimal functionality, consider installing multiple pull-out surfaces at different heights. The top surface serves as the primary folding area, while lower surfaces can hold sorting bins or act as temporary storage for folded items.
Install the non-slip liner on each surface to prevent clothing from sliding.
Additional tip: Incorporate adequate lighting above the folding station and consider adding a small rod or hooks nearby for hanging items that need immediate attention or can’t be folded.
Keep a small basket nearby for loose buttons, collar stays, or other items found during the folding process, and maintain the sliding mechanisms by periodically cleaning and lubricating them to ensure smooth operation.
Incorporate Vacuum-Sealed Storage Bags
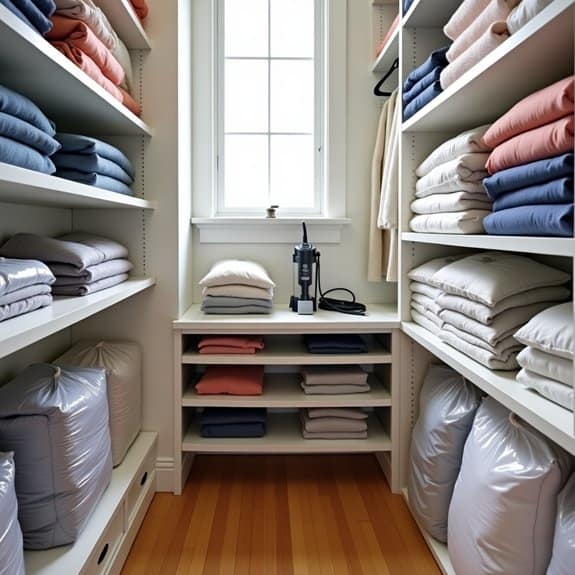
Vacuum-sealed storage bags represent a revolutionary solution for maximizing closet space, particularly when storing seasonal clothing, bedding, or bulky items. These space-saving tools can reduce the volume of soft goods by up to 75%, creating valuable room in even the most cramped closets.
The strategic use of vacuum storage bags not only saves space but also protects items from dust, moisture, and pests. This organization method proves especially valuable during seasonal transitions or in homes with limited storage options, allowing you to maintain easy access to your belongings while keeping them in pristine condition.
Required Items:
- Vacuum-sealed storage bags (various sizes)
- Vacuum cleaner with hose attachment
- Clean, dry items to store
- Labels and marker
- Storage containers or boxes (optional)
- Dryer sheets (optional)
- Inventory list template
- Sorting bins
Sort items by category and season, ensuring each piece is clean and completely dry before storage. Fold clothes neatly and place them in appropriately sized vacuum bags, being careful not to overfill. Leave enough space at the top for proper sealing.
Insert a dryer sheet in each bag for freshness, then seal the bag according to manufacturer instructions. Using your vacuum’s hose attachment, remove the air through the designated valve until the bag is fully compressed.
Stack compressed bags in designated areas of your closet, either on shelves or in storage containers. Label each bag clearly with contents and season. Consider creating zones within your closet for different types of stored items – winter wear, summer clothes, or special occasion items. Maintain an inventory list to track stored items’ locations.
For optimal results, store vacuum-sealed bags in a cool, dry place away from direct sunlight. Check bags every few months to ensure they maintain their seal, and consider resealing if needed.
When retrieving items, allow them to breathe for several hours before use, and promptly store the empty bags flat for future use. Remember to clean the vacuum valve area before each use to ensure proper suction and sealing.
Install Belt and Scarf Storage Rails
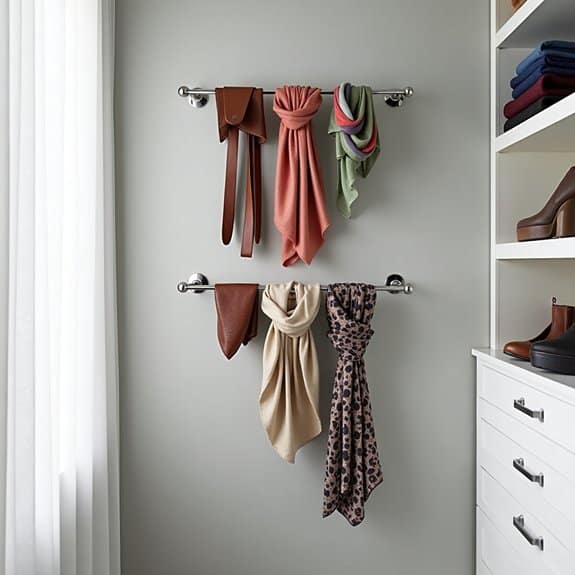
Proper storage of belts and scarves is essential for maintaining their condition and extending their lifespan. When these accessories are crumpled or tangled, they can become damaged, wrinkled, and difficult to locate when needed. A dedicated rail system keeps these items visible, accessible, and wrinkle-free.
Installing belt and scarf storage rails transforms a chaotic closet corner into an organized fashion command center. This solution not only protects your accessories but also creates a boutique-like display that makes coordinating outfits easier and more enjoyable. Well-organized accessories can inspire new combinations and ensure you get maximum use from your collection.
Required Items:
- Wall-mounted hook rails or sliding belt racks
- Mounting screws and anchors
- Power drill
- Level
- Measuring tape
- Pencil
- Screwdriver
- Stud finder
- S-hooks or specialty hangers (optional)
Begin by selecting an accessible wall space in your closet, ideally at eye level or slightly below. Use a stud finder to locate wall studs, marking their positions with a pencil. Measure and mark the desired height for your rails, using a level to ensure straight lines. If installing multiple rails, space them about 8-12 inches apart vertically to accommodate different accessory lengths.
For wall-mounted rails, drill pilot holes at the marked locations, insert wall anchors if needed, and secure the rails with screws. If opting for sliding racks that mount to your closet rod, simply hook them over the rod and adjust the spacing between units as needed.
Once installed, sort your accessories by type, color, or frequency of use before hanging them individually on the rails. To maximize your new organization system, consider implementing a one-in-one-out policy to prevent overcrowding. Regularly assess your collection and rotate seasonal items to maintain order.
For delicate scarves, use smooth hooks or rings to prevent snags, and consider using end clips on belt rails to keep items from sliding off. Review your organization system every few months to ensure it continues to meet your needs and make adjustments accordingly.

