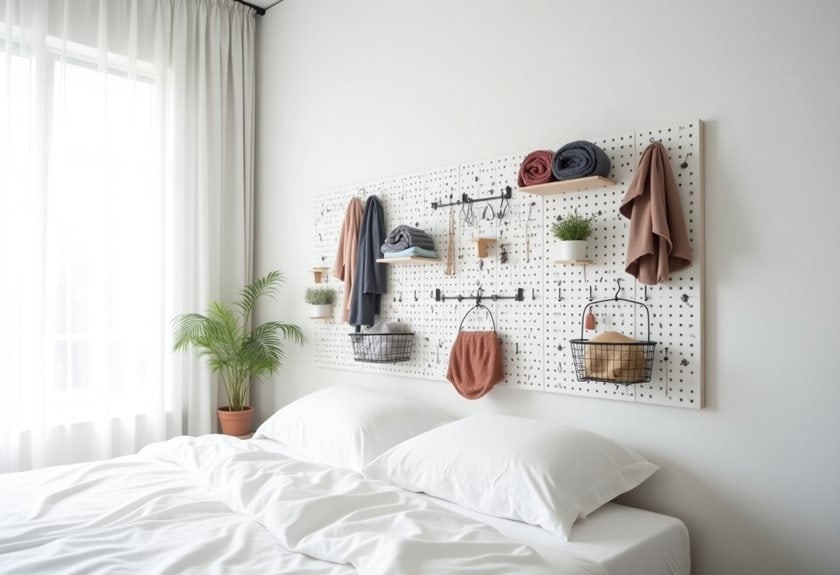
Your bedroom should be a peaceful sanctuary, but let’s be honest—it often becomes a cluttered chaos of clothes, accessories, and everyday items. I’ve spent years helping clients transform their wall space into organized havens, and I’m excited to share my favorite solutions that blend style with function. From sleek floating shelves to genius pegboard systems, these 15 ideas will revolutionize how you use your vertical real estate. Ready to reclaim your room?
Floating Shelves for Daily Essentials
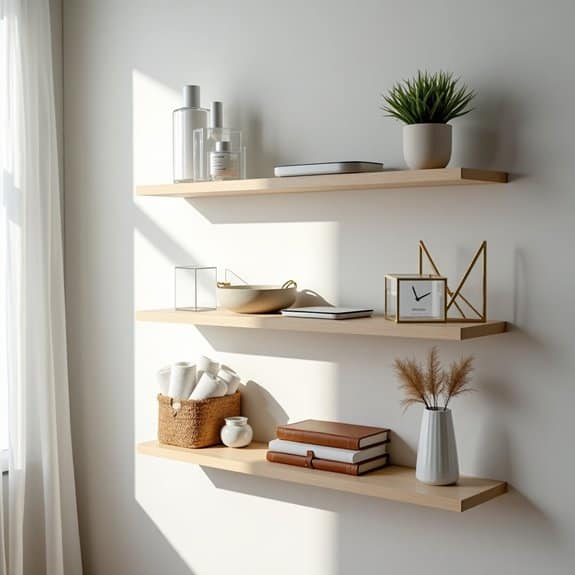
Having quick access to daily essentials can streamline your morning routine and help you start each day efficiently. Floating shelves provide an elegant storage solution that keeps frequently used items within arm’s reach while freeing up valuable surface space on nightstands and dressers.
Strategic placement and organization of floating shelves can transform a cluttered bedroom into a functional sanctuary. When essential items have designated spots, you eliminate the stress of searching for things during rushed mornings and create a visually appealing display that enhances your room’s aesthetic.
Required Items:
- Floating shelves (2-3 pieces)
- Wall anchors and mounting hardware
- Level
- Drill
- Pencil
- Measuring tape
- Storage containers or baskets
- Bookends
- Small decorative trays
- Clear drawer organizers
Start by identifying the ideal location for your floating shelves, considering both accessibility and visual balance in the room. Install the shelves at varying heights, with the most frequently used items on the middle shelf at eye level.
Group items by category: daily skincare and grooming products on one shelf, electronics and charging stations on another, and perhaps books or decorative items on the third. Use small containers or organizing trays to keep similar items together and prevent shelves from looking cluttered.
Consider the visual weight of items when arranging them – heavier items should be placed toward the ends of shelves near the wall brackets for stability. Maintain approximately 70% capacity on each shelf to preserve a clean, organized appearance and allow for easy access to items. Label containers discretely if needed to maintain organization long-term.
Additional Tips: Rotate items seasonally to ensure shelves remain relevant to your current needs. Install LED strip lighting underneath shelves for ambiance and improved visibility.
Review the contents monthly to remove items that are no longer used frequently, and adjust groupings as your daily routine changes. Remember to dust shelves weekly to maintain a polished appearance and prevent build-up around stored items.
Pegboard Command Center
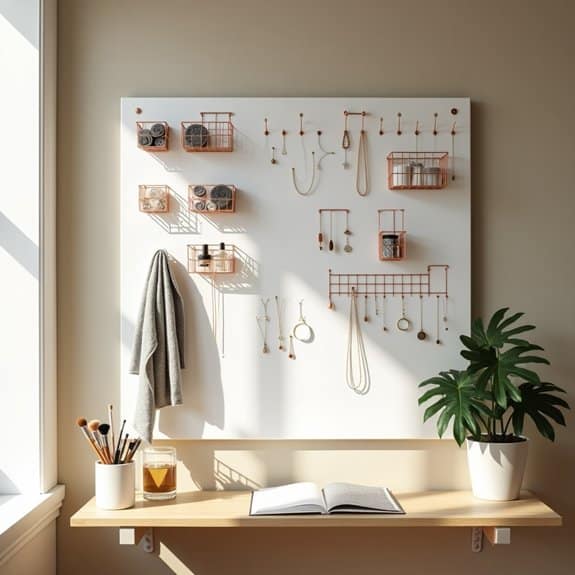
A pegboard command center transforms an ordinary bedroom wall into a highly functional organization hub that keeps essential items visible and accessible. By utilizing vertical space, this system prevents cluttered surfaces while maintaining easy access to frequently used items, from jewelry to daily planners.
Creating a designated command center helps establish routines, reduces morning stress, and keeps important items from being misplaced. The versatility of pegboards allows for customization based on individual needs, whether for professional items, school supplies, or personal accessories.
Required Items:
- Pegboard panel
- Wall anchors and screws
- Pegboard hooks (various sizes)
- Hanging baskets
- Small containers
- Wire shelving units
- Mounting hardware
- Level
- Drill
- Pencil
- Measuring tape
- Wire baskets
- Binder clips
- Labels
Mount the pegboard securely to the wall using appropriate anchors and ensure it’s level. Begin by mapping out zones on the pegboard – designate specific areas for different categories like accessories, daily essentials, and planning tools.
Install various hooks, baskets, and containers strategically based on the weight and size of items they’ll hold. Position frequently used items at eye level and arrange less-used items on the periphery. Create clear pathways between zones to maintain visual organization and prevent overcrowding.
Additional Success Tips: Regularly reassess the layout of your command center and adjust it based on changing needs. Use color-coding or labels to maintain organization, and avoid overcrowding the board by rotating seasonal items.
Consider leaving some empty spaces for flexibility and future additions. Clean and dust the pegboard weekly to maintain its appearance and functionality.
Wall-Mounted Jewelry Display

A well-organized jewelry display not only prevents tangled necklaces and lost earrings but also transforms your accessories into an artistic wall feature. When jewelry is properly displayed, you’re more likely to wear your favorite pieces regularly and maintain better awareness of your collection.
Wall-mounted jewelry organization maximizes vertical space while keeping precious items dust-free and easily accessible. This solution works particularly well for smaller bedrooms where dresser space is limited, and it allows you to appreciate your jewelry as décor while keeping it properly stored.
Required Items:
- Decorative hooks
- Wall anchors
- Screwdriver
- Level
- Measuring tape
- Pencil
- Hammer
- Decorative hanging rods
- Picture hanging wire
- Jewelry organizer panels
- Command strips (optional)
- Small screws
- Cork board (optional)
Start by selecting an easily accessible wall space, ideally near your dressing area or full-length mirror. Measure and mark the installation area, ensuring enough space between pieces to prevent overcrowding.
Install wall anchors first, followed by decorative hooks spaced 4-6 inches apart for necklaces and bracelets. Mount horizontal rods or floating shelves below the hooks for additional storage options. For earrings, install a mesh panel or cork board section at eye level, securing it firmly with appropriate hardware.
Group similar items together: necklaces on hooks, bracelets on rods, and earrings on the mesh panel. Consider arranging pieces by color, length, or frequency of use. Test the security of all mounted elements before hanging jewelry, and ensure each piece has adequate space to hang freely without tangling with neighboring items.
Additional Tips: Incorporate clear acrylic organizers for rings and smaller pieces that don’t hang well. Position the display away from direct sunlight to prevent metal tarnishing and gem damage. Leave room for expansion, and rotate pieces seasonally to maintain organization and prevent overcrowding.
Consider adding small LED lighting to enhance visibility and create ambiance.
Over-the-Door Storage Solutions
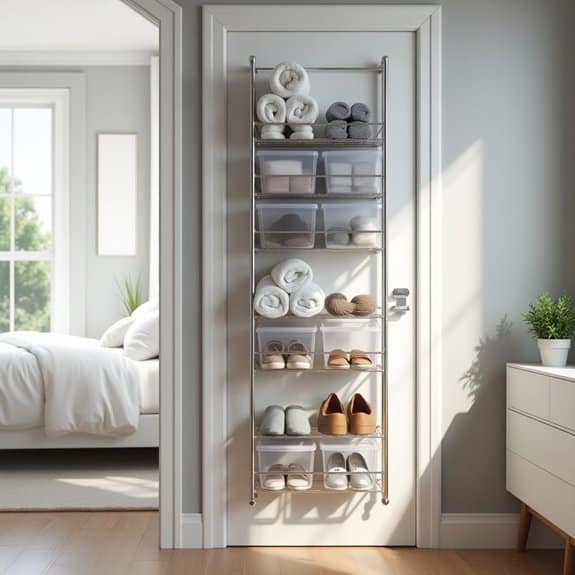
Making the most of vertical space is crucial in any bedroom, and the often-overlooked door area presents a perfect opportunity for additional storage. Over-the-door storage solutions can transform an unused surface into a functional organizing space, helping to declutter floors and surfaces while keeping essential items easily accessible.
Over-the-door organizers are particularly valuable in small bedrooms or shared living spaces where maximizing every square inch matters. These systems can store everything from shoes and accessories to clothing and beauty products, effectively doubling your storage capacity without taking up precious floor space.
Required Items:
- Over-the-door hanging rack or organizer
- Door hooks or brackets
- Measuring tape
- Level
- Storage bins or baskets (optional)
- Label maker (optional)
- Command strips or mounting hardware
- Screwdriver
- Storage containers that fit the organizer
Start by measuring your door’s dimensions, including thickness, to ensure proper fit of the over-the-door organizer. Remove the door hooks or brackets from the packaging and position them at the top of the door, ensuring they’re level and secure. If using multiple organizers, space them evenly down the door’s length.
For added stability, especially with heavier items, consider securing the bottom of the organizer to the door using command strips or mounting hardware.
Sort items by category before placing them in the organizer, keeping frequently used items at eye level. When using pocket organizers, distribute weight evenly to prevent sagging. For shoe organizers, place heavier shoes at the bottom and lighter ones toward the top.
To maintain organization long-term, regularly assess stored items and rotate seasonal pieces as needed. Consider using clear storage containers or labels to easily identify contents, and avoid overloading the organizer beyond its weight capacity.
Periodically check the mounting hardware and adjust as necessary to ensure the system remains secure and functional.
Vertical Basket Storage System
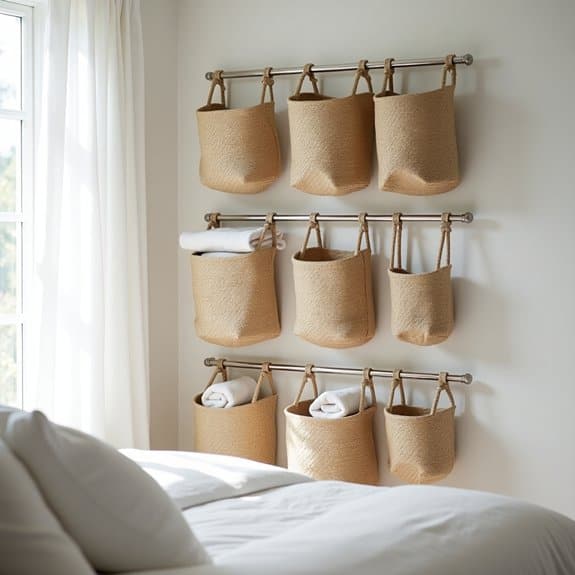
Making the most of vertical space in your bedroom is essential for maximizing storage capacity while maintaining a clutter-free environment. A vertical basket storage system offers a versatile solution that combines functionality with style, allowing you to store various items while keeping them easily accessible.
Vertical basket storage systems are particularly effective for small bedrooms or areas where floor space is limited. This organization method creates designated spaces for clothing, accessories, and personal items while adding a decorative element to your room’s design through the use of attractive baskets and mounting hardware.
Required Items:
- Wall-mounted track system or shelving brackets
- Mounting hardware (screws, anchors, level)
- Wire or woven storage baskets
- Power drill
- Measuring tape
- Pencil
- Stud finder
- Labels (optional)
- Basket liners (optional)
Start by determining the ideal location for your vertical storage system, using a stud finder to locate wall supports. Measure and mark the placement for your track system or brackets, ensuring they’re level.
Install the mounting hardware securely into the wall studs or using appropriate anchors. Once the tracking system is firmly in place, attach the basket holders or hooks according to the manufacturer’s specifications. Space the baskets evenly, considering the height of items you’ll be storing and ensuring easy access to each container.
Select baskets that complement your room’s décor and are appropriately sized for your intended storage items. Sort items by category before placing them in baskets, such as dedicating specific baskets for accessories, folded clothing, or seasonal items.
Consider using clear containers or adding labels to easily identify contents. For optimal organization maintenance, regularly assess the contents of your vertical basket system, rotating seasonal items as needed and adjusting basket placement to accommodate changing storage needs.
Use basket liners to protect delicate items and maintain cleanliness, and consider implementing a color-coding system for more efficient item location. Remember to periodically check the security of wall mountings and tighten any loose hardware to ensure long-term stability and safety.
Magnetic Makeup Organizer Wall
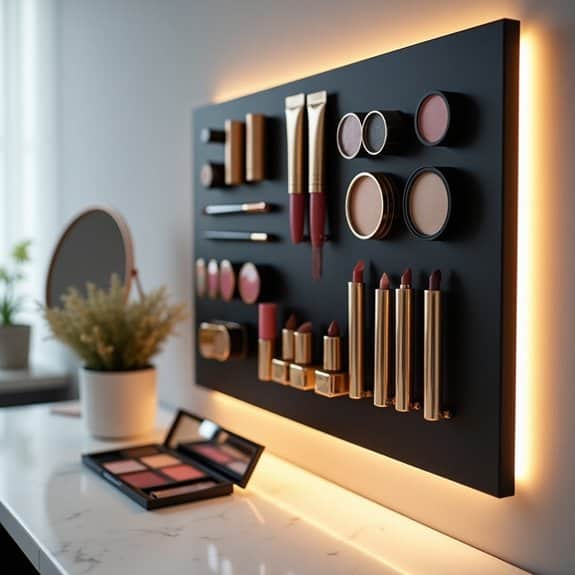
A magnetic makeup organizer wall provides a revolutionary solution to the age-old problem of cluttered vanities and overcrowded bathroom counters. By utilizing vertical space, this organization method transforms your makeup collection into an easily accessible, visually appealing display that saves precious surface area while keeping everything within arm’s reach.
Creating a magnetic makeup wall not only streamlines your morning routine but also helps prevent makeup products from being forgotten in the depths of drawers or bags. This system allows you to see all your products at once, making it easier to keep track of expiration dates and inventory while adding a modern, sophisticated touch to your bedroom or bathroom decor.
Required Items:
- Magnetic board or sheet metal
- Strong mounting hardware
- Small neodymium magnets
- Industrial-strength adhesive
- Magnetic strips
- Command strips (optional)
- Level
- Drill and screwdriver
- Measuring tape
- Pencil
Install the magnetic board by first selecting an easily accessible wall space near your getting-ready area. Measure and mark the desired location, ensuring the board is level. Mount the board securely using appropriate hardware for your wall type.
Next, attach small neodymium magnets to your makeup products using industrial-strength adhesive, waiting for them to dry completely. For items that don’t work well with individual magnets, create custom holders using magnetic strips. Test the magnetic strength of each item before letting go to ensure security.
Additional tip: Create zones on your magnetic wall based on product categories (face, eyes, lips) and frequency of use. Regularly clean both the magnetic surface and the magnets to maintain strong adhesion, and periodically check that all mounted items remain secure.
Consider installing LED strip lighting around the board to improve visibility and add ambiance to your makeup station.
Hanging Book Ledges
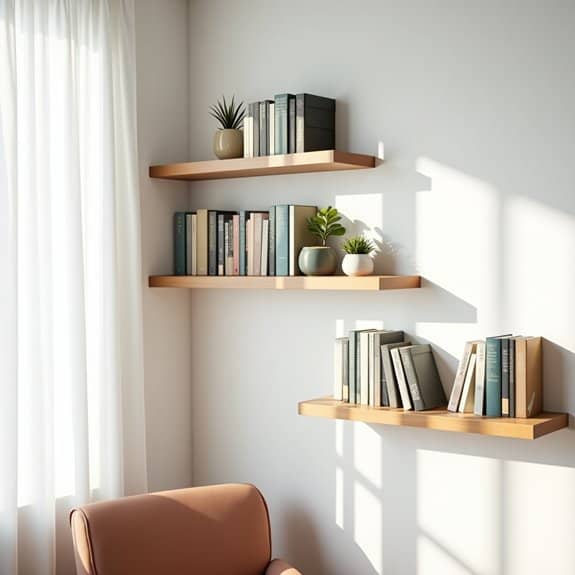
Reading in bed is one of life’s simple pleasures, but keeping books organized and easily accessible in the bedroom can be challenging. Hanging book ledges offer an elegant solution that maximizes vertical wall space while creating an attractive display of your favorite reads. These floating shelves keep books visible and within arm’s reach without taking up valuable floor space or nightstand real estate.
Installing book ledges transforms an ordinary bedroom wall into a functional library that doubles as decor. This organization method prevents books from collecting dust under the bed or becoming scattered across various surfaces. It’s particularly beneficial for small bedrooms where space optimization is crucial, and it encourages regular reading by keeping books visible and inviting.
Required Items:
- Floating book ledges
- Stud finder
- Level
- Pencil
- Drill
- Screwdriver
- Wall anchors
- Screws
- Measuring tape
- Books to display
The installation and organization process begins with selecting an appropriate wall space, ideally near the bed or a reading chair. Use the stud finder to locate wall studs and mark their positions. Measure and mark where each ledge will go, ensuring they’re level and properly spaced – typically 12-15 inches apart vertically.
Install the ledges according to manufacturer instructions, using wall anchors if you can’t secure them directly into studs. Once mounted, arrange books by size, starting with larger books at the bottom ledges for stability. Consider adding small decorative items between books to create visual interest.
For optimal organization and longevity, rotate books periodically to prevent shelf warping, and avoid overloading ledges beyond their weight capacity. Keep current reads at eye level and arrange books by genre or color for both functionality and aesthetic appeal.
Consider installing small LED strip lights above the ledges to create ambiance and improve visibility for nighttime reading selection.
Built-In Bedside Nooks
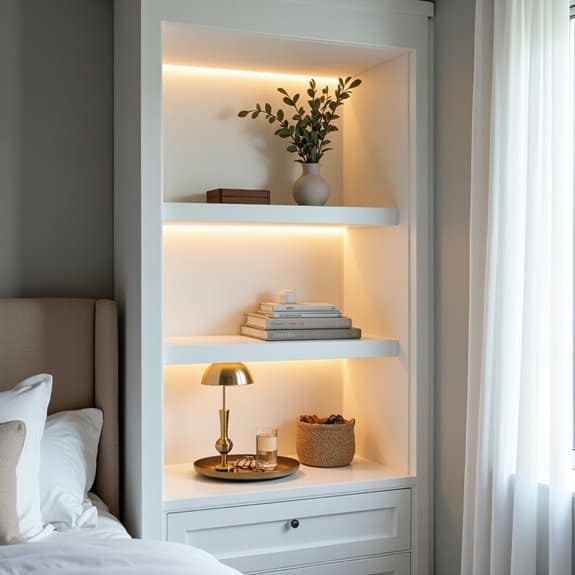
Built-in bedside nooks serve as practical alternatives to traditional nightstands, maximizing vertical space while creating a sleek, integrated look in the bedroom. These architectural features provide dedicated storage spaces that keep essential items within arm’s reach without cluttering the room’s visual flow.
Proper organization of bedside nooks is crucial for maintaining both functionality and aesthetics. When well-organized, these spaces can house everything from reading materials to charging stations, while maintaining a calm and orderly environment conducive to rest and relaxation.
Required Items:
- Small storage containers or baskets
- Drawer organizers or dividers
- Cable management solutions
- LED strip lighting or puck lights
- Hooks or small hanging systems
- Shelf liners
- Small decorative trays
- Dust cloths
- Label maker (optional)
Start by removing all items from the nook and cleaning the surfaces thoroughly. Assess the space and divide it into zones based on frequency of use – designate the most accessible areas for daily essentials like reading glasses, remote controls, or medications.
Install lighting if needed, ensuring proper cable management for any electrical items. Add shelf liners to protect the surfaces and provide grip for items.
Group similar items together using small containers or organizers, positioning them according to their designated zones. Implement a cable management system for charging cables and electronic devices, keeping them neat and accessible.
Consider adding hooks on the sides for items like headphones or sleep masks.
For optimal maintenance and continued organization, establish a weekly routine to declutter and wipe down surfaces. Rotate items seasonally, and regularly assess whether stored items truly belong in the bedside nook.
Consider using drawer organizers or small trays to prevent items from sliding around, and maintain a “one in, one out” policy to prevent accumulation of unnecessary items.
Wall-Mounted Drawer Units
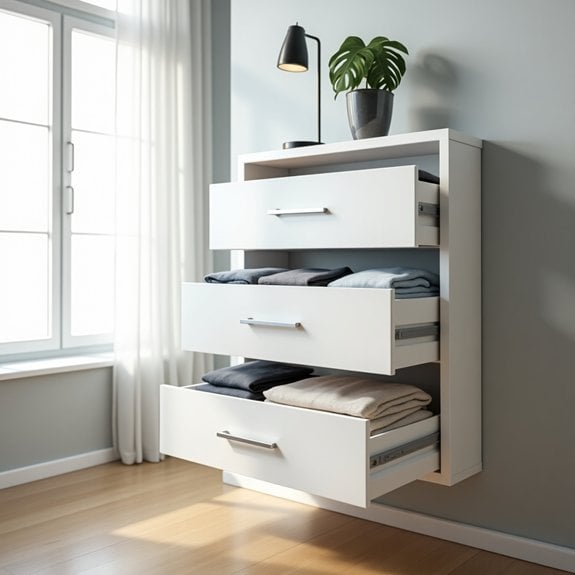
Wall-mounted drawer units represent a revolutionary solution for maximizing vertical storage space while maintaining a clean, floating aesthetic in the bedroom.
These modern storage solutions free up valuable floor space and create an illusion of a larger room, making them particularly valuable in smaller bedrooms or urban living spaces.
When properly organized, wall-mounted drawer units serve as both functional storage and stylish design elements. Their versatility allows for storing everything from clothing and accessories to books and electronics, while their elevated position makes cleaning underneath effortless and helps maintain a clutter-free environment.
Required Items:
- Measuring tape
- Level
- Wall anchors and mounting hardware
- Drawer organizers/dividers
- Labels
- Storage bins or containers
- Pencil and paper
- Cleaning supplies
- Drill
- Stud finder
Begin by emptying all drawers and cleaning them thoroughly. Sort items into categories based on frequency of use and type. Install drawer organizers or dividers to create designated spaces for different items, ensuring smaller objects don’t get lost or mixed.
Position frequently used items in the most accessible drawers, typically at eye level, while storing seasonal or rarely used items in higher or lower drawers.
Create a logical flow by grouping similar items together. For example, dedicate one drawer to accessories, another to electronics and charging cables, and others to clothing items.
Label each drawer clearly, either on the front or inside, to maintain the organization system long-term. Consider using clear storage containers within larger drawers to further compartmentalize items and maintain order.
To maximize the effectiveness of wall-mounted drawer units, regularly reassess the contents and adjust the organization system as needed. Implement a one-in-one-out rule to prevent overflow, and schedule quarterly maintenance checks to ensure the mounting hardware remains secure and the organizational system continues to serve its purpose efficiently.
Use drawer liners to protect items and maintain cleanliness, and consider installing motion-sensor lights for better visibility in deeper drawers.
Fold-Down Desk and Storage
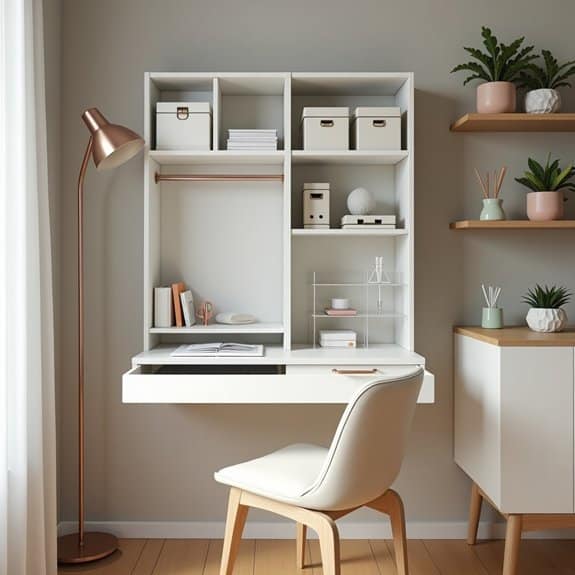
A fold-down desk creates the perfect solution for small bedrooms where space is at a premium. This versatile piece of furniture transforms from a compact wall unit into a functional workspace, making it ideal for those who work from home or need a dedicated study area.
When properly organized, it can serve as both a productive workspace and an efficient storage solution. The key to maximizing a fold-down desk area lies in creating designated zones for different activities and maintaining a clutter-free environment.
Strategic organization ensures that everything has its place and can be quickly stored away when the desk needs to be folded up, maintaining the room’s aesthetic appeal while maximizing functionality.
Required Items:
- Fold-down desk with built-in storage
- Desktop organizers
- File folders
- Cable management solutions
- Small containers or drawer organizers
- Wall-mounted shelving
- Command hooks or mounting hardware
- Label maker
- Storage boxes
- Desk lamp
Start by categorizing all items that will be stored in and around the fold-down desk area. Designate specific zones within the desk’s storage compartments for different categories: office supplies, documents, electronics, and personal items.
Install wall-mounted shelving above or beside the desk to maximize vertical storage space while keeping frequently used items within arm’s reach. Implement a cable management system to keep wires organized and prevent tangling when folding the desk up.
Use adhesive cable clips or cord organizers to secure cables along the desk’s edges or wall. Within the desk’s storage compartments, utilize small containers or drawer organizers to separate items and prevent them from shifting when the desk is moved.
Create a daily maintenance routine to keep the fold-down desk area organized. Remove any unnecessary items, file papers immediately, and ensure all tools and supplies are returned to their designated spots after use.
Consider implementing a “one in, one out” rule to prevent accumulation of unnecessary items and maintain the organized system long-term. When closing the desk, always double-check that items are secure and won’t fall out when the unit is folded up.
Suspended Clothing Racks
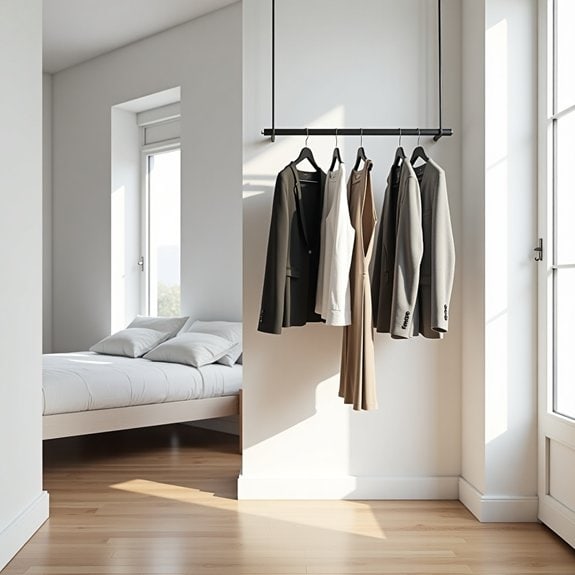
Suspended clothing racks represent a modern, space-saving solution for bedrooms of any size, offering an aesthetic and practical way to display and organize clothing. These floating systems not only maximize vertical space but also create a boutique-like atmosphere, turning everyday garments into visual elements of your room’s design.
By elevating clothing off the floor, suspended racks improve air circulation around garments and make cleaning underneath easier. This organizing method works particularly well for frequently worn items, special occasion pieces, or creating capsule wardrobes that need to be easily accessible while keeping floor space open.
Required Items:
- Heavy-duty ceiling hooks or mounting brackets
- Strong cables, chains, or rods
- Clothing rack bars
- Level
- Drill and drill bits
- Stud finder
- Measuring tape
- Pencil
- Wire cutters
- Appropriate anchors for ceiling type
- Safety equipment (goggles, gloves)
Installing and organizing a suspended clothing rack starts with careful planning and measurement. Use a stud finder to locate ceiling joists and mark mounting points that will ensure even weight distribution.
Install heavy-duty hooks or brackets securely into the joists, making sure they’re perfectly level. Attach cables or chains to the desired length, considering both accessibility and aesthetic appeal. Mount the horizontal rack bar, ensuring it’s completely level before securing all connections.
When organizing clothes on the suspended rack, distribute weight evenly to maintain balance. Arrange items by category, color, or frequency of use, keeping heavier items toward the ends where support is strongest. Leave adequate space between hangers to prevent clothing from becoming crushed and to maintain good air circulation.
To maximize the effectiveness of suspended clothing racks, regularly assess the weight load and check mounting hardware for security. Consider installing multiple racks at different heights for varied storage needs, and use slim, uniform hangers to maintain a clean look while preventing damage to clothing.
Adding small S-hooks to the main bar can create additional hanging spots for accessories or lightweight items without compromising the system’s integrity.
Wire Grid Storage Panel
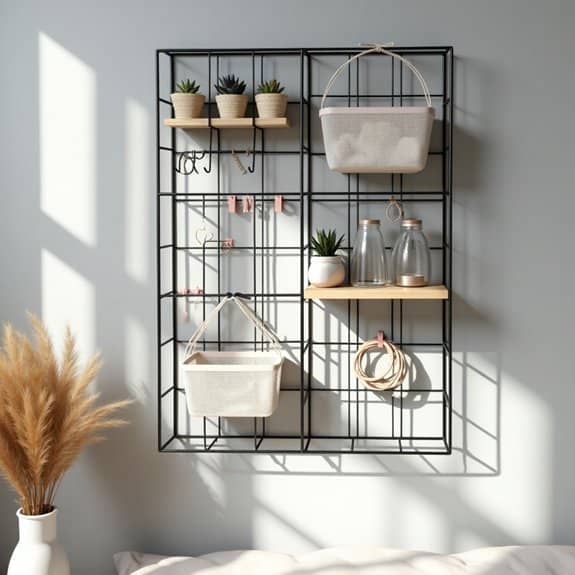
A wire grid storage panel offers a versatile and modern solution for maximizing vertical wall space in any bedroom. This adaptable system allows you to create a customized storage solution that can evolve with your changing needs while keeping essential items visible and easily accessible.
By implementing a wire grid system, you transform an ordinary wall into a functional organization hub that can hold everything from jewelry and accessories to daily essentials and decorative items. The open design maintains a clean, minimalist aesthetic while providing practical storage that prevents cluttered surfaces and overcrowded drawers.
Required Items:
- Wire grid panel
- Wall anchors and screws
- Level
- Drill
- S-hooks
- Grid clips
- Hanging baskets
- Small containers or cups
- Wire cutters (optional)
- Measuring tape
- Pencil
Mount the wire grid panel by first determining your ideal placement and marking the wall with a pencil, using a level to ensure straight alignment. Install wall anchors at marked points, then secure the panel using appropriate screws.
Once mounted, begin customizing your storage configuration by adding S-hooks, clips, and hanging baskets at strategic points. Arrange items by category, placing frequently used objects at eye level and storing lesser-used items higher or lower on the grid. Consider creating zones for different types of items, such as accessories, beauty products, or office supplies.
For maximum organization success, regularly assess and adjust your grid layout based on usage patterns. Invest in clear containers to keep smaller items contained and visible, and label everything to maintain order.
Consider adding small LED lights to illuminate the grid, making it both functional and decorative. Remember to leave some empty space for future additions and avoid overloading the grid, which can create a cluttered appearance and compromise its effectiveness as an organizational tool.
Corner Shelf Systems
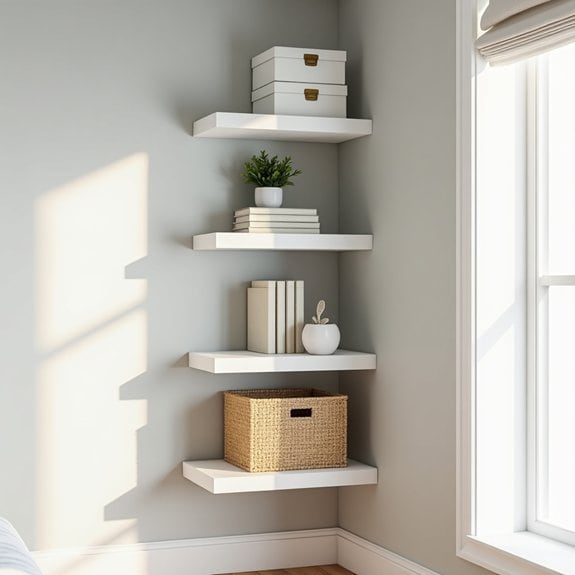
Corner spaces in bedrooms often become neglected dead zones, collecting dust and wasting valuable storage potential. A well-planned corner shelf system transforms these awkward angles into functional storage solutions, maximizing vertical space while maintaining a clean, organized appearance.
Corner shelving provides multiple tiers of storage without consuming precious floor space, making it ideal for small bedrooms or rooms where space optimization is essential. These systems can accommodate books, decorative items, small storage boxes, and daily essentials while creating visual interest in previously unused corners.
Required Items:
- Corner shelf unit
- Level
- Measuring tape
- Pencil
- Wall anchors
- Screwdriver
- Drill
- Stud finder
- Cleaning supplies
- Storage boxes or baskets
- Label maker (optional)
Start by thoroughly cleaning the corner area and measuring both the available space and the dimensions of your chosen shelf unit. Using a stud finder, locate and mark wall studs for secure mounting. Install wall anchors where necessary, ensuring the shelf system will be properly supported.
Mount the shelving unit according to manufacturer specifications, using a level to ensure perfect alignment. For freestanding units, ensure proper stabilization and consider securing them to the wall for safety.
When positioning items on your corner shelves, place heavier items on lower shelves for stability. Arrange books, storage boxes, and decorative items in a way that maintains visual balance while keeping frequently used items easily accessible.
Group similar items together and consider using matching storage containers to create a cohesive look.
To maintain organization long-term, implement a regular dusting schedule and periodically reassess item placement. Consider seasonal rotation of stored items, keeping current necessities within easy reach while storing off-season items on higher shelves.
Use clear containers or labels to quickly identify contents, and avoid overcrowding shelves to maintain both functionality and aesthetic appeal.
Adjustable Track Shelving
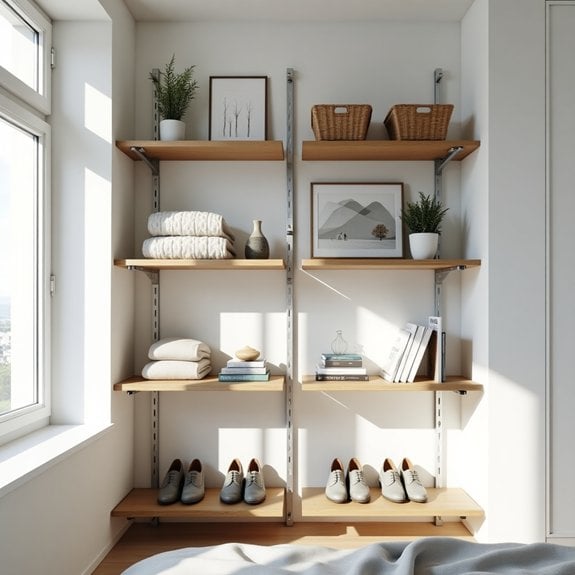
Adjustable track shelving systems represent one of the most versatile and efficient storage solutions for any bedroom. These customizable systems allow you to maximize vertical wall space while providing flexibility to modify shelf heights and configurations as your storage needs change over time.
By implementing an adjustable track shelving system, you create valuable storage space without sacrificing floor area. This organization method works particularly well for displaying decorative items, storing books, housing folded clothing, or organizing shoes and accessories – all while maintaining easy access and visibility.
Required Items:
- Track mounting brackets
- Vertical tracks
- Shelf standards
- Shelf brackets
- Shelves (wood or wire)
- Stud finder
- Level
- Drill and drill bits
- Screwdriver
- Measuring tape
- Pencil
- Wall anchors
- Screws
Installation begins with locating wall studs and marking their positions. Mount the vertical tracks securely to the wall studs, ensuring they’re perfectly level and parallel to each other. Space multiple tracks no more than 32 inches apart for optimal support.
Once tracks are secure, insert the shelf standards into the tracks, followed by attaching shelf brackets at desired heights. Finally, place your chosen shelves onto the brackets, making sure they’re level and secure.
For maximum organization efficiency, place frequently used items at eye level, heavier items on lower shelves, and lighter or rarely used items on upper shelves. Consider using shelf dividers or bins to create designated spaces for different categories of items.
Label shelves or containers to maintain organization long-term, and leave some empty space for future additions or seasonal rotation of items.
Mounted Storage Cubbies
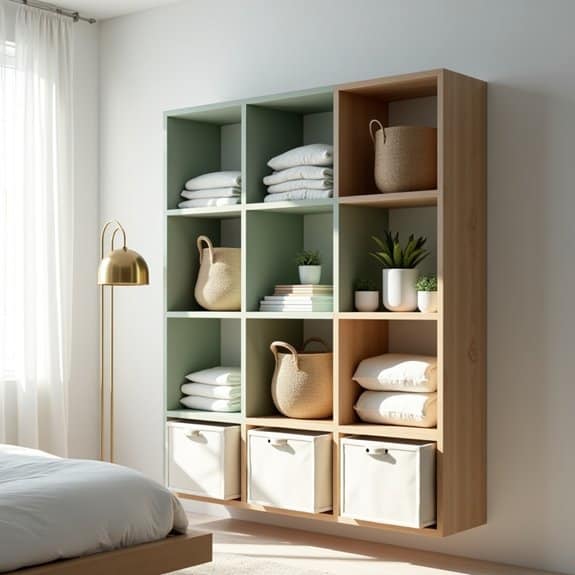
Mounted storage cubbies represent a game-changing solution for maximizing vertical wall space while creating dedicated spots for everyday items. These versatile storage units keep belongings off the floor and within easy reach, transforming cluttered walls into functional storage zones that blend seamlessly with your bedroom’s decor.
By installing wall-mounted cubbies, you create distinct spaces for various categories of items, from books and accessories to decorative pieces and daily essentials. This organizational method not only saves valuable floor space but also adds a modern architectural element to your room while maintaining clear sightlines and reducing visual clutter.
Required Items:
- Wall-mounted storage cubbies
- Stud finder
- Level
- Drill and drill bits
- Screwdriver
- Wall anchors
- Measuring tape
- Pencil
- Storage bins or baskets (optional)
- Labels (optional)
Begin by determining the ideal location for your mounted cubbies, using a stud finder to locate wall studs for secure installation. Measure the wall space carefully and mark your mounting points, ensuring the unit will be level. Install wall anchors where necessary, then mount the cubbies according to the manufacturer’s instructions, making sure to secure them properly to support the weight of your items.
Once mounted, sort your belongings into categories that make sense for your lifestyle, placing frequently used items at eye level and lesser-used items in higher or lower compartments. For optimal organization and longevity of your mounted storage system, consider using coordinated storage bins or baskets within the cubbies to contain smaller items and maintain a uniform look.
Label each cubby or container clearly if storing similar items, and periodically assess the contents to prevent accumulation of unnecessary items. Rotate seasonal items as needed, and maintain a regular cleaning schedule to keep your mounted storage system functioning efficiently and looking its best.

