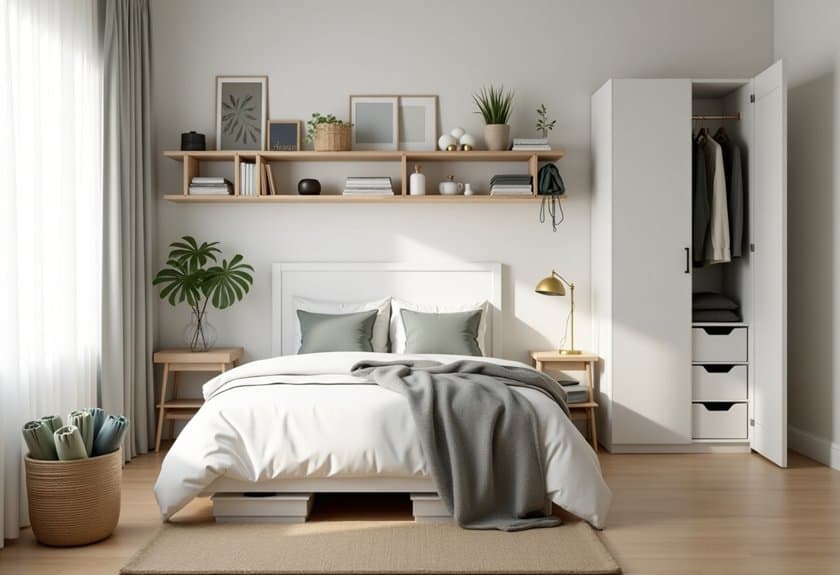
Did you know that the average person spends nearly 3,000 hours per year in their bedroom, yet most of us aren’t maximizing this precious space? Your bedroom should be more than just a place to crash – it’s your personal sanctuary that deserves both style and smart organization. From hidden storage solutions that’ll make your room feel twice as spacious to genius closet hacks you’ve never considered, I’m excited to share game-changing ideas that’ll transform your bedroom into an organized oasis you’ll actually want to show off.

Under-Bed Storage Solutions That Blend With Your Decor
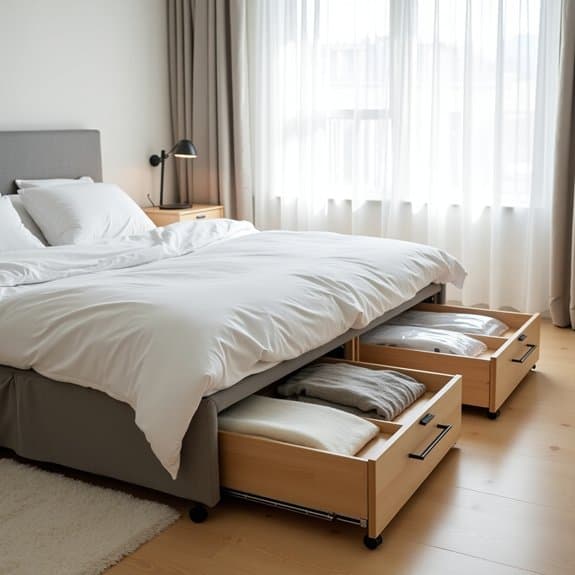
Under-bed storage represents one of the most underutilized spaces in the bedroom, offering valuable square footage for storing seasonal items, extra bedding, and clothing. When properly organized, this space can dramatically reduce closet clutter while maintaining the room’s aesthetic appeal and creating a more streamlined environment.
Incorporating stylish under-bed storage solutions that complement your existing décor transforms this hidden space from a dust-collecting void into a functional storage area. The key lies in selecting appropriate containers and implementing a systematic approach that allows easy access while maintaining visual harmony with your bedroom’s design scheme.
Required Items:
- Under-bed storage containers or drawers
- Bed risers (if needed)
- Storage bags or vacuum-seal bags
- Labels and marker
- Measuring tape
- Dust ruffle or bed skirt
- Rolling casters (optional)
- Anti-moisture packets
- Drawer dividers or organizers
Select appropriately sized containers that fit your under-bed clearance, measuring carefully to ensure proper fit. Sort items by category, such as seasonal clothing, extra bedding, or shoes, and place them in vacuum-seal bags to maximize space and protect against dust.
Position frequently accessed items toward the bed’s foot or sides for easier retrieval. Install wheels on storage containers if your flooring allows for smooth sliding, and implement a labeling system that’s visible when containers are pulled out.
Consider creating zones under the bed, designating specific areas for different categories of items. The foot of the bed should house frequently accessed items, while the head of the bed can store long-term storage items.
Ensure all containers have secure lids to prevent dust accumulation, and maintain organization by regularly reviewing and rotating stored items based on seasonal needs.
To maintain the effectiveness of your under-bed storage system, conduct quarterly reviews of stored items, removing anything that’s no longer needed. Use drawer dividers within larger containers to prevent items from shifting, and consider installing LED strip lighting under the bed frame to improve visibility.
Always ensure stored items are clean and completely dry before storing, and use anti-moisture packets in containers to prevent musty odors or mildew development.
Floating Shelves for Vertical Space Optimization
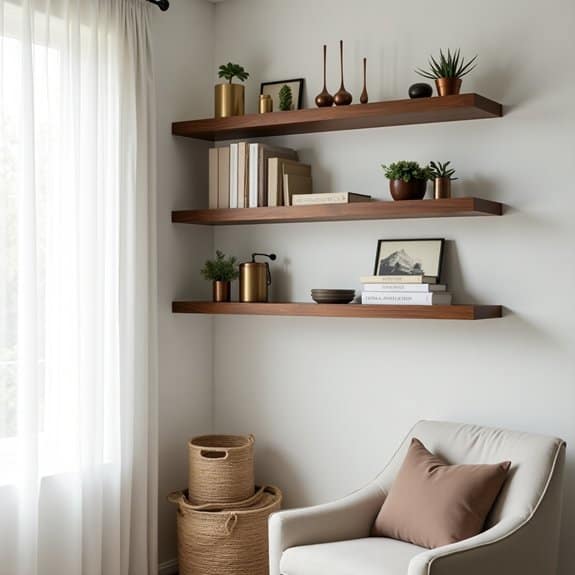
Maximizing vertical space in bedrooms has become essential, particularly in urban living where square footage comes at a premium. Floating shelves offer an elegant solution by creating storage opportunities on otherwise unused wall space while maintaining a clean, modern aesthetic that doesn’t overwhelm the room’s design.
Floating shelves transform dead wall space into functional storage areas, perfect for displaying books, decorative items, and daily essentials while keeping your floor space clear. This organization method not only improves room functionality but also creates visual interest through layered displays and purposeful arrangement.
Required Items:
- Floating shelves (various sizes)
- Stud finder
- Level
- Drill and drill bits
- Screwdriver
- Wall anchors
- Measuring tape
- Pencil
- Installation template
- Safety goggles
- Dust sheet
Start by mapping your wall space, using the stud finder to locate and mark wall studs. Measure and mark shelf positions, ensuring proper spacing between shelves (typically 12-16 inches) for various item heights. Install the first shelf bracket into studs when possible, or use appropriate wall anchors for drywall installation. Check for level positioning before securing completely.
Mount remaining shelves, working from top to bottom to maintain consistent spacing. Once shelves are secure, organize items by frequency of use, with daily essentials at eye level and less-used items higher up. Create visual balance by alternating tall and short items, and incorporate decorative elements between functional pieces.
Group similar items together, using bookends or small containers to keep items upright and organized. For optimal organization, limit each shelf to 70% capacity to prevent overcrowding and maintain visual appeal. Consider using clear containers for smaller items, and rotate displayed items seasonally to keep the space fresh and functional.
Label the undersides of shelves with weight limits to prevent overloading, and dust regularly to maintain the clean, organized appearance of your vertical storage solution.
Multifunctional Nightstand Arrangements
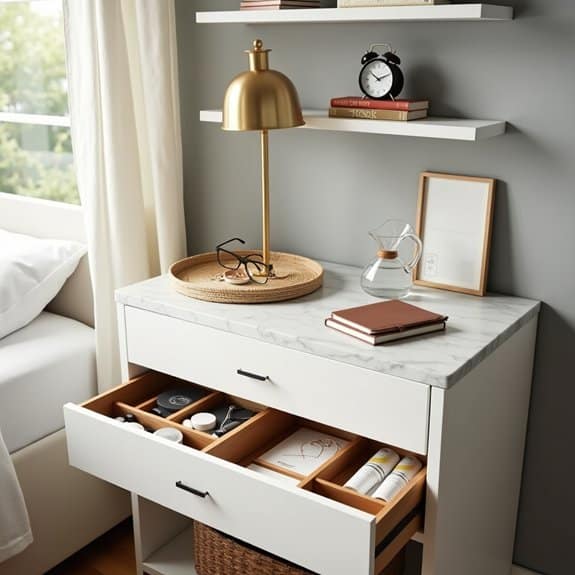
A well-organized nightstand serves as the command center for your bedtime routine, holding essential items within arm’s reach while maintaining a clutter-free space. The key to maximizing this small but crucial area lies in creating a strategic arrangement that balances functionality with style.
Transforming your nightstand into a multifunctional space requires careful consideration of both daily necessities and occasional items. The right organization system can eliminate morning scrambles for charging cables, reading materials, or medications while maintaining a peaceful aesthetic that promotes better sleep.
Required Items:
- Small drawer organizers or dividers
- Decorative tray or catch-all dish
- Compact lamp
- Charging station or cable management system
- Small storage boxes or containers
- Drawer liners
- Label maker
- Measuring tape
- Desktop organizer or book stand
- Small waste basket
Start by clearing the entire nightstand surface and emptying all drawers. Measure both the surface area and drawer dimensions to determine optimal organizer sizes. Install drawer liners to protect the interior and prevent items from sliding. Divide drawer space using organizers, creating designated zones for medications, personal care items, and technology accessories.
For the surface arrangement, position the lamp at the back corner, allowing adequate space for both illumination and other essentials. Place a charging station where it’s easily accessible but partially concealed. Use a decorative tray to corral small items like hand cream, reading glasses, or a water glass. If space permits, incorporate a small book stand or magazine holder for current reading materials.
Consider vertical space by mounting floating shelves above the nightstand or utilizing the wall space for items accessed less frequently. Store seasonal items or backup supplies in coordinating boxes at the bottom of drawers, and maintain a rotation system for reading materials to prevent accumulation.
Additional Tips: Implement a weekly maintenance routine to prevent clutter buildup, regularly sanitizing surfaces and updating stored items. Position frequently used items toward the front of drawers and surface arrangements. Consider your dominant hand when arranging items, and leave some empty space for temporary items or future needs. Use coordinating containers and organizers to maintain visual harmony while maximizing functionality.
Custom Closet Systems for Maximum Efficiency
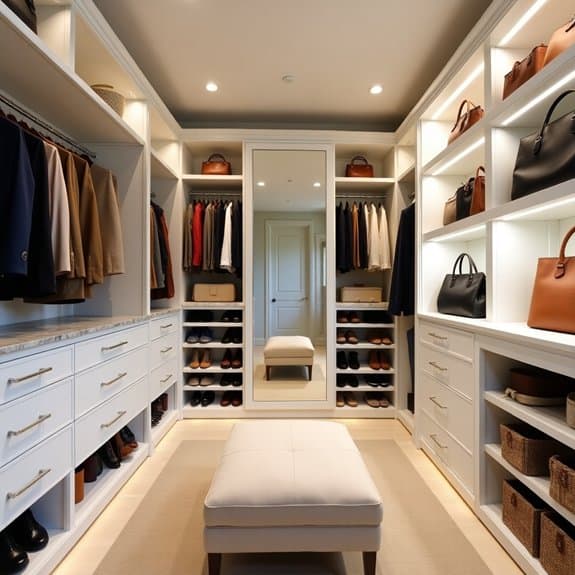
A well-organized custom closet system transforms a standard storage space into a highly functional wardrobe management center. By implementing a thoughtfully designed closet system, you can maximize vertical space, create designated zones for different types of clothing, and ensure every item has its proper place.
Custom closet systems not only streamline your daily routine but also protect and preserve your clothing investments. When each garment has adequate space and appropriate storage conditions, clothes maintain their shape and quality longer, ultimately saving money and reducing the time spent searching for specific items.
Required Items:
- Measuring tape
- Level
- Pencil and paper
- Drill and screwdriver
- Wall anchors
- Closet system components (rods, shelves, drawers)
- Storage boxes or bins
- Hangers
- Labels
- Drawer organizers
- Installation hardware
Start by removing everything from your existing closet and taking precise measurements of the space, including height, width, and depth. Create a detailed plan that accounts for your specific storage needs, considering the types and quantities of items you own.
Divide your closet into zones: hanging space for long and short garments, shelving for folded items, drawers for accessories, and specialized storage for shoes and bags.
Install the main framework of your custom system, beginning with the vertical supports and working outward. Mount hanging rods at appropriate heights (40 inches for shirts, 70 inches for dresses), and position shelves at easily accessible intervals.
Add drawers and specialized organizers for smaller items, ensuring smooth operation and proper alignment. Create designated spaces for seasonal items, with frequently used pieces at eye level and occasional items stored higher or lower.
Optimize your new closet system by implementing a regular maintenance schedule. Rotate seasonal items twice yearly, reassess your organization system every three months, and maintain clear pathways to all storage areas.
Consider installing motion-sensor lighting to illuminate dark corners and make the most of your newly organized space. Remember to leave room for future additions and maintain some flexibility in your storage configuration.
Decorative Storage Baskets and Bins
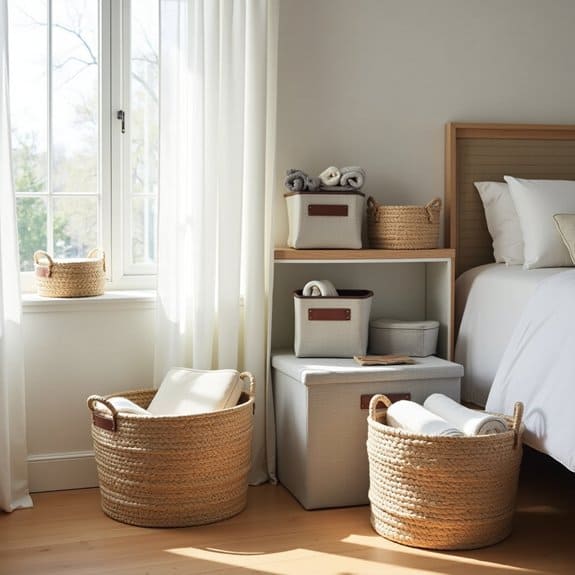
Decorative storage baskets and bins serve as both functional storage solutions and aesthetic elements in bedroom design.
These versatile containers can transform cluttered spaces into organized, visually appealing areas while maintaining the room’s overall style and ambiance.
Strategic placement of storage baskets and bins creates designated homes for various items, from clothing and accessories to books and personal items.
This organization system not only streamlines daily routines but also makes cleaning and maintenance more manageable while adding texture and visual interest to the space.
Required Items:
- Assorted decorative storage baskets
- Storage bins in various sizes
- Basket liners
- Labels or tags
- Measuring tape
- Container dividers
- Shelf liner (non-slip)
- Storage basket hooks
- Basket organizing inserts
Start by assessing your storage needs and measuring available spaces where baskets will be placed.
Sort items into categories based on use frequency and type.
Select appropriately sized baskets and bins that complement your room’s décor, ensuring they fit designated spaces perfectly.
Place larger baskets on the floor or under furniture for bulky items, while smaller ones can be positioned on shelves or in closets.
Line baskets with appropriate material if storing delicate items.
For optimal organization, implement a consistent labeling system to identify contents quickly.
Consider using clear bins for frequently accessed items and decorative baskets for seasonal storage.
Group similar items together, using smaller containers or dividers within larger baskets to prevent items from becoming jumbled.
Position most-used items in easily accessible locations while storing lesser-used items in harder-to-reach spaces.
Additional Organization Tips:
Consider rotating seasonal items between storage locations, regularly assess and declutter basket contents, and maintain a consistent organization system by returning items to their designated containers immediately after use.
Use basket organizer inserts to maximize vertical space and prevent items from becoming disorganized over time.
Remember to periodically clean and inspect baskets to maintain their appearance and structural integrity.
Built-in Window Seat Storage Ideas
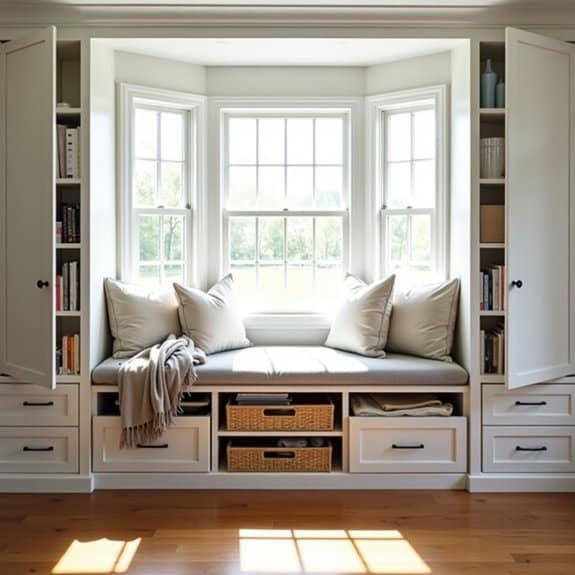
A well-organized window seat storage area transforms an often underutilized space into a functional storage solution while maintaining the aesthetic appeal of your bedroom. The built-in storage beneath a window seat can house anything from seasonal clothing to books, creating a clutter-free environment that enhances your room’s overall organization.
Window seat storage requires thoughtful planning and systematic organization to maximize its potential. When properly organized, this space can serve multiple purposes – providing both comfortable seating and hidden storage – while maintaining easy access to stored items and preventing them from becoming forgotten or damaged.
Required Items:
- Storage bins or baskets
- Labels and label maker
- Drawer dividers or organizers
- Moisture-absorbing packets
- Storage bags for fabric items
- Clear plastic containers
- Measuring tape
- Shelf liner
- Dust covers
Start by emptying the entire storage space and measuring the available area. Divide the space into zones based on the items you plan to store – frequently used items should be placed in easily accessible areas, while seasonal items can go deeper into the storage space.
Install shelf liner to protect stored items from moisture and dust. Sort items into categories and use appropriately sized containers or storage solutions for each group. Label all containers clearly, and consider using clear storage bins for better visibility.
If storing fabric items like blankets or seasonal clothing, use storage bags with moisture protection to prevent damage. Create a detailed inventory of stored items and maintain a rotation system for seasonal items.
Consider installing additional organizational tools like hooks on the sides or small shelves for frequently accessed items. Regular maintenance of this space, including cleaning and reorganization every few months, will ensure the storage system remains effective and items stay in good condition.
Drawer Organizers and Dividers
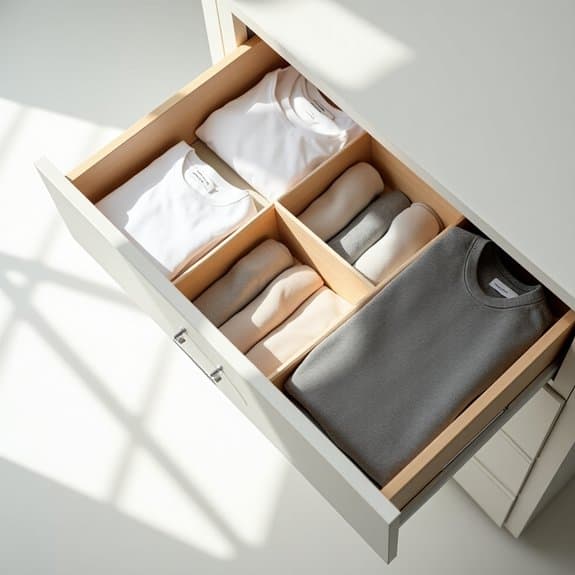
A well-organized drawer system transforms chaotic storage spaces into functional, easy-to-navigate areas that streamline daily routines. When drawers are properly compartmentalized, everything from socks and underwear to accessories and personal items finds its designated space, eliminating the frustration of rummaging through jumbled contents.
Drawer organizers and dividers serve as the foundation for maintaining order within bedroom storage. These simple yet effective tools maximize vertical space, prevent items from sliding around, and create clear boundaries between different categories of belongings, making it easier to maintain organization long-term.
Required Items:
- Drawer organizers (expandable or fixed)
- Drawer dividers
- Measuring tape
- Drawer liner (non-slip)
- Labels
- Storage bins or boxes (various sizes)
- Drawer-depth ruler
- Scissors
Start by removing everything from the drawers and measuring the interior dimensions, including depth, width, and height. Select organizers and dividers that fit these measurements, allowing for slight adjustments in expandable options.
Install non-slip liner at the bottom of each drawer to prevent organizers from sliding. Position larger dividers first to create main sections, then add smaller compartments for detailed organization.
Sort items by category and frequency of use, placing frequently accessed items in easily reachable locations. Arrange organizers to accommodate specific items – longer compartments for rolled clothing, smaller sections for accessories, and custom-sized spaces for personal items. Ensure all dividers are securely positioned and aligned properly.
For optimal maintenance, regularly reassess the organization system every few months, adjusting compartment sizes as needs change. Consider using clear organizers for better visibility, and implement a vertical folding method for clothing to maximize space efficiency.
Label sections if sharing the drawer space with others, and avoid overfilling compartments to maintain the system’s functionality.
Stylish Clothing Racks and Display Solutions
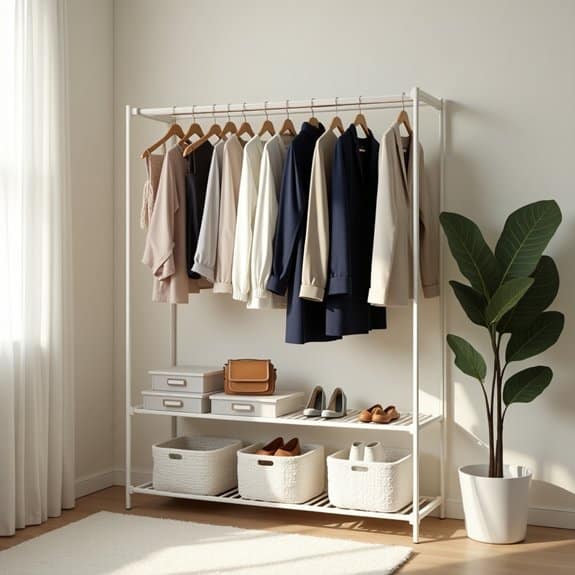
A well-organized clothing display system not only keeps your wardrobe accessible but also transforms your bedroom into a boutique-like space. When clothing is thoughtfully arranged and visible, it becomes easier to plan outfits, maintain garment care, and maximize your wardrobe investment.
Clothing racks and display solutions serve both functional and aesthetic purposes, creating an opportunity to showcase favorite pieces while keeping them wrinkle-free and ready to wear. This approach to organization can turn everyday clothing storage into an intentional design element that enhances your bedroom’s overall appeal.
Required Items:
- Freestanding clothing rack
- Matching hangers
- Storage boxes or baskets
- Drawer dividers
- Shelf risers
- Garment hooks
- Clear shoe boxes
- Small accessory organizers
- Labels
- Clothing rod dividers
Begin by positioning your clothing rack in a location with good lighting and sufficient space for movement. Sort clothing by category (tops, bottoms, dresses) and then by color within each category. Hang items using uniform hangers, spacing them evenly to prevent crowding.
Install shelf risers or small boxes on the rack’s bottom shelf for shoes and accessories. For maximum visual impact, arrange clothes from light to dark, keeping similar items together. Position frequently worn pieces at eye level and in easy-to-reach spots.
Incorporate storage boxes or baskets beneath the rack for items that don’t require hanging, such as workout clothes or accessories. Use clear shoe boxes on lower shelves to protect footwear while maintaining visibility.
Additional organization success depends on regular maintenance and thoughtful editing. Rotate seasonal items to the front when appropriate, remove items that haven’t been worn in six months, and assess the arrangement weekly to ensure the system continues to serve your needs effectively.
Consider adding small hooks on the sides of the rack for bags, belts, or scarves, and use garment dividers to maintain organized sections.
Hidden Storage Headboard Designs
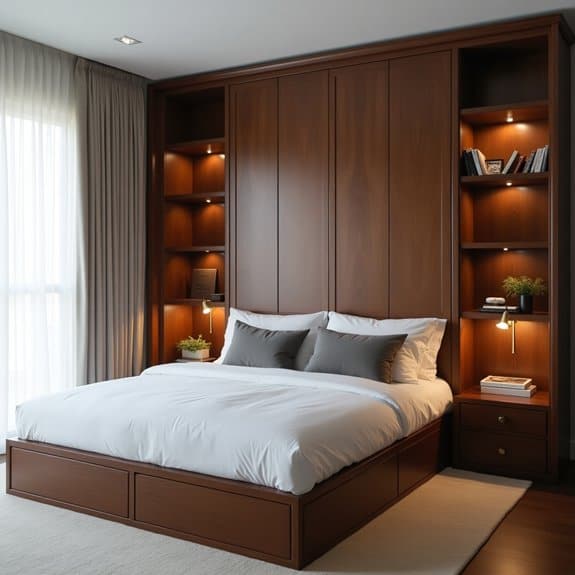
A well-designed storage headboard transforms your bedroom by combining style with functionality, eliminating the need for additional storage furniture while maintaining a clean, uncluttered aesthetic.
These innovative pieces serve as both a focal point and a practical solution for storing everyday items within arm’s reach. Hidden storage headboards are particularly valuable in smaller bedrooms or urban living spaces where maximizing every square foot is essential.
By utilizing the vertical space behind your bed, you can effectively store books, electronics, personal items, and even seasonal accessories without compromising your room’s visual appeal.
Required Items:
- Measuring tape
- Storage bins or baskets
- Drawer organizers
- Dust-proof containers
- Labels
- Drawer liners
- Small hooks
- LED strip lights (optional)
- Clear plastic containers
- Shelf dividers
The organization process starts with emptying all compartments and measuring each space to determine appropriate storage solutions.
Sort items into categories: frequently used items should be placed in easily accessible compartments, while seasonal or rarely used items can go in higher or lower sections.
Install drawer liners to protect the interior surfaces and prevent items from sliding. Utilize clear containers or labeled bins to maintain order within larger compartments.
For electronics and charging stations, create a dedicated space with built-in power strips or cable management solutions.
Books and magazines can be arranged vertically or horizontally depending on compartment dimensions, while smaller items like reading glasses or remote controls should be contained in designated spots using small organizers or trays.
For optimal organization maintenance, conduct monthly reviews of stored items, removing anything that’s no longer needed or hasn’t been used in the past three months.
Consider installing LED strip lighting to illuminate compartments, making it easier to locate items in low-light conditions.
Additionally, rotate seasonal items to front-facing compartments based on current needs, ensuring the most relevant items are always within easy reach.
Jewelry and Accessory Organization Systems

Organizing jewelry and accessories is crucial for protecting valuable pieces while ensuring easy access to your favorite items. A well-organized jewelry collection prevents tangling, tarnishing, and misplacement of precious pieces, allowing you to see and utilize your entire collection effectively.
An organized jewelry system not only preserves the quality of your pieces but also transforms your daily routine. Rather than spending precious morning minutes searching for matching earrings or untangling necklaces, you can quickly select and pair accessories that complement your outfit.
Required Items:
- Jewelry organizer or display stand
- Drawer dividers
- Soft-lined jewelry boxes
- Ring holders
- Necklace hooks
- Clear storage containers
- Fabric-lined trays
- Small zip-top bags
- Silica gel packets
- Anti-tarnish strips
- Wall-mounted hooks
- Command strips or mounting hardware
Start by sorting jewelry and accessories by category (necklaces, earrings, bracelets, rings) and frequency of use. Install wall-mounted organizers or hooks for frequently worn necklaces to prevent tangling, keeping them visible and easily accessible.
Utilize drawer dividers or small compartmentalized boxes for earrings and rings, grouping similar items together. Place bracelets in fabric-lined trays or specialized bracelet holders that prevent scratching and maintain their shape.
For special occasion pieces or valuable items, store them in individual soft pouches or boxes with anti-tarnish strips. Consider using clear containers for costume jewelry, arranging pieces by color or style. Install hooks or specialized hangers for scarves, belts, and other accessories, maintaining their shape while maximizing vertical space.
Additional Tips: Regularly review and declutter your collection, removing damaged pieces or items you no longer wear. Place silica gel packets in storage containers to prevent moisture damage, and clean pieces before storing them.
Consider taking photos of special pieces and their storage locations for insurance purposes and quick reference. Rotate your collection seasonally to maintain organization and ensure all pieces receive proper wear and care.
Space-Saving Folding Techniques
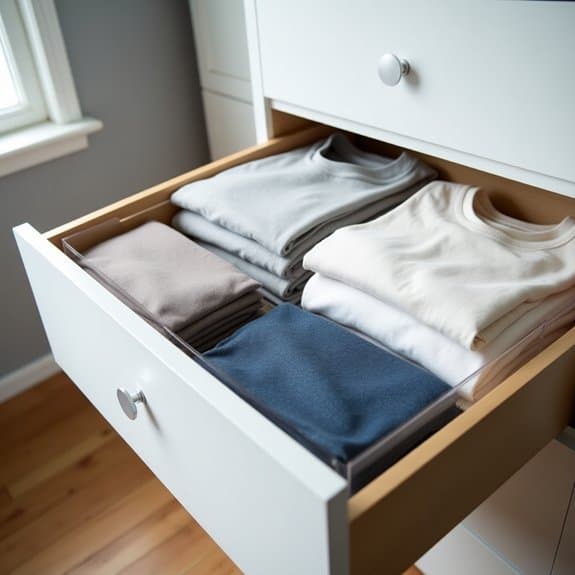
Mastering space-saving folding techniques is essential for maintaining an organized and clutter-free bedroom. Proper folding methods can reduce the space clothing occupies by up to 50%, allowing drawers and shelves to accommodate more items while keeping them easily accessible and wrinkle-free.
The right folding techniques transform chaotic drawers and cramped closets into efficient storage spaces that maximize every inch of available room. When clothes are folded correctly, not only do they take up less space, but they’re also easier to see and access, eliminating the frustrating process of digging through messy piles to find specific items.
Required Items:
- Flat surface for folding
- Drawer dividers
- Storage boxes
- Slim hangers
- Folding board (optional)
- Drawer organizers
- Measuring tape
- Labels
Start by sorting clothes into categories: t-shirts, pants, sweaters, and undergarments. For t-shirts, lay them face-down and fold the sides inward about three inches, then fold the bottom up to meet the collar, creating a neat rectangle. For pants, align the legs and fold them in half lengthwise, then fold from bottom to top in thirds. Sweaters should be folded similarly to t-shirts but with extra care to prevent stretching at the shoulders. Create tight, uniform folds that stand upright when placed in drawers vertically (file-folding method).
For delicate items like silk blouses or dress shirts, use tissue paper between folds to prevent creasing. Implement the KonMari vertical folding method for maximum visibility and accessibility – each item should be able to stand independently when placed in drawers. This technique allows you to see all items at once and prevents stacks from toppling over.
Additional Tips: Test different folding methods to find what works best for your specific clothing items and storage space. Maintain consistent folding sizes to create uniform stacks that fit perfectly in your drawers or storage boxes. Review and refold items monthly to maintain organization and prevent cluttered drawers from developing.
Consider using drawer dividers or small boxes to maintain separate sections for different clothing categories, making it easier to maintain the organization system long-term.
Corner Storage Solutions and Shelving Units
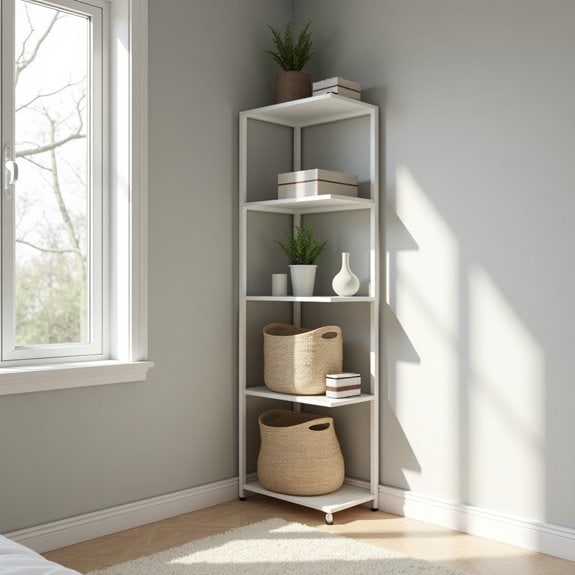
Bedroom corners often become neglected dead spaces or cluttered catch-alls that detract from a room’s aesthetic and functionality. Properly organized corners can transform these overlooked areas into valuable storage zones while maintaining a clean, sophisticated appearance.
Strategic corner organization not only maximizes available space but creates visual balance in the room. Corner storage solutions and shelving units serve as practical alternatives to traditional storage furniture, utilizing vertical space efficiently while maintaining floor area. These solutions can accommodate everything from books and decorative items to clothing and personal accessories, making them essential components of a well-organized bedroom.
Required Items:
- Corner shelving unit
- Mounting brackets and hardware
- Drill and screwdriver
- Level
- Measuring tape
- Storage baskets or bins
- Decorative boxes
- Clear containers
- Labels
- Wall anchors
- Dust cloth
Begin by measuring your corner space carefully, accounting for both width and height to ensure proper fit of shelving units. Install wall-mounted corner shelves starting from the bottom up, using appropriate wall anchors and ensuring each shelf is level.
For freestanding units, assemble according to manufacturer instructions and position them flush against both walls. Organize items by category, placing frequently used items at eye level and storing lesser-used items on higher or lower shelves. Incorporate storage containers that complement your room’s décor while maximizing shelf space.
Group similar items together using coordinated storage solutions: books arranged vertically on upper shelves, decorative boxes containing seasonal items on middle shelves, and daily-use items in easily accessible baskets on lower shelves. Consider implementing a color-coding system or labels to maintain organization long-term.
Leave some open space between stored items for visual breathing room and easier access. To maintain corner organization, regularly assess stored items for relevance and rotate seasonal items as needed. Consider installing LED strip lighting to illuminate dark corners and showcase displayed items effectively.
Keep heavier items on lower shelves for stability, and always ensure wall-mounted units are properly secured to support their intended weight capacity.
Ottoman and Bench Storage Options
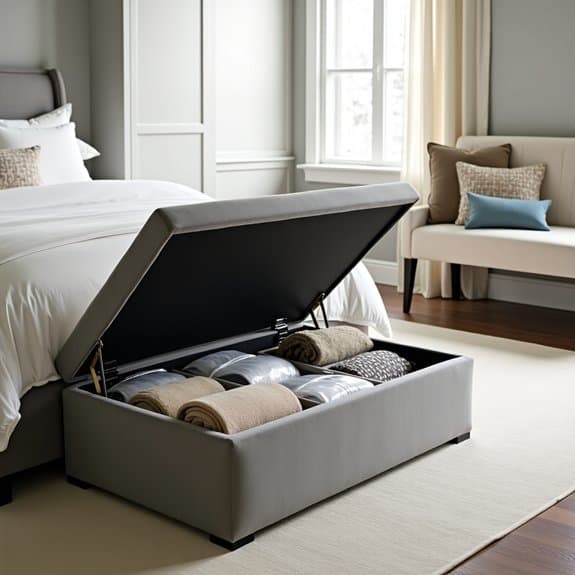
Storage ottomans and benches serve as dual-purpose furniture pieces that combine seating with valuable storage space in the bedroom. These versatile items can hide everything from extra bedding and seasonal clothing to shoes and accessories, helping maintain a clutter-free environment while adding style to your space.
When properly organized, ottoman and bench storage can transform your bedroom’s functionality, creating easily accessible storage solutions that blend seamlessly with your decor. The key is to maximize the available space while keeping items organized and easy to locate when needed.
Required Items:
- Storage containers or fabric bins
- Drawer organizers or dividers
- Labels or label maker
- Fabric storage bags
- Vacuum storage bags (for bulky items)
- Clear plastic containers
- Drawer liner or shelf liner
- Small boxes or compartments
Start by emptying the ottoman or bench completely and sorting items into categories such as seasonal items, frequently used items, and occasionally used items. Line the bottom of the storage area with shelf liner to protect stored items.
Place frequently accessed items toward the front or top of the storage space using appropriately sized containers or organizers that maximize the available space.
For clothing and textiles, use vacuum storage bags to compress bulky items like winter blankets or heavy sweaters. Utilize fabric storage bags for delicate items and clear containers for items that need to be easily visible.
Create designated zones within the storage space, using dividers or small boxes to keep categories separate and prevent items from shifting.
Additional Tips: Consider implementing a seasonal rotation system, swapping items out every few months to maintain organization and ensure frequently needed items are always accessible.
Use labels on containers and create an inventory list to track stored items. Regularly assess stored items and remove anything that hasn’t been used in the past year to maintain optimal organization and prevent overcrowding.
Minimalist Decluttering Strategies
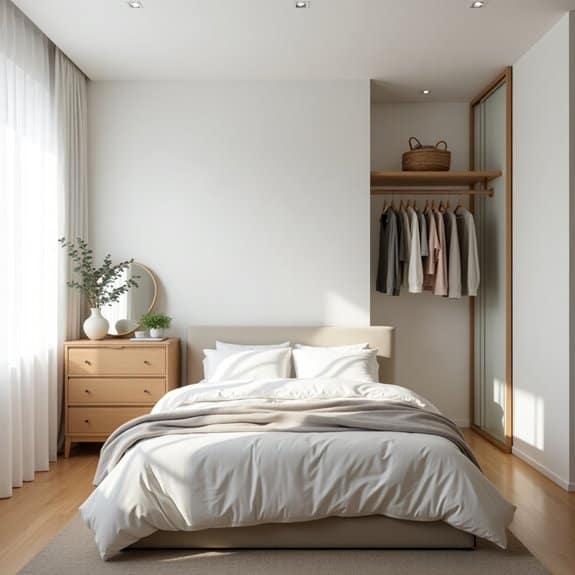
A minimalist approach to bedroom organization creates a serene environment that promotes better sleep and reduces mental clutter. When your bedroom follows minimalist principles, you eliminate unnecessary items that often contribute to stress and chaos, allowing the space to serve its primary purpose as a peaceful sanctuary for rest and rejuvenation.
The process of minimalist decluttering transforms your bedroom into a functional space where every item serves a purpose and has a designated home. This systematic approach not only simplifies your daily routines but also makes cleaning and maintaining the space significantly easier, leading to improved overall well-being.
Essential Tools:
- Storage boxes or bins
- Drawer dividers
- Labels
- Trash bags
- Donation boxes
- Measuring tape
- Storage containers
- Hangers (uniform style)
- Cleaning supplies
Start by removing everything from your bedroom except furniture. Sort items into three categories: keep, donate, and discard. For items in the “keep” category, apply the one-year rule – if you haven’t used it in the past year, let it go.
Next, organize remaining items by category (clothes, accessories, books, etc.) and assign specific zones in your bedroom for each category. Implement the “one in, one out” rule moving forward – for every new item that enters your bedroom, remove an existing item.
Establish a capsule wardrobe by selecting versatile pieces that mix and match well. Store out-of-season clothing in sealed containers under the bed or in high closet spaces. Position frequently used items at eye level and store occasional-use items in less accessible areas. Keep surfaces clear, limiting decorative items to no more than three per surface.
Additional Tips: Conduct a monthly maintenance review to prevent clutter from accumulating. Take photos of your organized space to serve as a reference point for maintaining the system. Consider digital alternatives for physical items like books and documents when possible.
Remember that minimalism is personal – focus on keeping items that truly add value to your daily life rather than adhering to strict numerical limits.
Seasonal Clothing Rotation Methods

Managing seasonal clothing transitions is a crucial aspect of maintaining an organized and functional wardrobe. By implementing an effective rotation system, you can maximize closet space, preserve clothing quality, and eliminate the frustration of sorting through out-of-season items when getting dressed.
Seasonal clothing rotation not only keeps your current wardrobe accessible and relevant but also provides an opportunity to assess your clothing collection, identify needed repairs, and evaluate your wardrobe needs. This systematic approach prevents cluttered drawers and overstuffed closets while protecting valuable clothing investments from unnecessary wear and damage.
Required Items:
- Storage containers or vacuum-seal bags
- Labels and markers
- Garment cleaning supplies
- Moth repellent or cedar blocks
- Storage bins or boxes
- Clothing rack
- Inventory list template
- Cloth garment bags
- Acid-free tissue paper
Start by completely removing all clothing from your closet and sorting items into three categories: current season, next season, and transitional pieces. Clean all garments thoroughly before storage, ensuring they’re completely dry.
Pack away out-of-season clothing in airtight containers or vacuum-seal bags, adding moth repellent or cedar blocks for protection. Label each container clearly with contents and season.
For items being stored long-term, fold knit garments to prevent stretching and hang structured pieces in cloth garment bags. Use acid-free tissue paper between delicate items to prevent color transfer and maintain shape.
Store containers in a cool, dry place away from direct sunlight, preferably in an elevated position to prevent moisture damage.
Create a detailed inventory of stored items, including condition notes and any repairs needed. This helps track clothing locations and plan future seasonal transitions. Regularly inspect stored clothing every few months for signs of damage or moisture, and ensure storage areas maintain proper ventilation.
Consider implementing a quarterly rotation schedule aligned with your local climate patterns rather than strict calendar seasons for more practical wardrobe accessibility.
Additional Tips: Maintain a “transition zone” in your closet for items that span multiple seasons, such as light jackets or layering pieces. Use this rotation process as an opportunity to donate or sell items that haven’t been worn in the previous season.
Consider investing in multi-purpose storage solutions that can be repurposed throughout the year, and always leave room for growth when selecting storage containers.
Small Space Storage Hacks
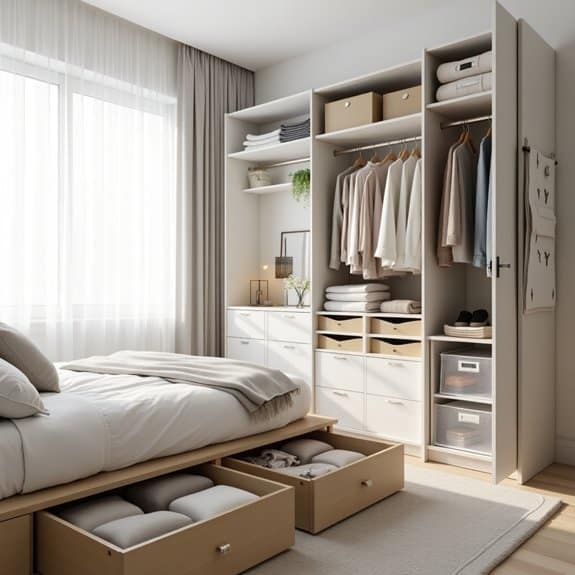
Making the most of limited bedroom space is crucial for maintaining a peaceful and functional living environment. Smart storage solutions can transform a cramped space into an efficiently organized sanctuary, allowing you to maximize every square inch while keeping essential items easily accessible.
Small space organization isn’t just about storing items – it’s about creating systems that work with your lifestyle while maintaining a clutter-free environment. When storage space is limited, vertical solutions and multi-functional furniture become invaluable tools in the quest for an organized bedroom.
Required Items:
- Under-bed storage containers
- Over-door organizers
- Command hooks
- Drawer dividers
- Storage ottomans
- Vacuum storage bags
- Clear bins
- Label maker
- Measuring tape
- Multi-tiered hangers
Begin by conducting a thorough decluttering session, removing items you no longer need or use. Install over-door organizers for accessories, shoes, or additional clothing storage.
Utilize under-bed space with slim storage containers for out-of-season clothing or extra linens. Maximize vertical space by installing floating shelves or using the back of doors for additional storage.
Create zones within your storage areas based on frequency of use, keeping daily items at eye level and storing seasonal items in harder-to-reach spaces. Implement drawer dividers to compartmentalize smaller items and prevent them from becoming jumbled.
Use vacuum storage bags to compress bulky items like winter coats or extra bedding, significantly reducing their footprint in your storage space.
Additional Tips: Consider furniture that serves multiple purposes, such as beds with built-in drawers or nightstands with hidden storage compartments. Use clear containers to easily identify contents and maintain organization long-term.
Regular maintenance of your organization system is key – schedule monthly quick clean-ups to prevent clutter from accumulating and adjust your storage solutions as your needs change.
Bedside Organization Essentials
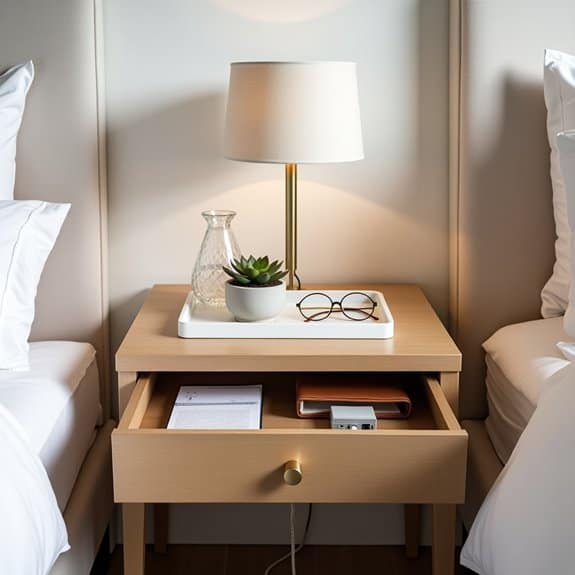
A well-organized bedside area serves as command central for your daily routine, holding essential items within arm’s reach while maintaining a calm, clutter-free environment. From medications and reading materials to electronics and personal items, the nightstand often becomes a catch-all space that can quickly spiral into chaos.
Creating an organized bedside setup not only enhances the aesthetic appeal of your bedroom but also improves your morning and evening routines. Strategic organization of this space ensures everything you need is readily accessible while maintaining a serene atmosphere conducive to rest and relaxation.
Required Items:
- Drawer organizers or small containers
- Cable management solutions
- Bedside lamp
- Small tray or dish
- Drawer liner
- Storage boxes
- Multi-plug power strip
- Small wastebasket
- Decluttering box
Start by completely clearing your bedside area and wiping all surfaces clean. Install a multi-plug power strip behind or beside the nightstand for convenient device charging, using cable management solutions to keep cords tidy and hidden.
Place a drawer liner inside any drawers to protect the surface and prevent items from sliding around. Organize the drawer space using small containers or organizers, grouping similar items together: electronics and chargers in one section, personal care items in another, and reading materials in a designated spot.
Position frequently used items on top of the nightstand, using a small tray to corral items like reading glasses, hand cream, or a water glass. Keep the surface minimal, featuring only essential items and perhaps a decorative element like a small plant or framed photo.
Store less frequently used items in lower drawers or nearby storage boxes, maintaining easy access while reducing visible clutter.
Additional Tips: Regularly assess and edit your bedside items, removing anything that hasn’t been used in the past month. Consider implementing a “one in, one out” rule to maintain organization.
Keep a small wastebasket nearby to dispose of tissues or papers promptly, and make a habit of returning items to their designated spots each morning to prevent clutter accumulation.
Wall-Mounted Storage Solutions
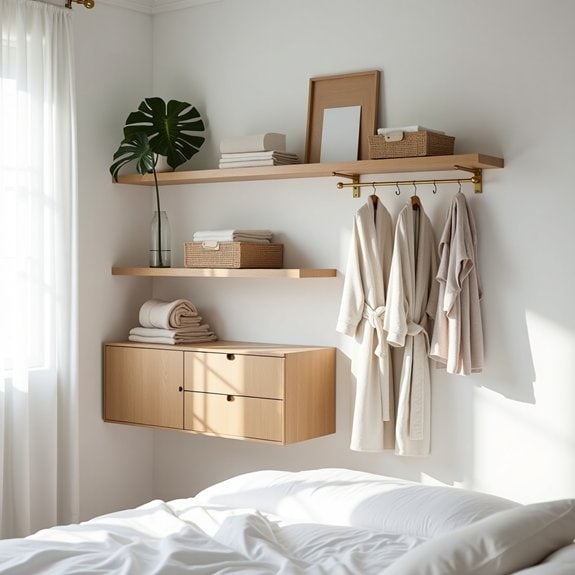
Wall space represents one of the most underutilized storage opportunities in bedrooms. When floor space is limited, vertical storage solutions can transform a cramped bedroom into an efficiently organized space while maintaining a clean, modern aesthetic.
Wall-mounted storage eliminates the need for bulky furniture pieces and creates a floating effect that makes rooms appear larger and more open. Strategic wall storage can revolutionize your bedroom organization system by keeping frequently used items easily accessible while storing less-used belongings out of sight.
This approach not only maximizes space efficiency but also contributes to a more peaceful environment by reducing visual clutter and maintaining clear surfaces.
Required Items:
- Wall anchors and screws
- Stud finder
- Level
- Power drill
- Measuring tape
- Pencil
- Wall-mounted shelves
- Floating cabinets
- Decorative hooks
- Storage baskets
- Cable management solutions
- Wall-mounted organizers
Start by mapping out your wall storage plan using a measuring tape and pencil to mark optimal locations for different storage solutions. Use a stud finder to locate secure mounting points, ensuring heavier items are anchored properly.
Install floating shelves at varying heights, with frequently accessed items at eye level and seasonal storage higher up. Mount decorative hooks between shelves for hanging accessories, robes, or tomorrow’s outfit. Install floating cabinets below eye level for items requiring concealment, ensuring adequate space between pieces for easy access.
For maximum functionality, group similar items together and use attractive storage containers that complement your room’s decor. Consider installing a wall-mounted desk or vanity area if space permits, incorporating additional storage solutions above and below.
Implement cable management systems to keep electronic charging stations tidy and accessible.
Additional Tips: Rotate stored items seasonally to maintain organization and prevent dust accumulation. Use clear containers for stored items to easily identify contents, and label everything for quick reference.
Consider installing adjustable storage systems that can be reconfigured as your needs change, and always leave some empty space for future storage needs or aesthetic balance.
Closet Door Organization Ideas

Closet doors represent valuable but often overlooked storage space that can dramatically increase your bedroom’s organization potential. When properly utilized, these vertical surfaces can help declutter your bedroom while keeping frequently used items easily accessible and visible.
Making the most of your closet doors can transform your daily routine by creating designated spaces for accessories, shoes, or planning materials. This approach is particularly valuable for small bedrooms where every square inch of storage space counts, and it helps maintain a clean, organized appearance by keeping items off the floor and other surfaces.
Required Items:
- Over-the-door hanging organizers
- Command hooks or mounting hardware
- Measuring tape
- Level
- Screwdriver
- Clear storage pockets
- Mirror with storage capability
- Door-mounted rack system
- Tension rods (if applicable)
- Label maker
Start by measuring your closet door dimensions, including thickness, to ensure any organizational systems will fit properly. Remove the door if necessary to install heavy-duty hanging systems. Position your main organizational piece, whether it’s an over-the-door organizer or mounted system, ensuring it’s level and secure.
For multiple organizing solutions, arrange them in zones: place frequently used items at eye level, occasional-use items lower, and rarely-used items at the bottom or top. Install additional hooks or smaller organizing units around the main system to maximize space usage. Consider using both sides of the door if it swings into a private area. Ensure all mounting hardware is appropriate for your door type and weight capacity.
When arranging items, implement a logical system based on frequency of use and category. Store similar items together, use clear containers for visibility, and label everything clearly. Remember to periodically check that all mounting hardware remains secure, especially for frequently used items, and adjust the organization system as your needs change over time.
Additional Tips: Maintain a 2-inch clearance around door hinges to prevent interference with door operation. Use shelf liner or non-slip materials in pocket organizers to prevent items from sliding. Consider seasonal rotation of items to keep the system relevant and efficient year-round. Test the door’s movement after installation to ensure nothing catches or creates noise when opening and closing.
Color-Coded Storage Systems
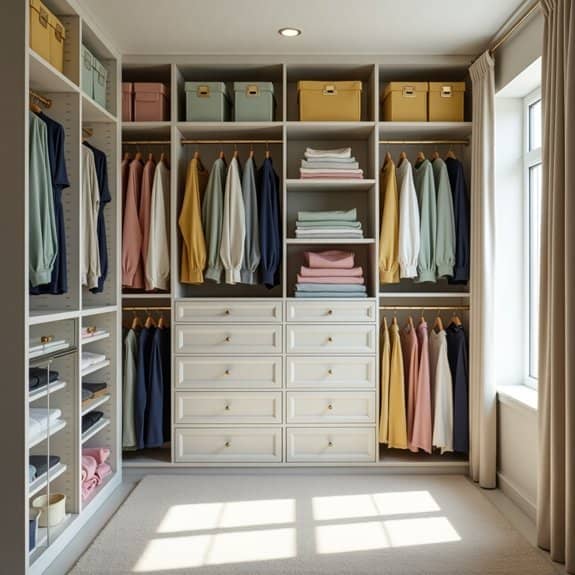
Color-coding is a powerful organizational tool that transforms bedroom storage from chaotic to intuitive. By assigning specific colors to different categories of items, you create a visual system that makes finding and maintaining organized spaces effortless, while adding a designer touch to your bedroom aesthetic.
This method of organization works particularly well for clothing, accessories, and personal items, as it engages your visual memory and creates instant recognition patterns. Color-coding can reduce the time spent searching for items and maintains organization long-term, as items naturally find their way back to their designated spaces.
Required Items:
- Colored storage bins or boxes
- Color-coordinated hangers
- Labels or label maker
- Color-coded drawer dividers
- Storage baskets in coordinating colors
- Colored tape or stickers
- Clear storage containers
- Color-coded folders or files
- Drawer organizers
- Color wheel or palette guide
Start by selecting a color scheme that makes sense for your needs – for example, red for formal wear, blue for casual clothes, green for workout gear, and yellow for seasonal items. Sort all belongings into broad categories, then assign a specific color to each category.
Place items into their corresponding colored containers or hang them on matching hangers, ensuring each zone is clearly defined and visible. Consider implementing a gradient system within each color category for further organization. For instance, within the blue section for casual wear, use light blue for tops, medium blue for bottoms, and dark blue for outerwear.
Install colored drawer dividers and storage bins in closets and drawers, maintaining consistency throughout the space. For optimal results, create a color key chart and display it in your closet or on the back of your bedroom door. Regularly assess the system’s effectiveness and adjust color assignments as needed.
Remember to choose colors that are distinctly different from each other to avoid confusion, and consider using patterns or shades within the same color family for subcategories of items.

