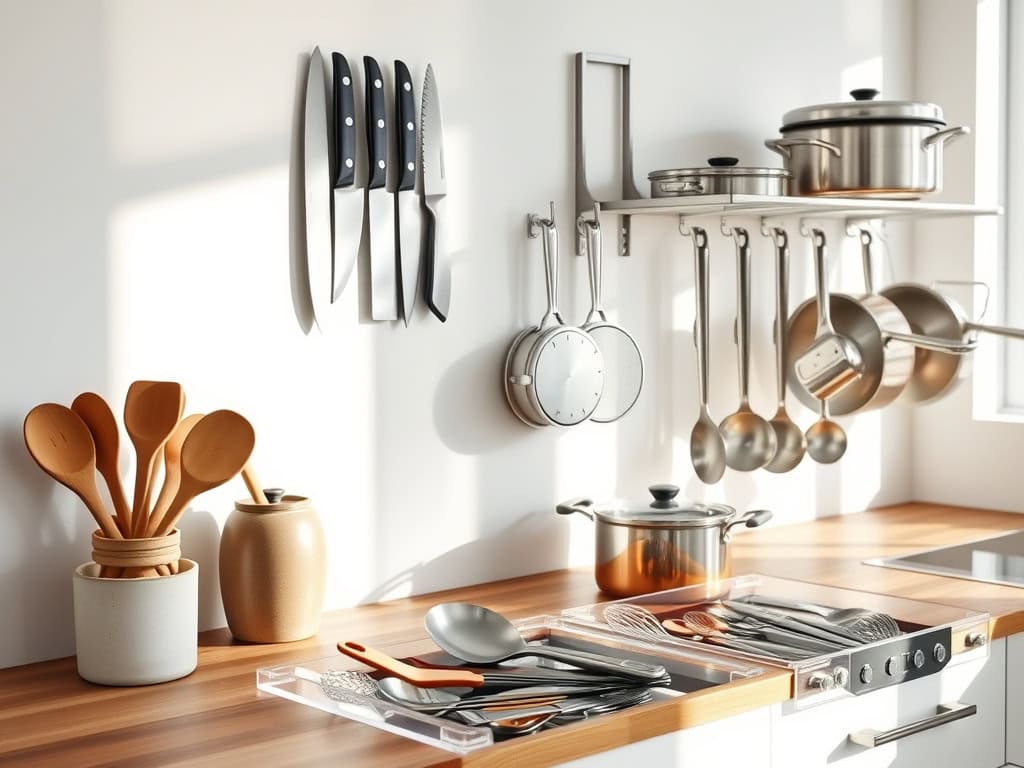
If you’ve ever felt overwhelmed by kitchen chaos or spent precious minutes hunting for that one spatula, you’re not alone! As someone who’s transformed countless cluttered kitchens, I can tell you that smart organization isn’t just about tidiness – it’s about creating a space where cooking becomes pure joy. From magnetic knife strips to innovative drawer solutions, there’s a perfect storage strategy waiting to revolutionize your cooking space. Let’s explore ten game-changing ideas that’ll make your kitchen work smarter, not harder.
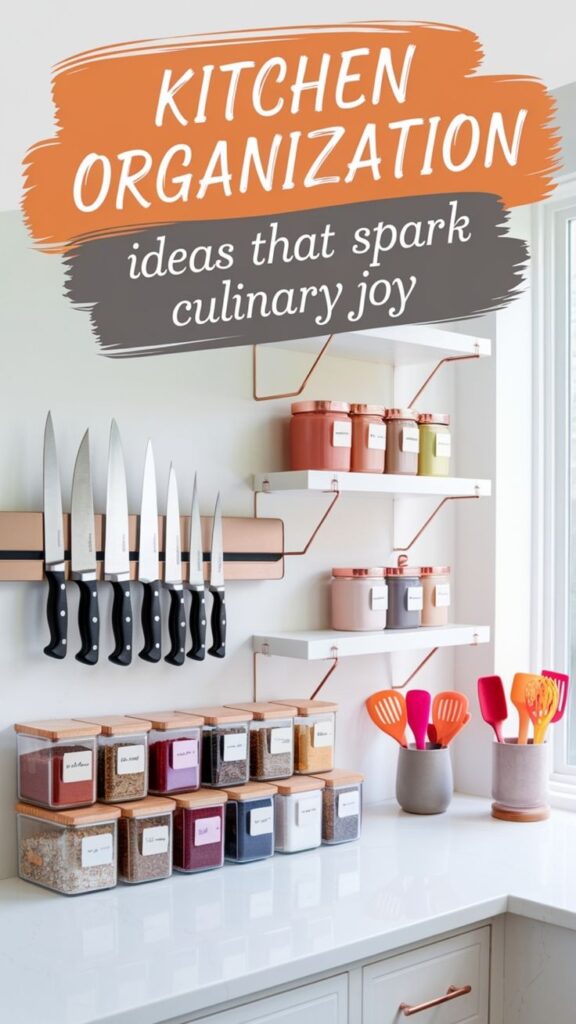
Magnetic Knife Strips and Blocks: Space-Saving Storage Solutions
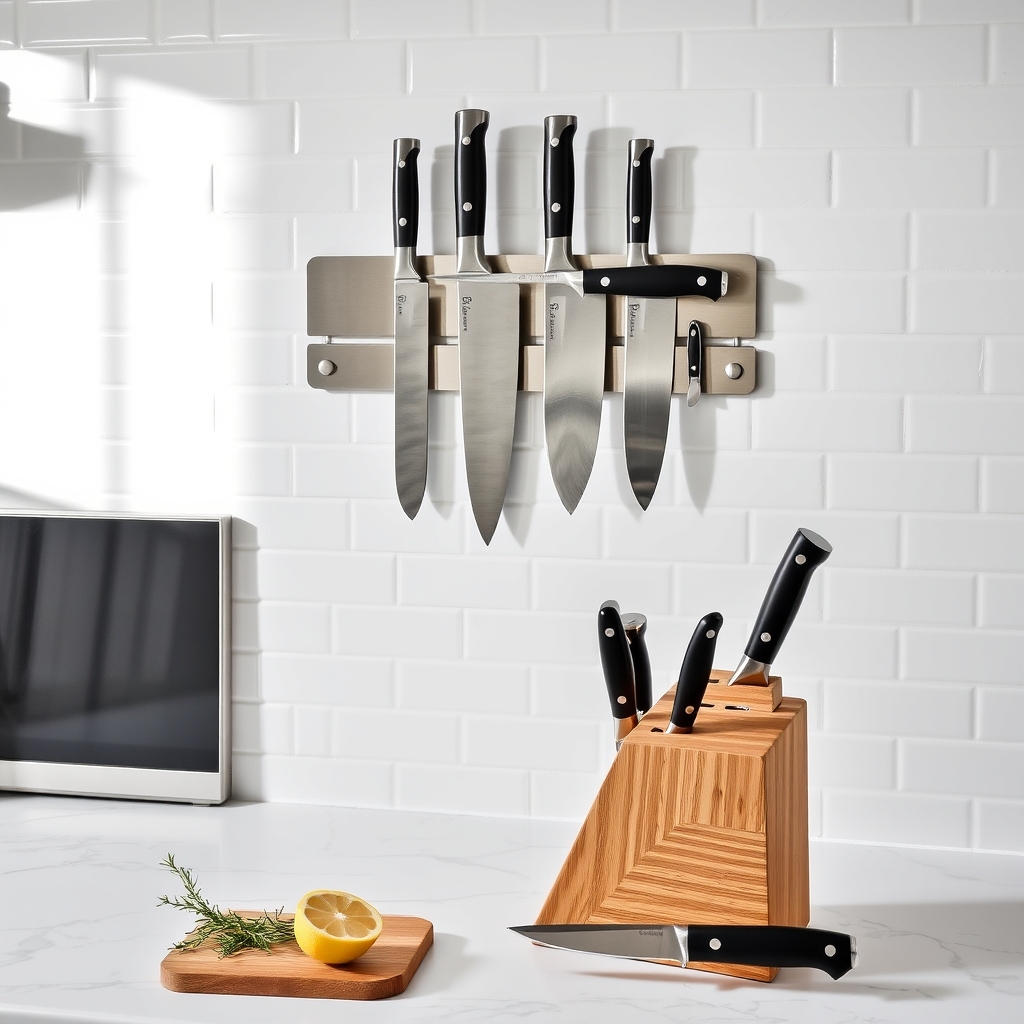
Proper knife storage is crucial for both safety and maintaining the quality of your kitchen knives. Cluttered drawers not only pose risks of accidental cuts but can also dull and damage expensive blades.
Magnetic strips and knife blocks offer practical solutions that keep sharp edges protected while maximizing counter and drawer space. Magnetic knife strips provide a modern, space-efficient approach to knife storage, while traditional knife blocks offer a classic solution that keeps blades readily accessible.
Both methods protect your investment in quality cutlery and create an organized, professional-looking kitchen workspace that enhances cooking efficiency.
Required Items:
- Magnetic knife strip
- Mounting hardware
- Wall anchors
- Screwdriver
- Level
- Pencil
- Measuring tape
- Knife block (wooden or acrylic)
- Cleaning supplies
- Safety gloves
Installation and Organization Process:
For magnetic strips, begin by selecting an easily accessible wall space, ideally near your primary prep area. Use a level and pencil to mark mounting points, install wall anchors if needed, and securely attach the magnetic strip.
Arrange knives by size and frequency of use, with most-used knives at eye level. Ensure proper magnetic contact by placing the blade flat against the strip.
For knife blocks, thoroughly clean and dry the block before use. Arrange knives with handles facing the same direction, placing larger knives in bigger slots and smaller knives in narrow slots.
Reserve the horizontal slots for heavy chef’s knives or bread knives. Keep empty slots between knives to prevent blade contact and maintain easy access.
Additional Tips:
Regular maintenance enhances both storage methods’ effectiveness. Clean magnetic strips weekly with a damp cloth, and periodically check mounting security.
For knife blocks, clean slots with compressed air or a narrow brush monthly. Always ensure knives are completely dry before storage to prevent moisture damage, and periodically rotate knife positions to maintain even wear on the storage system.
Custom Drawer Dividers and Organizers
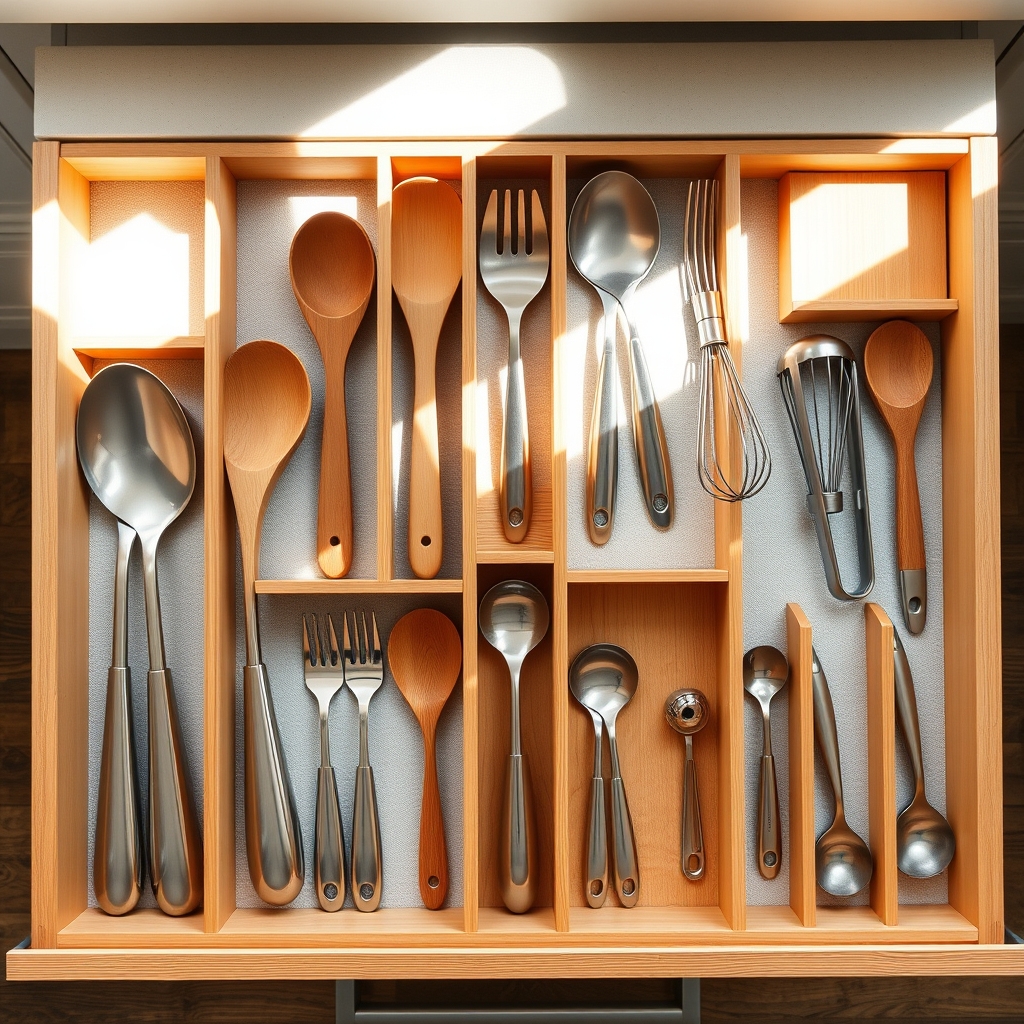
Well-organized kitchen drawers are fundamental to creating an efficient cooking space. When utensils and tools are properly separated and arranged, cooking becomes more enjoyable and time-efficient, eliminating the frustration of searching through cluttered drawers for specific items.
Custom drawer dividers and organizers offer a personalized solution that maximizes every inch of drawer space while keeping items in their designated spots. Unlike pre-made organizers, custom solutions can be tailored to accommodate specific utensil sizes and quantities, ensuring a perfect fit for your unique kitchen needs.
Required Items:
- Measuring tape
- Wood or acrylic sheets
- Saw
- Sandpaper
- Wood glue or adhesive
- Pencil
- Ruler
- Non-slip drawer liner
- Screwdriver
- Small screws (optional)
- Drawer pulls or handles (optional)
Start by emptying the drawer completely and measuring its interior dimensions, including depth. Group similar items together and measure the space needed for each category. Cut your chosen material (wood or acrylic) to create dividers that fit the drawer’s depth and height. Sand all edges smooth to prevent snags and splinters.
Create a layout plan on paper, considering the most frequently used items and ensuring easy access to all tools. Install non-slip liner at the bottom of the drawer before positioning dividers. Secure dividers using wood glue for permanent installation, or design them to interlock for a removable solution.
Create compartments of various sizes based on your measurements, with larger spaces for cooking spoons and smaller sections for measuring spoons and specialized tools.
Additional Tips: Consider leaving some extra space in each compartment for future additions to your kitchen tool collection. Label the tops of dividers or create a drawer map to help family members maintain the organization system. Review and adjust the layout after a few weeks of use to optimize the arrangement based on your cooking habits and needs.
Vertical Pan and Lid Storage Systems
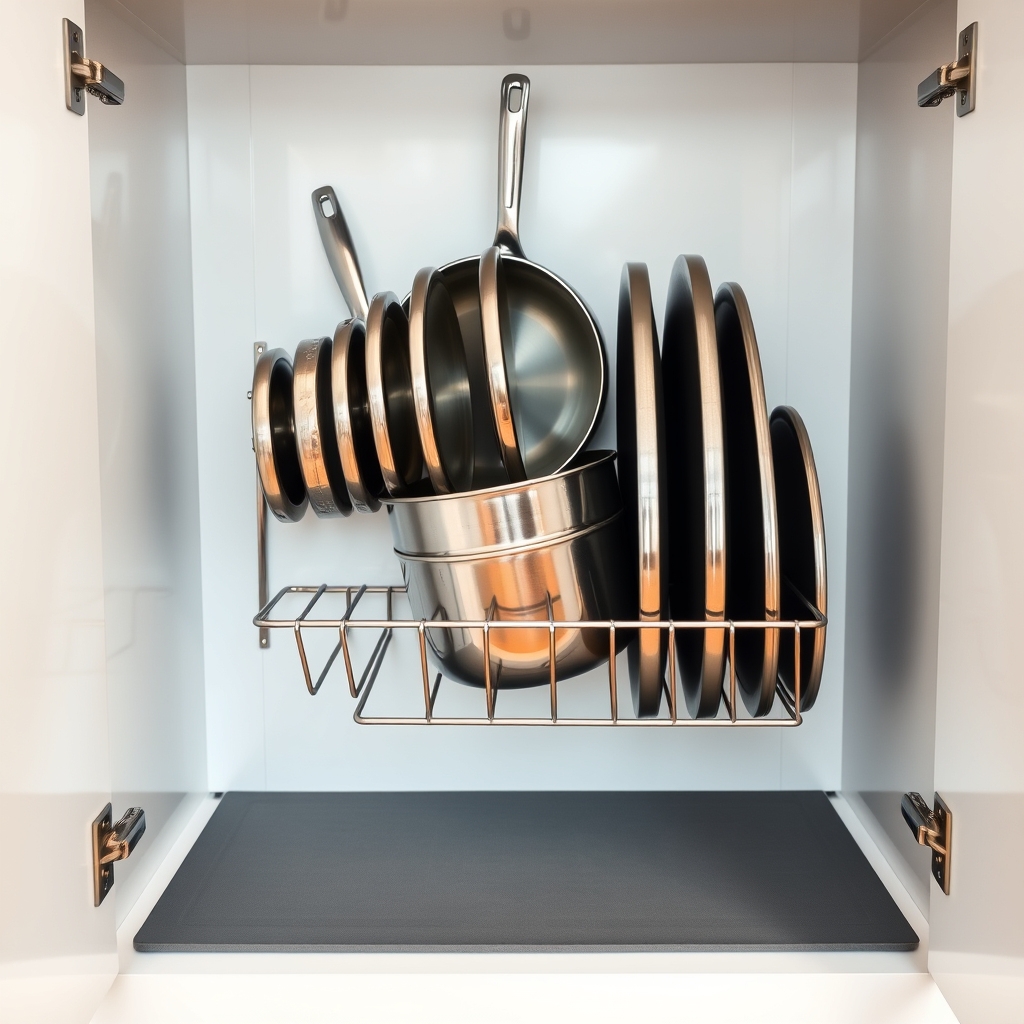
Organizing pots, pans, and their corresponding lids can be one of the most challenging aspects of kitchen organization. Traditional stacking methods often lead to cluttered cabinets, scratched cookware, and frustrating searches for matching lids. A vertical storage system transforms this chaos into an efficient, accessible arrangement that maximizes cabinet space while protecting your cookware investment.
Vertical storage solutions allow you to store your pans like files in a cabinet, making each piece instantly visible and easily retrievable. This approach not only prevents scratching and wear but also eliminates the need to unstack multiple items to reach the one you need. The organization of lids alongside their corresponding pans creates a streamlined cooking experience and helps maintain the longevity of your cookware.
Required Items:
- Adjustable pan organizer rack
- Cabinet door-mounted lid organizer
- Measuring tape
- Cabinet liner (non-slip)
- Label maker
- Cleaning supplies
- Storage hooks (if mounting on walls)
- Screwdriver
- Wall anchors (if needed)
Select a suitable location for your vertical storage system, either inside a cabinet or on a wall. Measure the space carefully to ensure proper fit. Install the non-slip liner at the base to prevent sliding. Assemble the pan organizer according to manufacturer instructions, adjusting the dividers to accommodate your specific pan sizes.
Arrange your pans from largest to smallest, ensuring each has enough space to slide in and out easily without touching adjacent items. For lid organization, mount the lid organizer on the cabinet door or adjacent wall space. Sort lids by size and assign each a specific slot. If using a wall-mounted system, ensure proper anchor support for the weight of your cookware. Position frequently used items at eye level for easy access.
To maintain the effectiveness of your vertical storage system, regularly assess the arrangement and adjust dividers as needed. Clean the organizers periodically to prevent dust accumulation, and consider labeling slots for family members or guests to maintain the system.
Store seasonal or rarely used items in less accessible spots, keeping daily essentials within easy reach. Remember to measure new cookware purchases to ensure they’ll fit within your established organization system.
Wall-Mounted Utensil Racks and Hooks
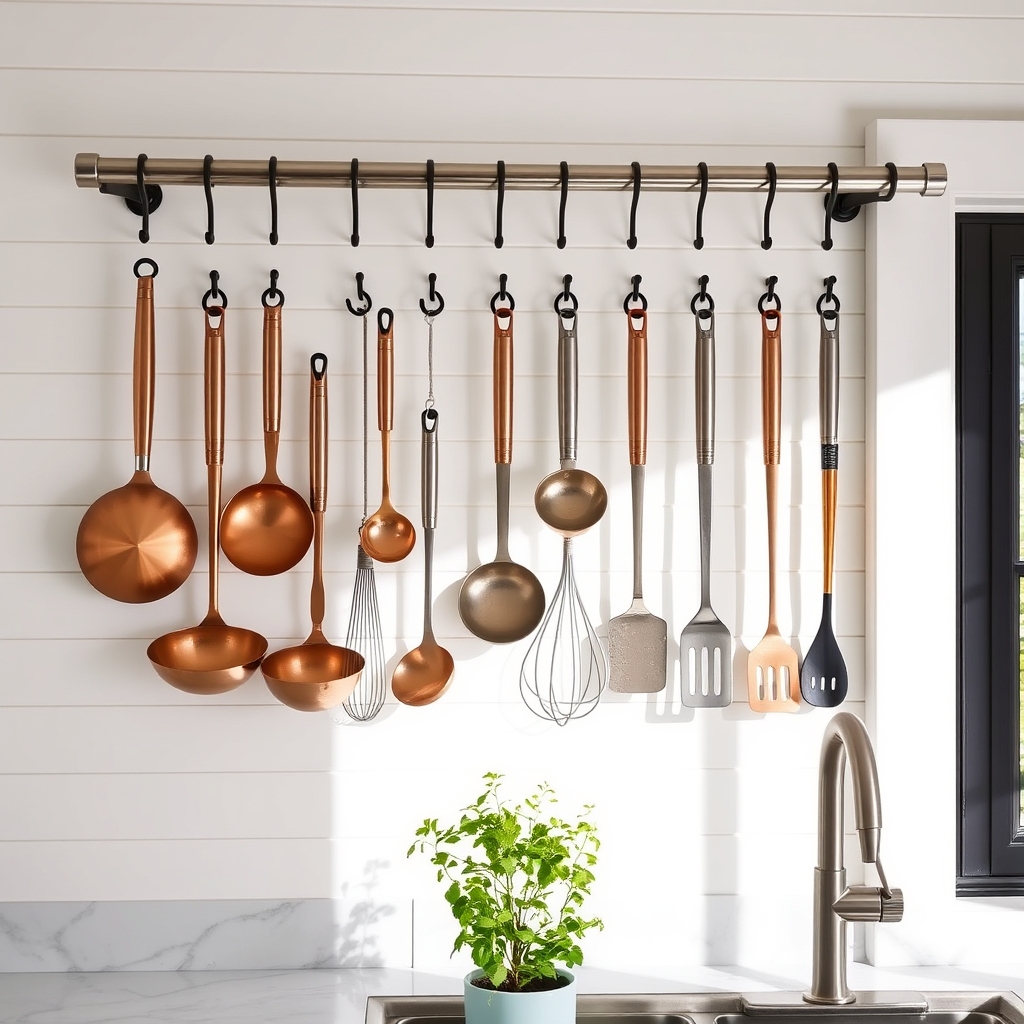
Wall-mounted storage solutions are game-changers for kitchen organization, transforming unused vertical space into functional storage areas. By getting utensils off countertops and onto walls, you create more workspace while keeping frequently used tools within easy reach.
Proper wall organization of kitchen utensils not only maximizes space efficiency but also adds a professional, decorative element to your kitchen. Well-arranged utensil racks and hooks create an attractive display while ensuring every tool has its designated spot, making cooking more efficient and enjoyable.
Required Items:
- Wall-mounted utensil rack or rail system
- Assorted hooks (S-hooks, J-hooks)
- Wall anchors and screws
- Level
- Drill and drill bits
- Pencil
- Measuring tape
- Stud finder
- Screwdriver
Start by selecting an accessible wall space near your primary cooking area, using a stud finder to locate wall studs. Measure and mark the desired height for your rack, typically 4-6 inches above the counter or work surface. Install wall anchors if you can’t mount directly into studs.
Mount the rack ensuring it’s completely level, then attach hooks at regular intervals. Sort utensils by frequency of use and size before hanging. Place frequently used items at eye level and within easy reach of your primary work zone. Group similar items together – cooking utensils in one section, measuring tools in another.
Ensure heavier items are hung on hooks mounted into studs or with appropriate wall anchors. For optimal organization, maintain 2-3 inches of space between hanging items to prevent tangling and allow easy access.
Consider installing multiple racks at different heights to accommodate various utensil sizes, and rotate items seasonally based on cooking habits. Label hook positions for specific items to maintain organization and ensure tools always return to their designated spots.
Pull-Out Cabinet Organizers for Small Appliances
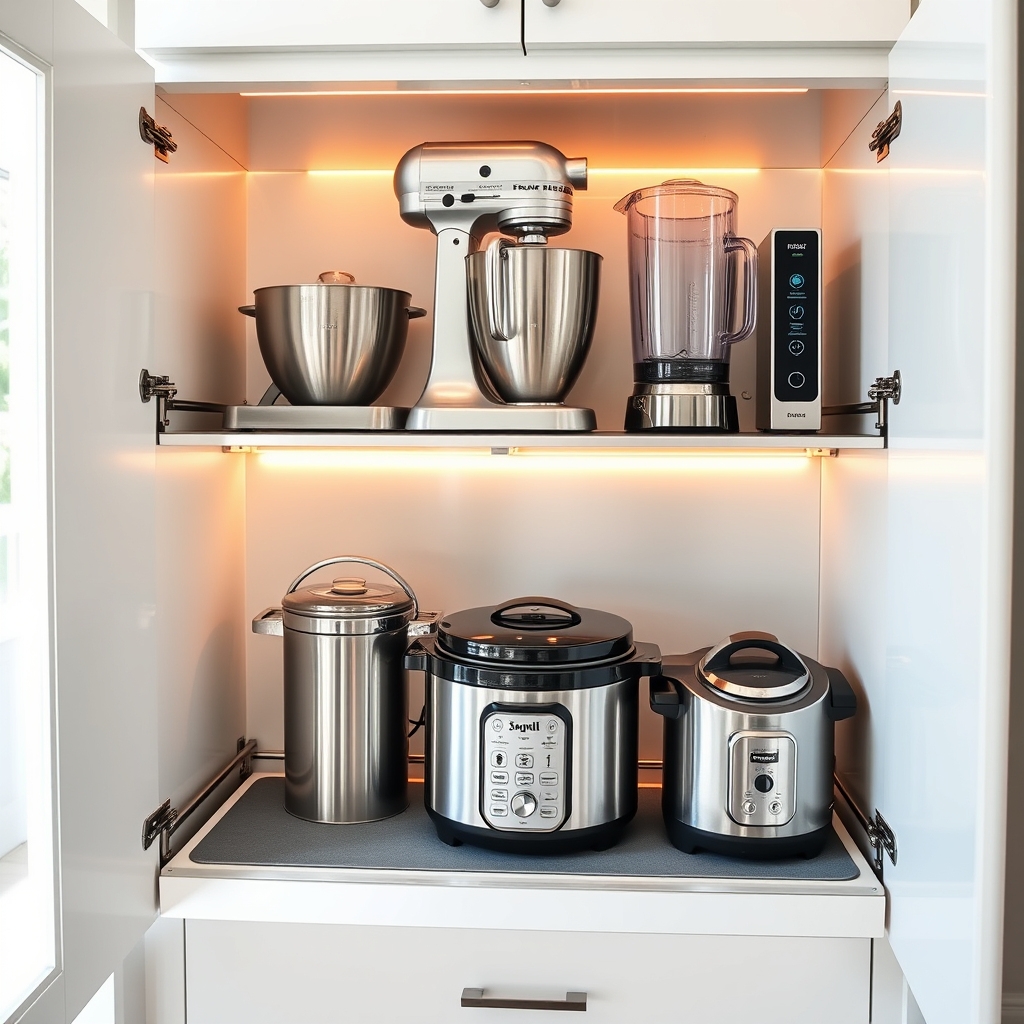
Small appliances often create chaos in kitchen cabinets, leading to frustration when trying to access needed items quickly. Pull-out cabinet organizers offer an elegant solution to this common problem, transforming cluttered spaces into efficient storage systems that make every appliance easily accessible.
Installing pull-out organizers maximizes vertical space while creating designated spots for items like blenders, food processors, and stand mixers. This organization method not only protects your investments but also encourages regular use of appliances by making them readily available rather than buried in hard-to-reach corners.
Required Items:
- Pull-out cabinet slides
- Heavy-duty shelf brackets
- Mounting screws
- Power drill
- Level
- Measuring tape
- Pencil
- Screwdriver
- Cabinet liner (non-slip)
- Wood cleats (if needed)
- Safety glasses
Begin by measuring your cabinet interior dimensions and selecting appropriate pull-out organizers that can support your appliances’ weight. Install the slide mechanisms according to manufacturer specifications, ensuring they’re level and properly secured to the cabinet walls.
Mount the shelf brackets onto the slides, confirming they can withstand the intended load. Once the hardware is installed, arrange appliances by frequency of use, with most-used items at eye level. Place heavier appliances on lower shelves for stability and safety.
Add non-slip liner to prevent movement and protect both the organizer and appliances.
Additional Tips:
Consider installing electrical outlets inside the cabinet for appliances used frequently, and add LED strip lighting to illuminate dark corners. Label each shelf space to maintain organization, and implement a “one in, one out” rule when acquiring new appliances to prevent overcrowding.
Regular maintenance of the sliding mechanisms will ensure smooth operation and longevity of your organization system.
Countertop Tool Caddies and Rotating Stations
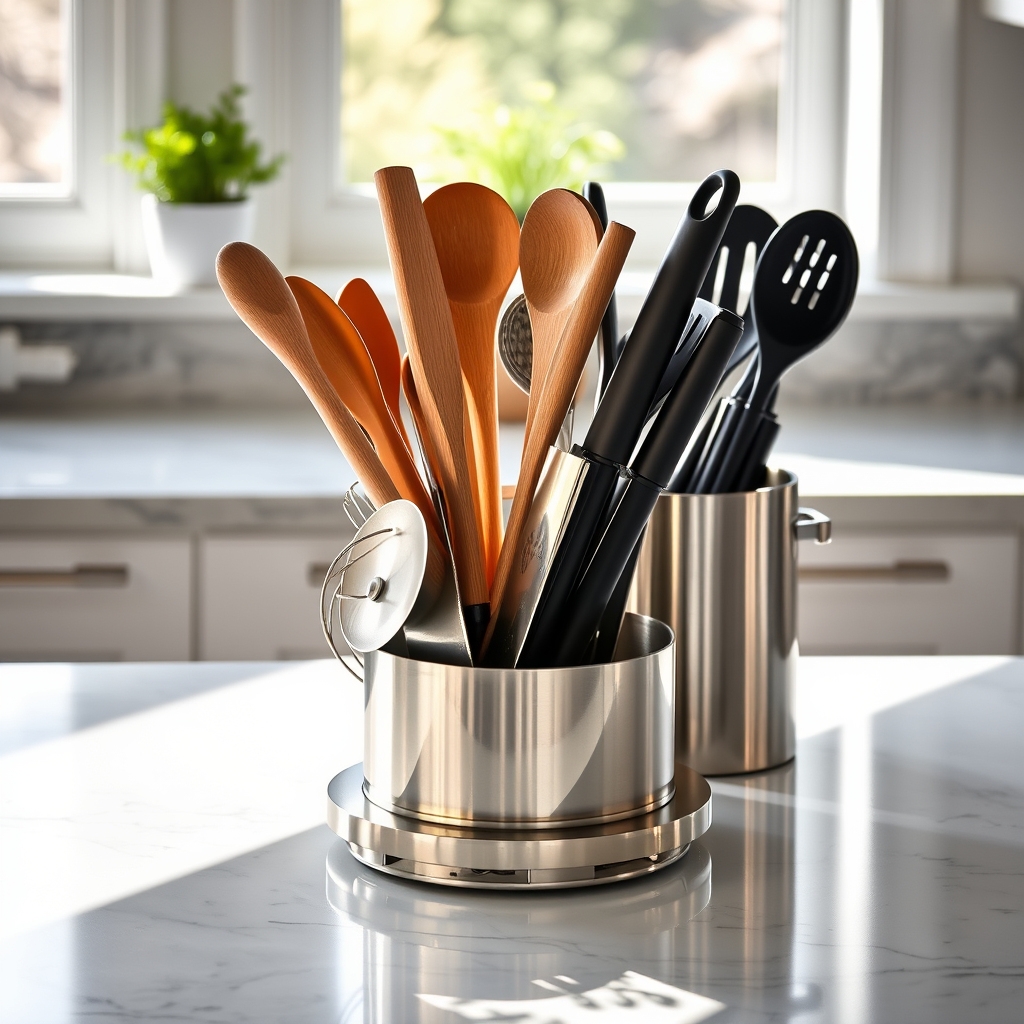
A well-organized countertop tool station serves as the command center of any efficient kitchen, allowing quick access to frequently used utensils while cooking. When essential tools are within arm’s reach, meal preparation becomes smoother, more enjoyable, and significantly faster.
Strategic placement and thoughtful organization of countertop caddies and rotating stations can transform a cluttered kitchen into a professional-grade workspace. The key lies in combining functionality with aesthetic appeal, ensuring that tools are both accessible and visually pleasing without overwhelming valuable counter space.
Required Items:
- Countertop utensil caddy or rotating organizer
- Drawer dividers or small containers
- Label maker
- Measuring tape
- Cleaning supplies
- Storage containers for overflow items
- Rubber shelf liner
- Hook-and-loop fasteners (optional)
- Small risers or stands (optional)
Begin by clearing the designated counter space and thoroughly cleaning the area. Measure the space to ensure your chosen caddy or rotating station fits properly while maintaining adequate clearance from walls and other appliances.
Group utensils by frequency of use and function – cooking tools, measuring implements, and specialized gadgets should each have their designated sections. Position the most frequently used items in easily accessible spots, typically facing forward or in the front compartments of rotating stations.
For optimal organization, establish zones within your caddy system. Place longer tools like spatulas and wooden spoons in taller compartments, while shorter items like measuring spoons can occupy smaller sections. If using a rotating station, balance the weight distribution to ensure smooth turning.
Consider using rubber shelf liner at the bottom of containers to prevent tools from shifting or tipping.
Additional Tips: Maintain organization by implementing a one-in-one-out rule when acquiring new tools. Regularly assess the usefulness of each item and remove those that aren’t frequently used. Clean and sanitize both the tools and the organizing containers monthly to prevent buildup and maintain a professional appearance.
Consider seasonal rotation of tools, storing less-used items during off-seasons to maximize space efficiency.
Over-the-Cabinet Storage Solutions
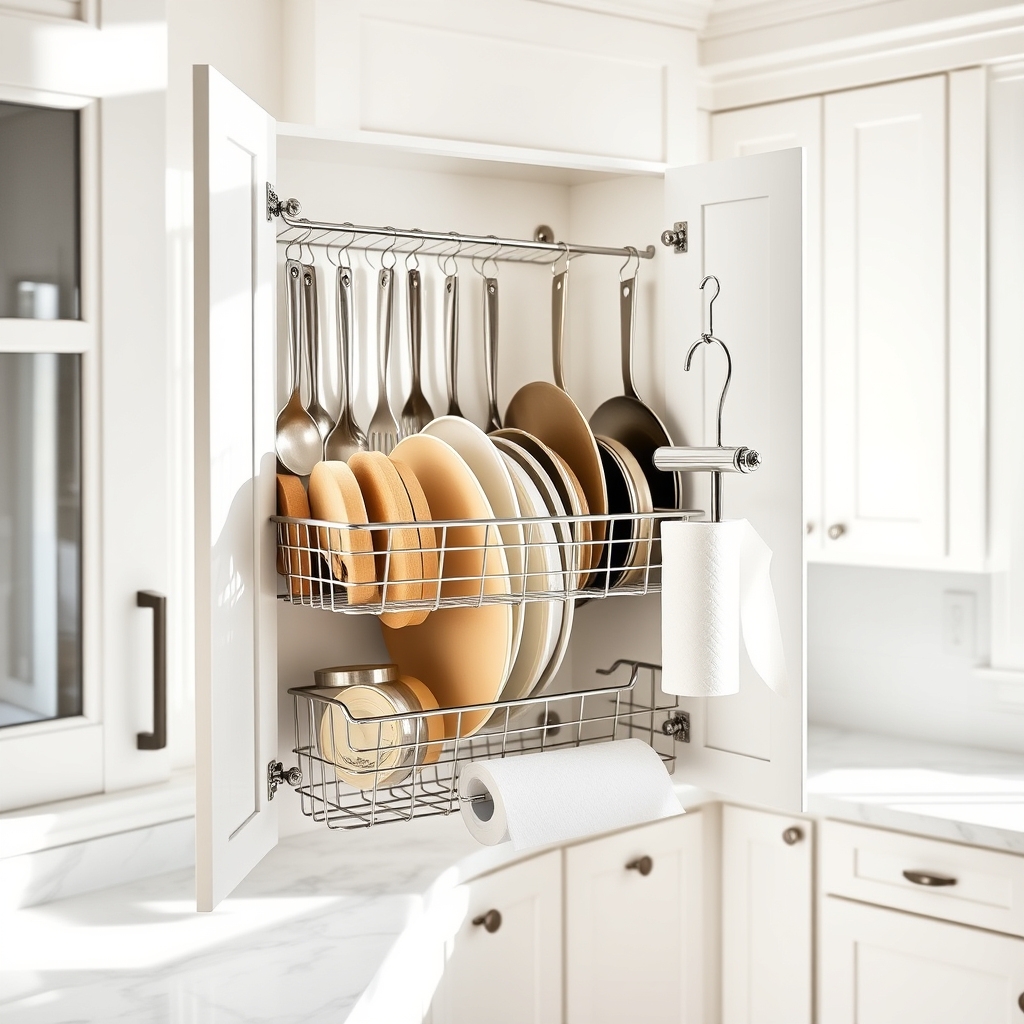
Maximizing kitchen storage space is essential for maintaining an organized and efficient cooking environment. Over-the-cabinet storage solutions offer valuable additional space without requiring permanent modifications to your kitchen, making them perfect for both homeowners and renters alike.
These often-overlooked storage areas on cabinet doors can transform cluttered countertops and packed drawers into well-organized spaces. By utilizing the vertical space on cabinet doors, you can keep frequently used items within easy reach while freeing up precious cabinet and counter space.
Required Items:
- Over-the-cabinet hanging organizers
- Cabinet door hooks
- Tension rods
- Command strips or adhesive hooks
- Measuring tape
- Cabinet door bumpers
- Storage baskets
- Cabinet door mounting brackets
- Label maker
Select appropriate over-the-cabinet organizers based on your cabinet thickness and intended use. Measure your cabinet doors carefully, accounting for any molding or decorative elements that might interfere with the hanging mechanisms.
Install door bumpers to prevent metal organizers from scratching cabinet surfaces. Position frequently used items at eye level and heavier items at the bottom of the organizer to maintain stability. Group similar items together, such as cleaning supplies, cutting boards, or pot lids.
For optimal organization, use a combination of different storage solutions. Install tension rods to hold spray bottles, mount adhesive hooks for lightweight tools, and utilize basket organizers for larger items. Ensure all hanging elements are securely fastened and test the weight capacity before fully loading the organizers.
Additional Tips: Regularly inspect the hanging mechanisms for wear and tighten any loose components. Create zones for different activities, such as food prep tools on one door and cleaning supplies on another.
Consider using clear containers or labels to maintain organization, and periodically review and adjust the system based on your changing needs and usage patterns.
Pegboard Systems for Kitchen Tools
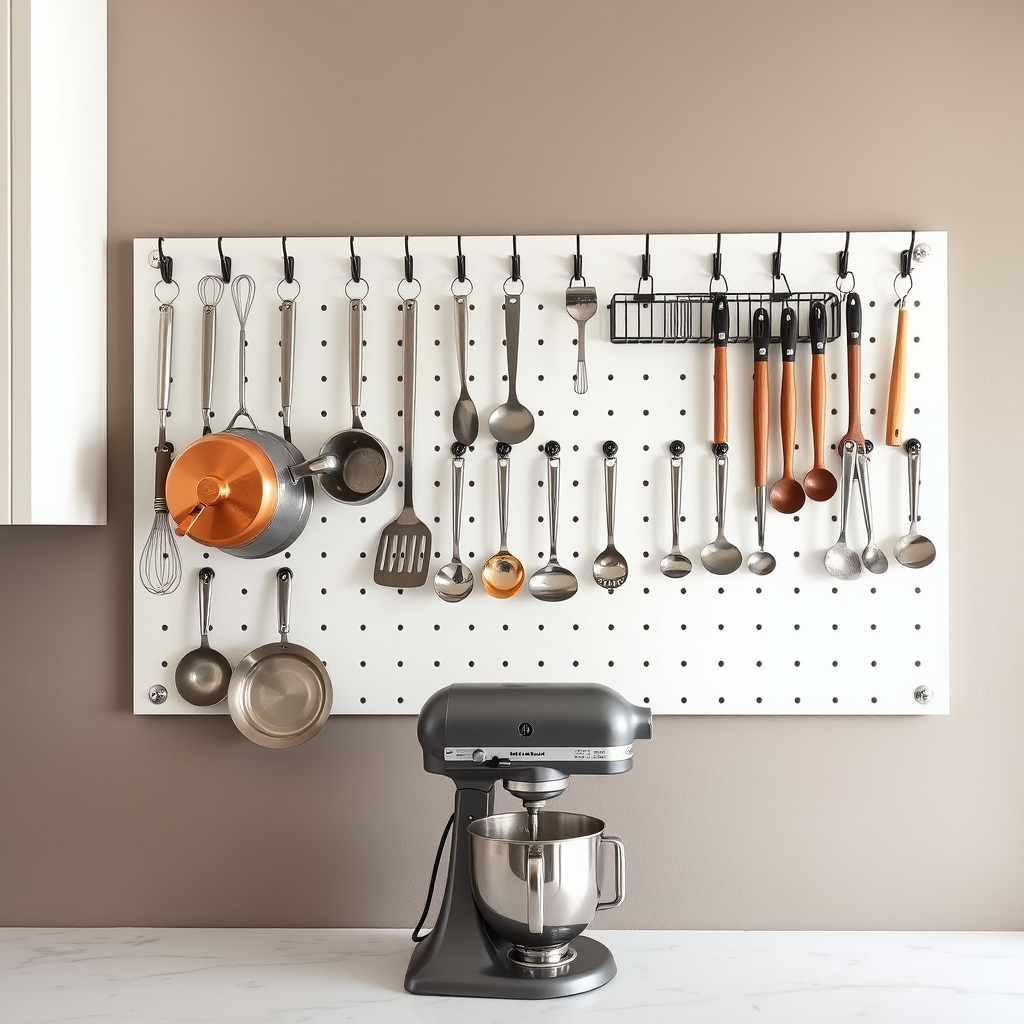
A well-organized pegboard system transforms any kitchen wall into a functional storage solution while keeping frequently used tools within easy reach. By displaying cooking implements vertically, pegboards maximize available space and turn kitchen tools into an attractive, practical display that adds character to the cooking space.
Installing a pegboard system eliminates the frustration of digging through crowded drawers and creates an efficient workflow in the kitchen. This organization method allows cooks to instantly locate needed items, protect delicate tools from damage, and maintain a clutter-free countertop workspace.
Required Items:
- Pegboard panels
- Wall anchors and screws
- Pegboard hooks (various sizes)
- Spacers or furring strips
- Level
- Drill
- Pencil
- Measuring tape
- Wire baskets (optional)
- Tool holders (optional)
- Spray paint (optional)
Start by measuring your wall space and cutting the pegboard to size if necessary. Install furring strips to the wall first, creating a gap between the wall and pegboard for hook insertion. Mount the pegboard securely using wall anchors and screws, ensuring it’s level.
Before hanging tools, plan your layout by tracing items on paper or arranging them on the floor to determine optimal placement. Begin inserting hooks and holders, spacing them appropriately for each tool. Group similar items together, placing frequently used tools at eye level and between waist and shoulder height. Heavier items should be secured with multiple hooks for added stability.
Consider adding wire baskets or containers for smaller items like measuring spoons or pastry tips. For long-term success, spray paint the pegboard before installation to protect it from kitchen moisture and create a cohesive look.
Label hook positions on the board to maintain organization when items are removed. Keep a few extra hooks on hand for new additions, and periodically review the layout to ensure it continues to meet your cooking needs and workflow patterns.
Clear Container Sets for Measuring Tools
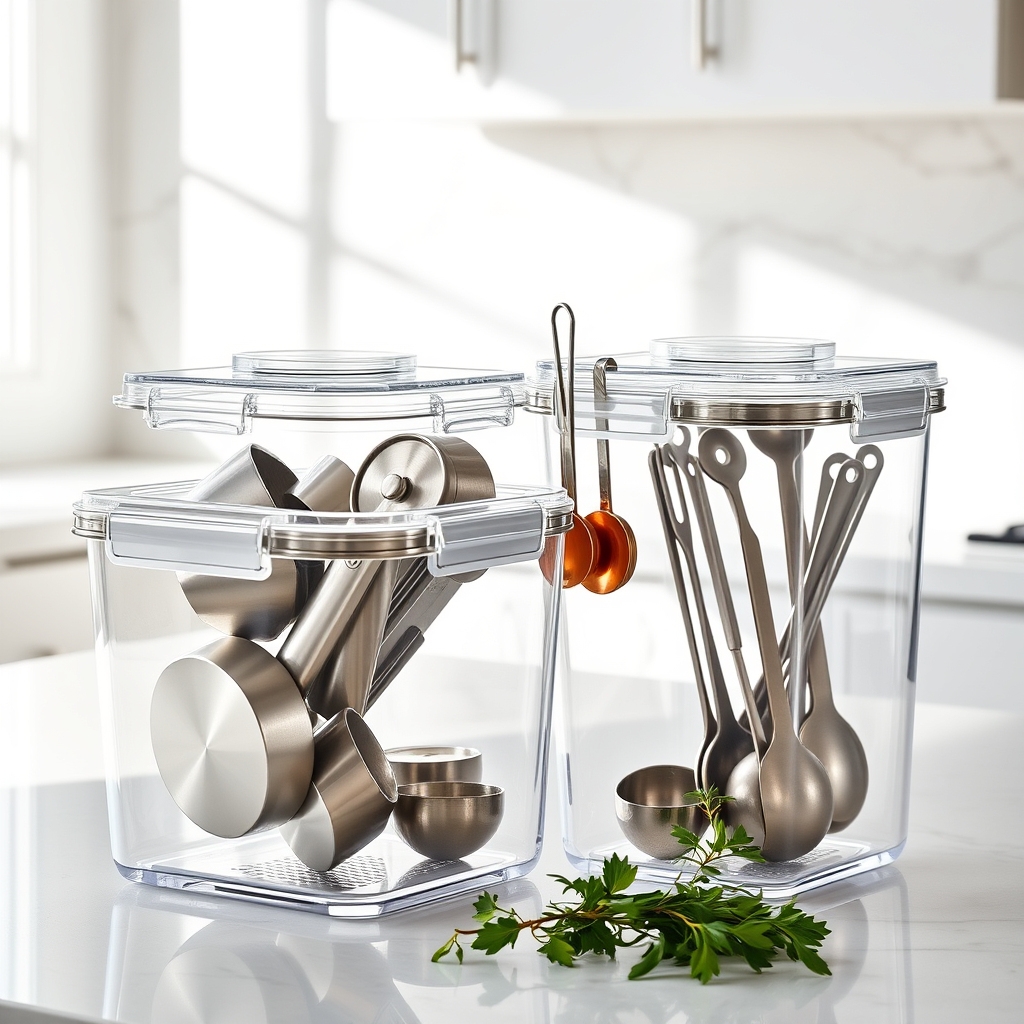
Organizing measuring tools is crucial for any functional kitchen, as these items are among the most frequently used utensils during food preparation. Having a systematic approach to storing measuring cups, spoons, and other measurement tools not only saves time but also ensures accuracy in recipe execution.
Clear container sets offer an ideal solution for organizing measuring tools, as they provide visibility, protection from dust, and easy access. This organization method prevents the common frustration of searching through cluttered drawers and helps maintain the tools’ condition while keeping them readily available for use.
Required Items:
- Clear plastic containers with lids
- Drawer dividers or small bins
- Label maker or labels
- Measuring cups (dry and liquid)
- Measuring spoons
- Kitchen scale
- Specialty measuring tools
- Cleaning supplies
Select appropriately sized clear containers based on your measuring tool collection. Group similar items together – keep dry measuring cups in one container, measuring spoons in another, and liquid measuring tools in a third. For optimal organization, place frequently used items in easily accessible containers at the front.
Consider using stackable containers to maximize vertical space, and implement a labeling system to quickly identify contents. Additional containers can be designated for specialty measuring tools like kitchen scales, conversion charts, or unique measuring devices.
Clean all measuring tools thoroughly before placing them in containers, and ensure containers are completely dry to prevent moisture buildup. To maintain this organization system, regularly assess the condition of both containers and measuring tools.
Replace any damaged items promptly, and clean containers monthly to prevent dust accumulation. Consider keeping a small container of silica gel packets in each container to absorb any moisture, especially in humid environments. Periodically verify that all measurements are still accurate, as warped or damaged measuring tools can affect recipe outcomes.
Under-Shelf Baskets and Hanging Storage
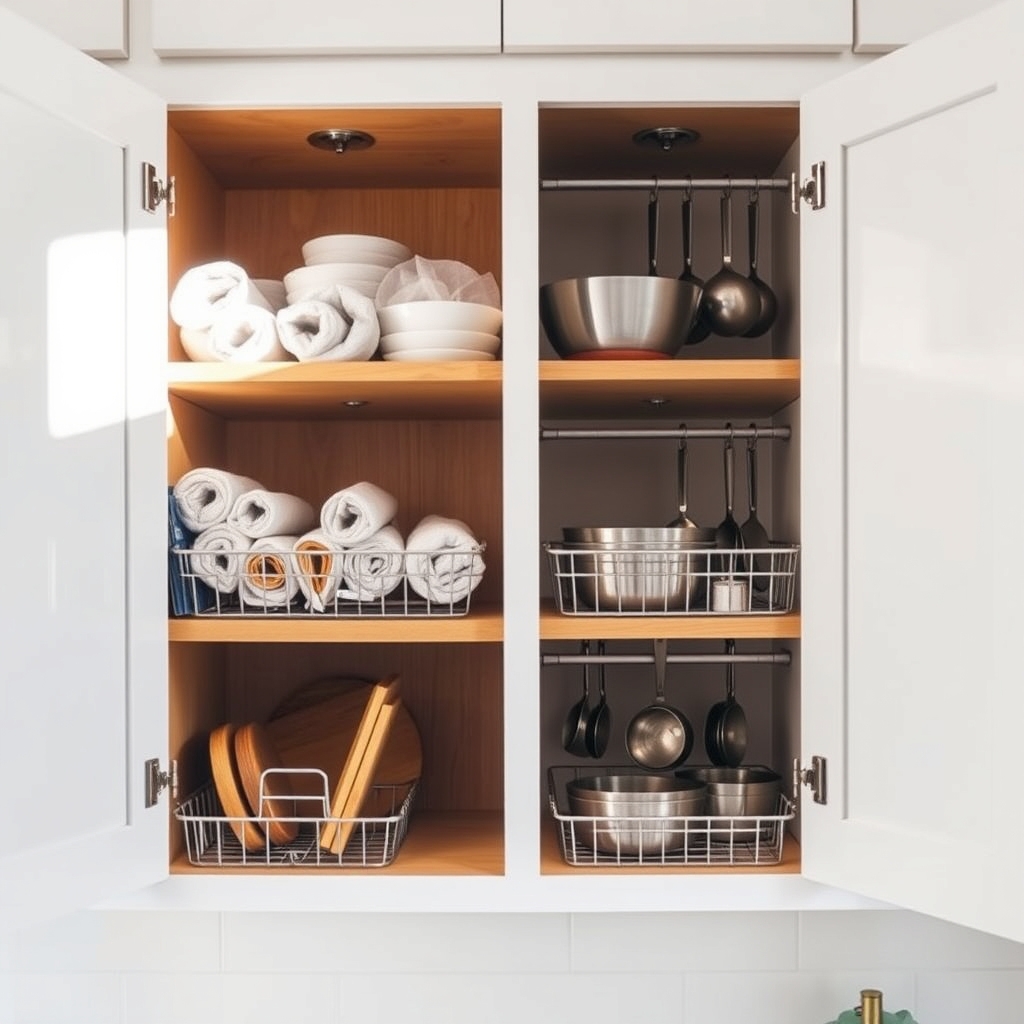
Maximizing vertical space in kitchen cabinets is crucial for creating an efficient and organized cooking environment. Under-shelf baskets and hanging storage solutions unlock valuable unused space, effectively doubling storage capacity while keeping frequently used items easily accessible.
By implementing these storage solutions, you can transform awkward cabinet spaces into functional storage areas, reducing counter clutter and making it easier to locate and access kitchen tools. This organization method is particularly valuable in smaller kitchens where every inch of space counts.
Required Items:
- Under-shelf wire baskets
- Adhesive or screw-in hooks
- Cabinet door organizers
- S-hooks
- Measuring tape
- Pencil
- Screwdriver
- Wall anchors (if needed)
- Level
- Cable ties or organizing clips
Start by measuring the available space inside your cabinets and under existing shelves to determine appropriate basket sizes. Install under-shelf baskets by sliding them onto the existing shelf or securing them with included hardware. Position these baskets strategically to store items like dish towels, cutting boards, or frequently used utensils.
For hanging storage, install hooks on cabinet doors or walls, ensuring they’re properly anchored to support the weight of your tools. Group similar items together, such as measuring cups or cooking utensils, and hang them using S-hooks or dedicated organizers. Arrange items by frequency of use, keeping daily essentials at eye level and less-used items higher up or in less accessible spots.
Additional Tips: Regularly assess the weight capacity of your hanging storage to prevent damage to cabinet doors or walls. Use rubber-coated hooks to prevent scratching on metal utensils, and consider installing drawer-style under-shelf baskets for easier access to items stored in deep cabinets. Label storage areas to maintain organization and ensure items return to their designated spots after use.

