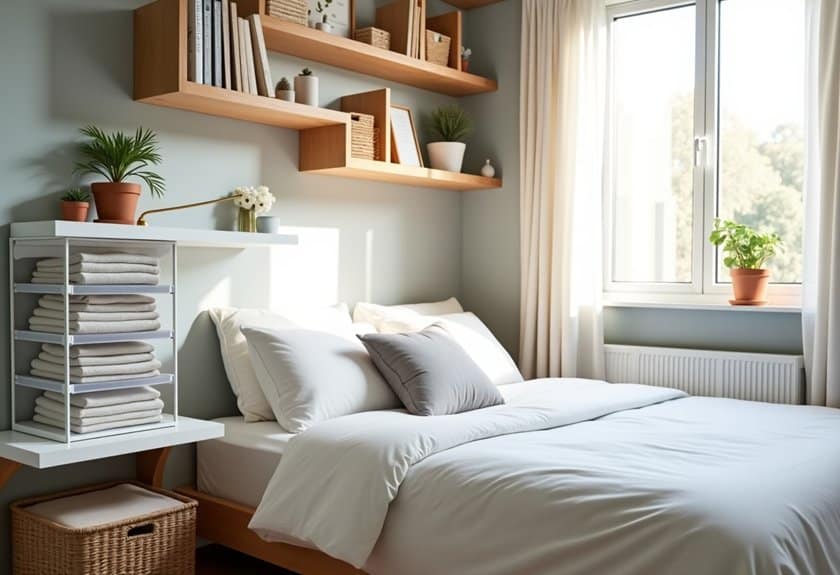
When my cramped 10×12 bedroom felt more like a storage unit than a sanctuary, I knew it was time for a DIY organization overhaul. You’ll be amazed at how a few creative storage solutions can transform even the tiniest space into a well-ordered retreat. From floating shelves that maximize vertical real estate to genius under-bed storage hacks, these 12 budget-friendly ideas will help you reclaim your room – without sacrificing style or breaking the bank.
Floating Shelves for Space-Saving Wall Storage
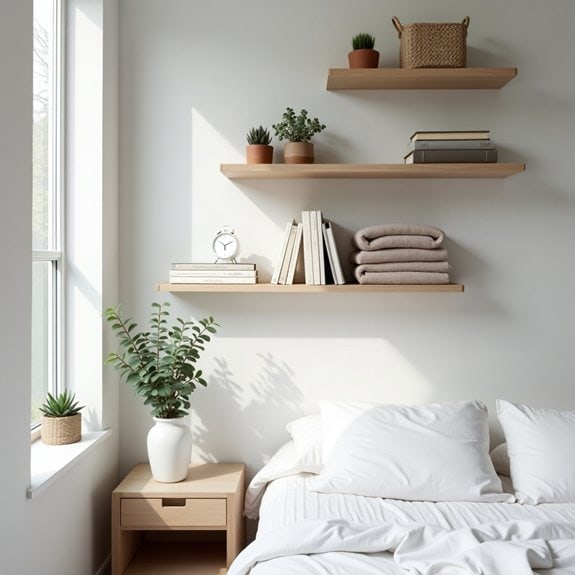
In small bedrooms, vertical space utilization becomes crucial for maximizing storage while maintaining floor space. Floating shelves offer an elegant solution by creating functional storage areas without the bulk of traditional furniture, allowing you to display and store items while keeping your room feeling open and uncluttered.
Installing floating shelves strategically can transform unused wall space into valuable storage real estate. These versatile additions can house books, decorative items, daily essentials, and even function as space-saving nightstands, making them an essential component in small bedroom organization.
Required Items:
- Floating shelves (various sizes)
- Stud finder
- Level
- Drill and drill bits
- Screwdriver
- Wall anchors
- Measuring tape
- Pencil
- Wall-mounting hardware
- Cleaning supplies
Begin by assessing your wall space and determining optimal shelf placement. Use a stud finder to locate wall studs and mark them lightly with a pencil. Measure and mark where each shelf will go, ensuring they’re level and properly spaced.
When mounting multiple shelves, start with the highest shelf and work your way down, maintaining at least 12 inches between shelves for adequate storage space.
For effective organization, arrange items by frequency of use and visual appeal. Place daily essentials at eye level and arm’s reach, while storing less frequently used items on higher shelves. Group similar items together and use decorative boxes or baskets to contain smaller objects, maintaining a clean aesthetic while maximizing storage capacity.
Additional Tips: Consider installing shelves in unexpected places, such as above the door or in corners, to maximize storage potential. Limit the number of items displayed to prevent a cluttered appearance, and regularly rotate stored items based on seasonal needs.
Install shelf lighting to create ambiance while highlighting displayed items and ensuring visibility of stored objects.
Maximize Under-Bed Space With Rolling Storage Bins
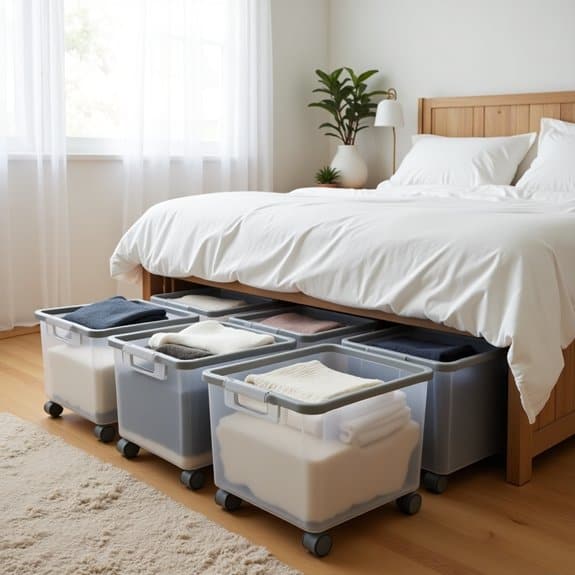
Making use of under-bed space is crucial in small bedrooms where every square inch counts. This often-overlooked area can provide significant storage capacity, equivalent to multiple dresser drawers, without taking up any additional floor space in your room.
Rolling storage bins transform this hidden space into an easily accessible storage solution for seasonal clothing, extra bedding, shoes, or rarely used items. The addition of wheels makes it simple to access your belongings without struggling to reach under the bed, while proper organization ensures you can quickly locate items when needed.
Required Items:
- Rolling storage bins with lids
- Measuring tape
- Labels or label maker
- Drawer dividers or small containers
- Dust covers or bed skirt
- Vacuum cleaner
- Furniture risers (optional)
- Clear plastic bags for fabric items
Start by thoroughly cleaning under the bed and measuring the available space, including height, width, and depth. Select rolling storage containers that maximize the dimensions while allowing enough clearance for smooth movement.
Organize items by category, placing frequently used items in bins closer to the bed’s foot for easy access. Use clear containers or detailed labels to identify contents without pulling out each bin.
Sort items by season or usage frequency, placing similar items together. Protect clothing and fabrics by storing them in sealed plastic bags before placing them in the bins. Position the bins so their wheels align with the direction you’ll pull them out, ensuring smooth movement on your floor surface.
If needed, use furniture risers to create additional clearance height for larger storage containers. For optimal long-term organization, establish a twice-yearly schedule to review and rotate stored items, removing anything no longer needed.
Use drawer dividers within larger bins to prevent items from shifting, and consider using vacuum storage bags to compress bulky items like winter bedding or seasonal clothing, maximizing the available space in each container.
Door-Mounted Organizers for Accessories and Shoes
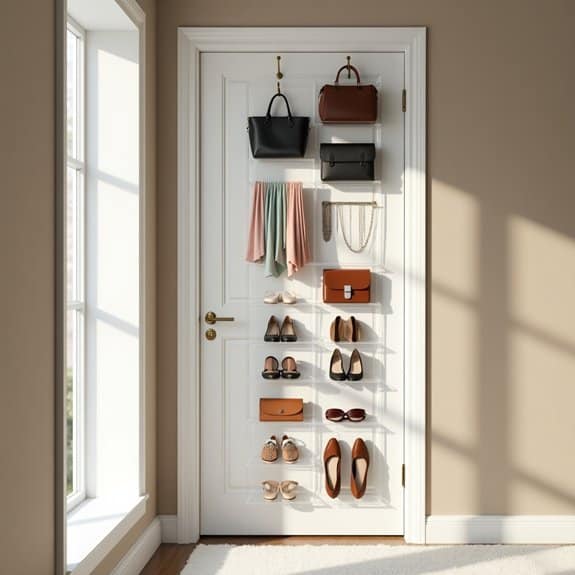
Making the most of vertical space is crucial in small bedrooms, and the often-overlooked door surface presents a valuable opportunity for storage. Door-mounted organizers transform dead space into functional storage areas, keeping accessories and shoes off the floor while maintaining easy accessibility.
Door-mounted storage systems are particularly effective for organizing daily-wear items like scarves, belts, jewelry, and frequently worn shoes. This organization method not only saves precious floor and closet space but also helps create a systematic approach to outfit planning and morning routines.
Required Items:
- Over-the-door shoe organizer with clear pockets
- Over-the-door hook system
- Adhesive hooks or command strips
- Measuring tape
- Level
- Installation hardware (if required)
- Storage bins or small containers (optional)
- Label maker or tags (optional)
Start by measuring your door’s dimensions and selecting appropriate organizers that won’t interfere with door closure. Install the over-the-door shoe organizer first, ensuring it hangs straight and secure. Dedicate the bottom rows to shoes, arranging them by frequency of use.
Reserve the upper pockets for accessories, grouping similar items together – scarves in one section, belts in another, and small purses or clutches in their designated area. For jewelry and smaller accessories, consider using small containers within the pockets to prevent items from getting tangled or lost.
If using additional hook systems, position them at appropriate heights for longer items like robes or coats. Ensure all mounting hardware is secure and weight-distributed evenly to prevent damage to the door.
Consider implementing a rotation system where seasonal items are stored in less accessible pockets while keeping frequently used items at eye level.
Additional Tip: Regularly assess and reorganize the contents of your door organizer every few months. Remove items that haven’t been used, and adjust the arrangement based on seasonal needs and usage patterns. To maintain the organizer’s shape and functionality, avoid overloading pockets and regularly check the mounting hardware for security.
Multi-Purpose Bedside Tables With Hidden Storage
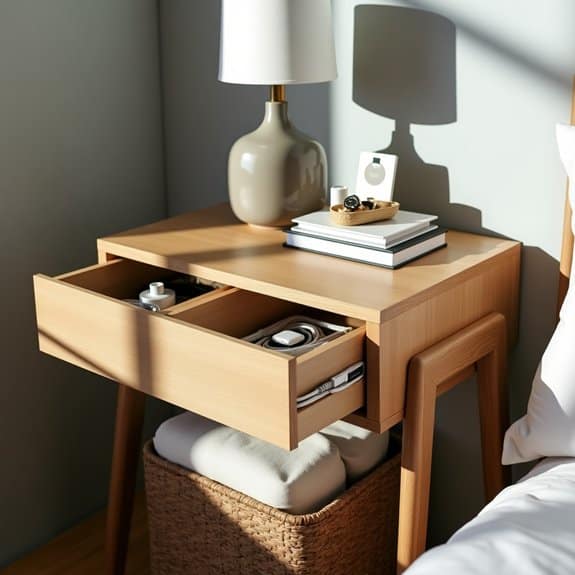
Bedside tables serve as essential landing spots in any bedroom, but in small spaces, they need to work even harder. Maximizing these surfaces requires thoughtful organization and clever storage solutions that maintain both functionality and aesthetics. A well-organized bedside table can store daily essentials while eliminating visible clutter that can make a small bedroom feel cramped.
The key to successful bedside table organization lies in selecting pieces that offer multiple storage options while maintaining a clean, uncluttered surface. Hidden storage compartments, drawers, and shelves can house everything from books and electronics to personal items and midnight snacks, all while presenting a tidy exterior that contributes to a peaceful sleeping environment.
Required Items:
- Multi-purpose bedside table with drawers or hidden compartments
- Drawer organizers or small containers
- Cable management solutions
- Decorative boxes or baskets
- Drawer liners
- Labels
- Small storage jars or containers
- Charging station or dock
- LED strip lights (optional)
Start by emptying the bedside table completely and sorting items into categories: daily essentials, occasional use items, and decorative pieces. Install drawer liners to protect the interior surfaces and prevent items from sliding around. Utilize drawer organizers to create designated spaces for different categories of items, placing frequently used items in easily accessible locations.
For tables with hidden compartments, consider using small containers or decorative boxes to keep items dust-free and organized.
Next, establish a charging station within the table by drilling small holes for cable management if necessary. Use adhesive cable clips to keep wires tidy and accessible. For tables with open shelving, incorporate decorative boxes or baskets that complement your room’s décor while providing concealed storage for less attractive items.
The top surface should remain relatively clear, featuring only essential items like a lamp, clock, or small dish for jewelry. Consider installing LED strip lights under shelves or within drawers to illuminate storage areas and add ambiance. Items used daily should be positioned within arm’s reach, while less frequently used items can be stored in lower drawers or back corners of compartments.
Additional Tips: Regularly assess and purge stored items to prevent accumulation of unnecessary clutter. Consider using vertical space by adding small wall-mounted shelves above the bedside table for additional storage. Implement a rotation system for seasonal items, and use clear containers in hidden compartments to easily identify contents without opening multiple boxes or drawers.
Vertical Wall-Mounted Jewelry Display Solutions

A well-organized jewelry display not only prevents tangled necklaces and lost earrings but also transforms your accessories into an artistic wall feature. In small bedrooms, utilizing vertical space for jewelry storage is particularly crucial as it maximizes floor space while keeping frequently worn pieces easily accessible.
Wall-mounted jewelry organization systems serve multiple purposes: they protect delicate pieces from damage, provide a clear visual inventory of your collection, and create an elegant focal point in your bedroom. This solution eliminates the need for traditional jewelry boxes that occupy precious surface space on dressers or nightstands.
Required Materials:
- Wall hooks or mounting hardware
- Decorative pegboard or mesh panel
- Jewelry hooks in various sizes
- Small mounting brackets
- Level
- Drill and drill bits
- Anchors
- Measuring tape
- Pencil
- Hammer
- Decorative frame (optional)
- Clear Command strips (optional)
Select your wall space and measure the area where you’ll mount your jewelry display. Install the main mounting hardware according to your wall type, ensuring it’s level and secure. For pegboards, leave approximately 1-2 inches of space between the wall and board to accommodate hooks.
Arrange larger pieces like necklaces at the top, followed by bracelets in the middle section, and earrings at eye level. Group similar items together and maintain adequate spacing to prevent tangling.
When arranging your pieces, consider frequency of use and visual appeal. Create distinct zones for different types of jewelry, keeping everyday pieces within easy reach. Incorporate various hook styles and lengths to accommodate different jewelry types effectively. For delicate chains, use smooth, curved hooks to prevent damage, while sturdy pegs work well for chunky bracelets and watches.
Additional Tips: Rotate your jewelry seasonally to maintain organization and prevent overcrowding. Install the display away from direct sunlight to protect precious metals and stones from fading.
Consider adding small dishes or trays at the bottom of your display for rings and other small pieces. Photograph your organized display to maintain the arrangement after cleaning or rearranging, and regularly dust the area to keep both jewelry and display looking pristine.
Custom Corner Shelving Units for Dead Space
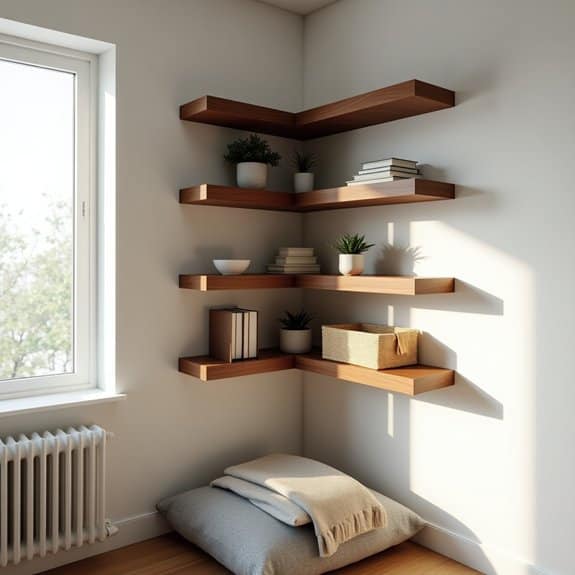
Corner spaces in small bedrooms often become wasted areas where dust collects and valuable storage potential goes unused. These awkward angles can actually become prime real estate for storage and display when properly utilized with custom corner shelving. Transforming these dead zones not only maximizes your room’s square footage but creates vertical storage opportunities that keep floor space clear.
Custom corner shelves work particularly well in small bedrooms because they take advantage of typically unused wall space while creating a built-in look that feels intentional rather than makeshift. These units can house everything from books and decorative items to essential storage boxes and daily-use items, making them both functional and aesthetically pleasing.
Required Items:
- Measuring tape
- Level
- Pencil
- Corner shelf brackets
- Wall anchors
- Screwdriver
- Power drill
- Wood shelves (cut to size)
- Sandpaper
- Wood stain or paint
- Screws
- Stud finder
Start by measuring your corner space carefully, noting the width you want each shelf to extend from the corner and ensuring equal lengths on both walls. Mark your desired shelf heights, using a level to ensure accurate placement. Locate wall studs using a stud finder and mark their positions. Install heavy-duty corner brackets using wall anchors where studs aren’t available, ensuring each bracket is perfectly level.
Cut your shelves to size if they’re not pre-cut, sand the edges smooth, and apply your chosen finish. Once dry, place the shelves onto the installed brackets and secure them with screws from underneath. Work from bottom to top, checking that each shelf is level before moving to the next one. Consider varying the spacing between shelves based on what you plan to store on them.
To maximize your new corner shelving system, use coordinating storage boxes or baskets on lower shelves for items you don’t need frequent access to, while keeping frequently used items at eye level. Consider installing small LED strip lights under each shelf to illuminate items and create ambiance.
Remember to leave some open space for displaying decorative items to maintain a balanced, uncluttered look while still maximizing storage capacity.
Over-the-Door Hanging Storage Systems
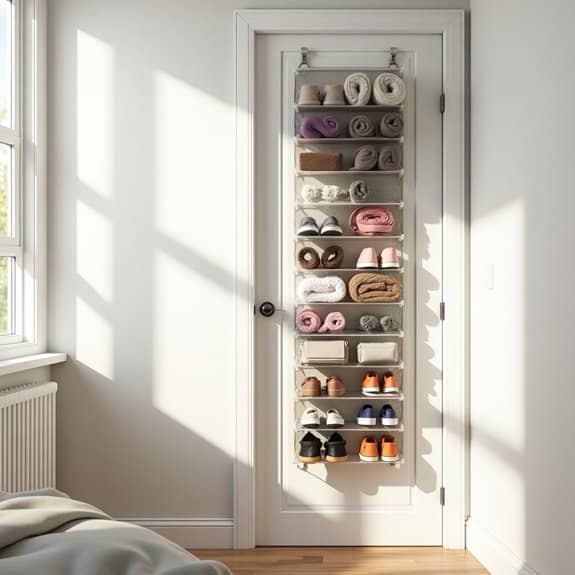
Making the most of vertical space is crucial in small bedrooms, and the often-overlooked door surface presents a valuable opportunity for additional storage. Over-the-door hanging systems can transform an underutilized space into an efficient storage solution, perfect for everything from shoes and accessories to daily essentials.
These versatile organizing systems free up precious closet and drawer space while keeping items easily accessible. By implementing an over-the-door storage solution, you can maintain a clutter-free environment and create designated spaces for various items without sacrificing floor space or requiring permanent installation.
Required Items:
- Over-the-door hanging organizer (mesh, clear plastic, or fabric)
- Over-the-door hooks
- Storage bins or baskets (if needed)
- Labels
- Measuring tape
- Command strips (optional for securing)
- Door bumpers
Installation and Organization Process:
Start by measuring your door’s height and width to ensure proper fit of the hanging organizer. Remove any existing door hardware that might interfere with the system. Place the hanging hooks over the top of the door, ensuring they’re level and properly seated.
If using multiple organizers, arrange them in a way that allows the door to close properly. Sort items by category before placing them in the pockets or compartments. Arrange frequently used items at eye level, with heavier items toward the bottom for stability.
For optimal use, designate specific zones within the organizer based on item type or frequency of use. Consider using clear pockets for better visibility or adding labels to maintain organization. Install door bumpers to prevent damage to the wall when the door opens. If the organizer shifts during door movement, secure the bottom corners with command strips.
Additional Tips:
Rotate seasonal items to maintain relevance and prevent overcrowding. Clean the organizer regularly to prevent dust accumulation. Periodically assess the contents and remove unused items to maintain organization.
Consider using compression bags for soft items to maximize space in deeper pockets. Remember to check the weight capacity of your organizer and distribute items evenly to prevent sagging or damage to the door.
DIY Dresser-Top Organizing Trays and Boxes
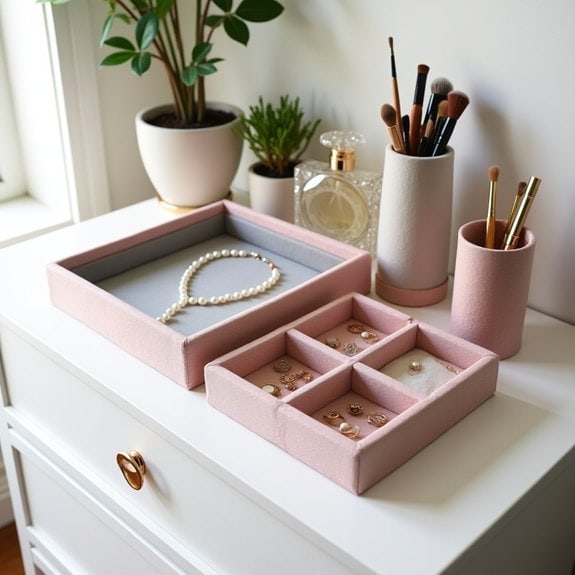
A cluttered dresser top can quickly become a catch-all space for jewelry, cosmetics, and daily essentials, creating visual chaos in an otherwise peaceful bedroom. Organizing this space with custom trays and boxes not only creates a more aesthetically pleasing environment but also ensures everything has its designated spot.
Creating your own organizing system with DIY trays and boxes allows you to maximize vertical space while maintaining easy access to frequently used items. This personalized approach ensures the organization system fits your specific needs and matches your room’s décor, making it more likely you’ll maintain the organization long-term.
Required Items:
- Shallow boxes or trays of various sizes
- Decorative paper or fabric
- Scissors
- Glue or mod podge
- Small containers or dividers
- Felt padding
- Measuring tape
- Clear acrylic organizers (optional)
- Label maker or tags
- Double-sided tape
Start by measuring your dresser top and planning the layout of your organizing system. Group similar items together and determine how much space each category needs. Cut felt padding to fit the bottom of your boxes and trays to prevent scratching the dresser surface.
Cover the exterior of boxes with decorative paper or fabric that complements your room’s color scheme. Create designated zones for different items: jewelry in one section, daily essentials in another, and cosmetics in a third. Use smaller containers or dividers within larger trays to separate items further.
Place frequently used items toward the front and occasional-use items toward the back. Secure boxes and trays with double-sided tape if needed to prevent shifting.
For maximum organization success, implement a weekly maintenance routine to prevent clutter from accumulating. Consider rotating seasonal items to storage boxes under the bed or in closets to maintain a streamlined appearance.
Remember to periodically assess whether your current system still serves your needs and adjust the layout accordingly as your storage requirements change.
Space-Efficient Fold-Down Desk and Work Area
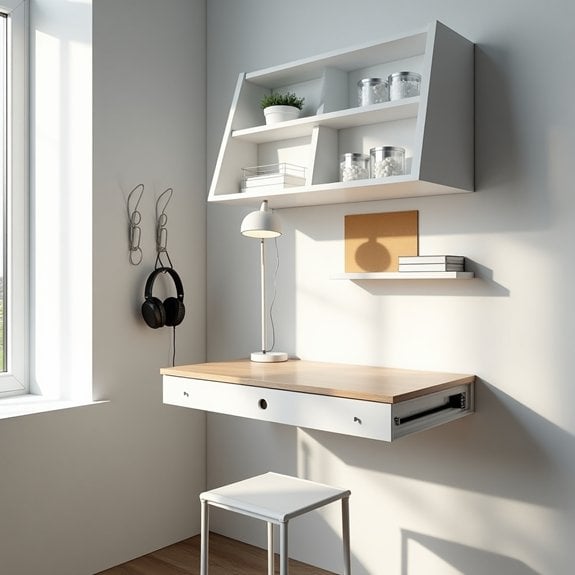
A fold-down desk serves as an ingenious solution for small bedrooms, allowing residents to maintain a productive workspace without permanently sacrificing valuable floor space. When properly organized, this versatile furniture piece can transform from a compact wall fixture to a fully functional home office in moments.
Creating an efficient fold-down desk area requires careful planning and strategic organization to ensure all necessary work items are easily accessible yet neatly tucked away when the desk is folded up. This dual-purpose approach maximizes room functionality while maintaining a clutter-free environment essential for both work and relaxation.
Required Items:
- Fold-down desk with mounting hardware
- Wall-mounted storage containers
- Cable management system
- Desktop organizers
- Multi-purpose storage boxes
- Floating shelves
- Command hooks or small hanging organizers
- LED task lighting
- Compact office supplies
- Collapsible chair or stool
Install the fold-down desk at a comfortable height, ensuring proper clearance for both the desk surface and seating area. Mount floating shelves above or beside the desk to store frequently used items, and install wall-mounted storage containers for office supplies and documents. Implement a cable management system to keep wires organized and prevent tangling when folding the desk.
Position desktop organizers strategically on the desk surface, using vertical space whenever possible. Store less frequently used items in labeled storage boxes that can be tucked under the bed or in nearby closet space. Ensure all items have designated homes that don’t interfere with the desk’s folding mechanism.
Additional Tips: Consider implementing a daily reset routine where all items return to their designated spots before folding up the desk. Use clear containers to easily locate items, and regularly assess and purge unnecessary supplies to prevent clutter accumulation.
Install a small bulletin board or whiteboard nearby for important notes and reminders that can remain visible even when the desk is folded away.
Built-In Headboard Storage Solutions
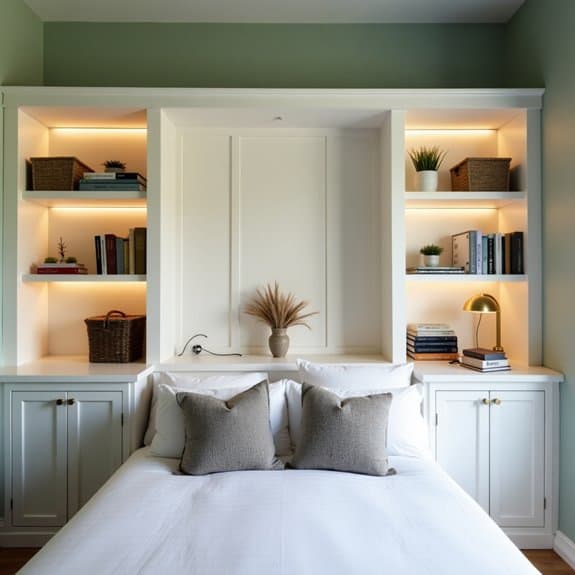
A built-in headboard storage system serves as a game-changer in small bedrooms, effectively combining style with functionality. By utilizing the vertical space behind your bed, you create valuable storage real estate without sacrificing precious floor space, making it an ideal solution for rooms where every square inch counts.
The headboard area typically goes unused, but with proper organization, it can house books, electronics, personal items, and decorative pieces. A well-organized built-in headboard storage system not only keeps essentials within arm’s reach but also eliminates the need for additional furniture pieces like nightstands or shelving units.
Required Items:
- Storage bins or baskets
- Drawer organizers
- Bookends
- LED strip lights or reading lights
- Clear containers
- Labels
- Dust-proof containers
- Small hooks
- Adjustable shelf pins
- Measuring tape
Start by categorizing items based on frequency of use, placing daily essentials like reading materials, phones, and charging cables in easily accessible compartments. Install adjustable shelving to accommodate items of varying heights, and use storage bins or baskets to contain smaller items that could create visual clutter.
Incorporate proper lighting within the storage spaces to ensure visibility, and consider installing USB ports or power outlets for convenient device charging. Position frequently accessed items at eye level when lying down, while storing seasonal or less-used items in higher or lower compartments.
Use clear containers for items that need to be visible and labeled bins for those that don’t. Consider implementing a rotation system for stored items, regularly evaluating and updating the contents based on changing needs and seasons.
Additional Tip: Maintain organization by implementing a weekly quick-clean routine, wiping down surfaces and reorganizing any displaced items. Consider using drawer dividers or small containers within larger compartments to prevent items from shifting during use, and periodically assess stored items to prevent accumulation of unnecessary clutter.
This helps maintain the functionality and aesthetic appeal of your built-in headboard storage system long-term.
Window Seat Storage Bench Ideas
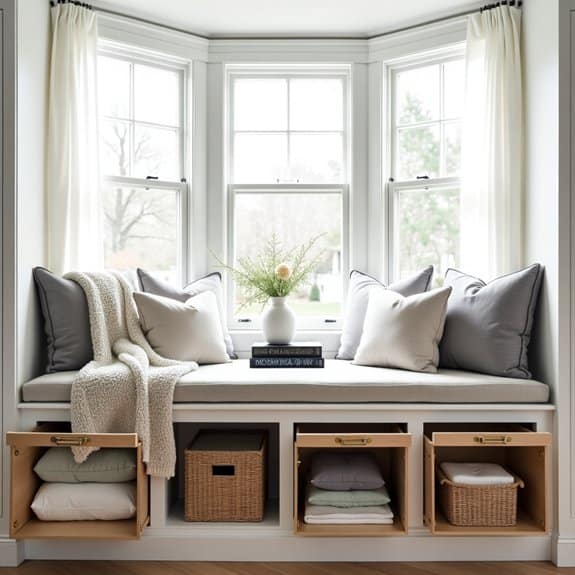
A window seat storage bench serves as a dual-purpose solution for small bedrooms, offering both a cozy seating area and valuable storage space. When properly organized, this feature can help declutter your room while creating an inviting spot to read, relax, or simply enjoy the view.
Maximizing the storage potential of your window seat bench requires thoughtful planning and systematic organization. The space beneath the seat can accommodate various items, from seasonal clothing to books and bedding, making it essential to create an organized system that allows easy access while maintaining a tidy appearance.
Required Items:
- Storage bins or baskets
- Label maker or labels
- Drawer dividers or organizers
- Clear storage containers
- Fabric storage bags
- Shelf liner
- Measuring tape
- Dust-proof containers
- Storage cubes
- Vacuum storage bags
The organization process starts with emptying the entire storage space and measuring the available area. Divide the space into zones based on the items you plan to store, using appropriately sized containers that fit the depth and height of the bench.
Place frequently used items toward the front for easy access, while seasonal items can go toward the back. Install drawer dividers or small organizers to prevent smaller items from getting lost or mixed together.
Consider implementing a rotation system for seasonal items, using vacuum storage bags to compress bulky items like winter blankets or sweaters during warmer months. Label all containers clearly, including contents and dates if applicable, to maintain organization long-term.
Additional Tips: Create a maintenance schedule to review and reorganize the contents every three months, preventing clutter buildup and ensuring items remain accessible. Use clear containers for better visibility, and consider adding LED strip lighting inside the storage area for improved visibility.
Keep a small step stool nearby if the storage space is deep, and maintain a current inventory list to track stored items effectively.
Closet Door Organization Hacks
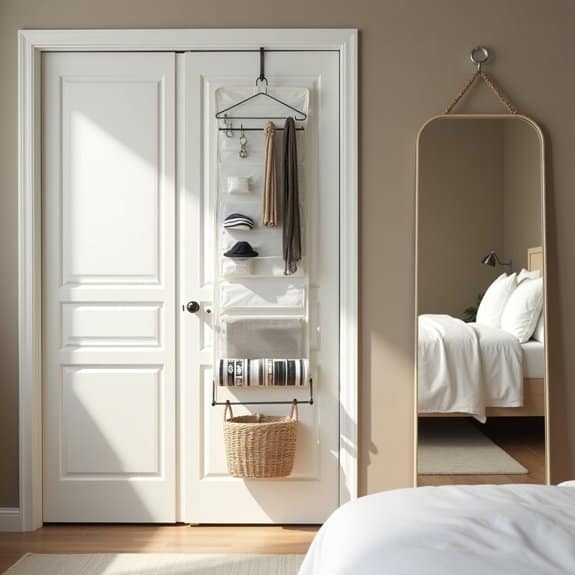
Closet doors often represent untapped storage potential in small bedrooms, where every square inch counts. By utilizing this vertical space effectively, you can significantly increase your storage capacity without sacrificing precious floor space or creating visual clutter in your room.
Transforming your closet doors into functional organization zones not only maximizes storage but also keeps frequently used items easily accessible. This approach is particularly valuable for small bedrooms where traditional storage solutions may not be practical or where existing closet space is already maximized.
Required Items:
- Over-the-door hanging organizer
- Command hooks or adhesive strips
- Door-mounted rack system
- Mirror with storage capability
- S-hooks
- Measuring tape
- Level
- Screwdriver
- Wall anchors
- Clear storage pockets
Start by measuring your closet door dimensions, including thickness, to ensure compatibility with your chosen organization systems. Install an over-the-door hanging organizer on the interior side of the door for items like shoes, accessories, or folded clothing.
For the exterior side, mount hooks or racks at varying heights to accommodate different items while maintaining easy door operation. Add clear storage pockets at eye level for frequently accessed items like accessories or daily essentials.
Ensure all mounted items are secured properly with appropriate hardware, considering the door’s weight capacity and movement. If using adhesive solutions, clean the door surface thoroughly and allow proper curing time before adding items.
Additional success tips: Rotate items seasonally to prevent overcrowding and maintain organization. Implement a weight distribution strategy by placing heavier items at the bottom of the door and lighter ones at the top.
Consider using matching containers or organizers for a cohesive look, and regularly assess the functionality of your system, adjusting as needed to better serve your specific storage needs.

