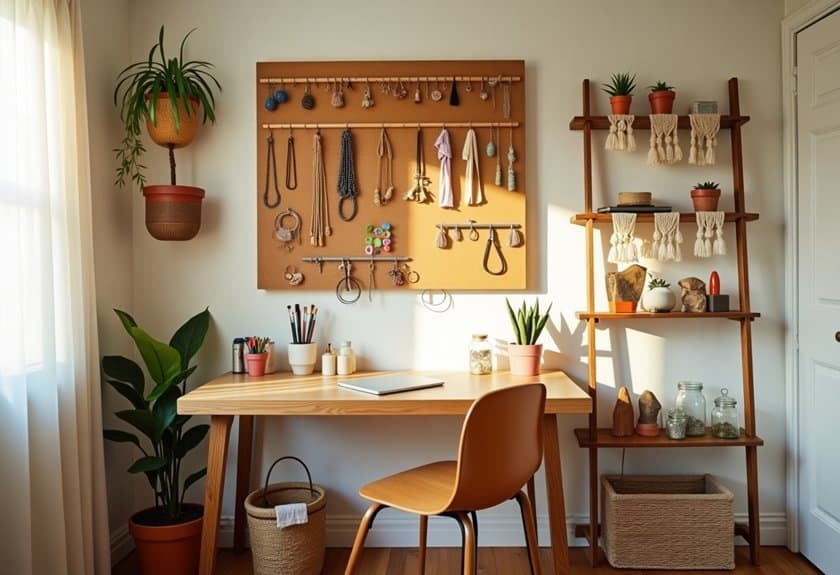
You’re about to discover how to transform your bedroom into a creative sanctuary that’s both organized and inspiring! As a fellow artist who once struggled with scattered supplies and cluttered spaces, I’ve gathered 15 clever DIY solutions that’ll help you take control of your creative chaos. From floating pegboards that display your tools like gallery art to upcycled treasures that maximize every inch, these projects blend form and function in ways you never imagined possible. Let’s explore how to make your artistic haven a reality.
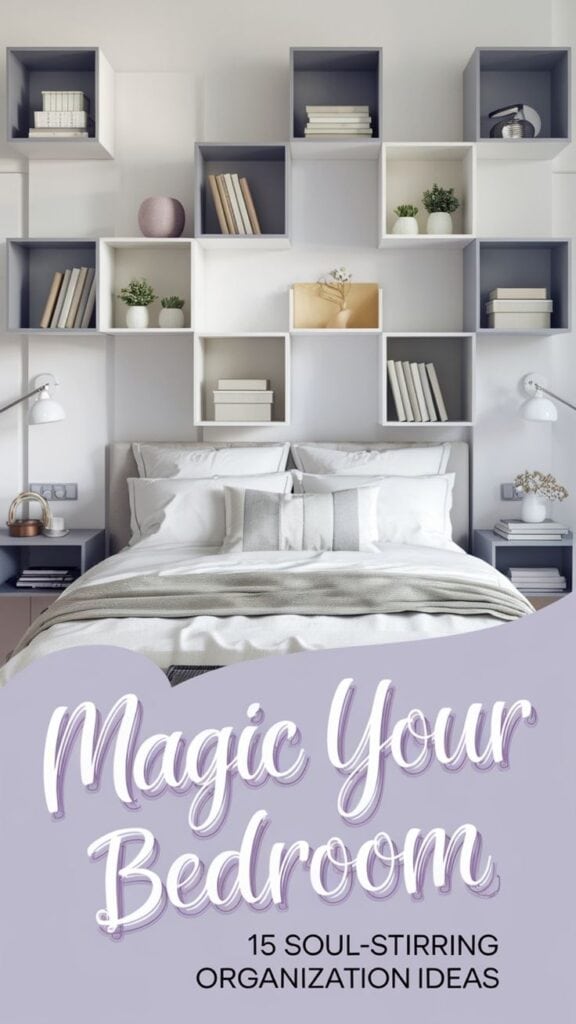
Floating Pegboard Wall for Art Supplies
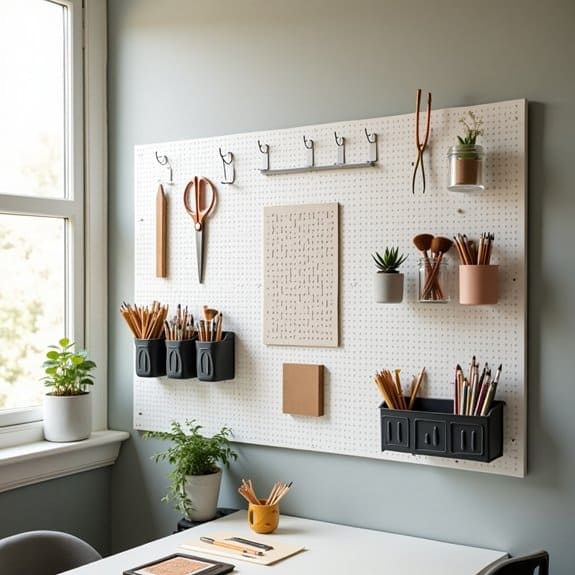
Organizing art supplies can transform a chaotic creative space into an inspiring studio-like environment within your bedroom. When materials are visible and easily accessible, you’re more likely to engage in artistic pursuits and maintain a creative practice.
A floating pegboard wall system offers a versatile solution that maximizes vertical space while keeping art supplies visible and within reach. This organization method prevents supplies from cluttering desk surfaces and drawers, while simultaneously creating an aesthetic display that can inspire creativity.
Required Items:
- Large pegboard panel
- Wall spacers or furring strips
- Wall anchors and screws
- Pegboard hooks (various sizes)
- Level
- Drill
- Pencil
- Measuring tape
- Paint (optional)
- Pegboard baskets and containers
- Scissors
- Wire cutters
Mount the pegboard by first locating wall studs and marking their positions. Install furring strips horizontally across the wall, ensuring they’re level and securely anchored into studs. Attach the pegboard to the furring strips, leaving space behind for hook insertion. If desired, paint the pegboard to match your room’s aesthetic.
Begin organizing supplies by grouping similar items together – drawing materials, painting supplies, and crafting tools. Install various pegboard hooks, baskets, and containers strategically based on the size and weight of items. Position frequently used supplies at eye level and arrange materials by color or size for visual appeal.
Create designated zones for different media types to maintain systematic organization. To maintain the system’s effectiveness, implement a “return to home” policy where items are returned to their designated spots immediately after use.
Consider installing small labels beneath hooks or containers to maintain organization, and periodically reassess the arrangement based on your evolving needs and usage patterns. Leave some empty hooks for future additions or seasonal rotation of supplies.
Rolling Under-Bed Storage Crates
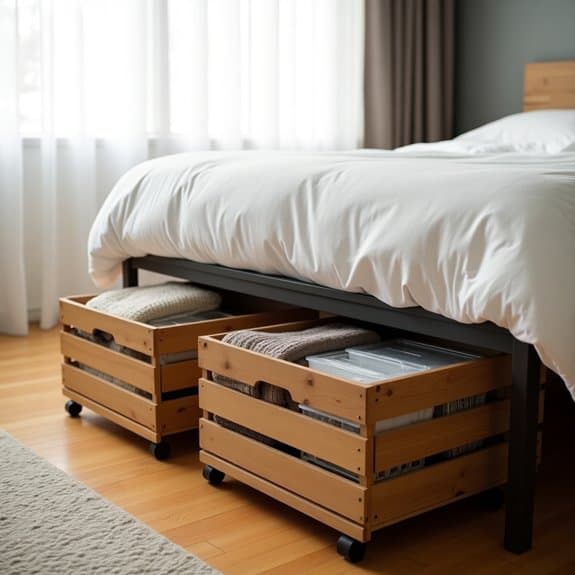
Under-bed storage space represents one of the most underutilized areas in the bedroom, offering valuable real estate for storing seasonal items, extra bedding, or clothing. By implementing rolling storage crates, you can transform this forgotten space into an organized, accessible storage solution that maximizes your room’s potential.
Creating rolling under-bed storage crates not only helps declutter your living space but also provides easy access to stored items without the need to lift heavy containers or struggle to reach deep under the bed. This system is particularly beneficial for small bedrooms where vertical storage options are limited.
Required Items:
- Wooden or plastic storage crates
- Caster wheels (4 per crate)
- Screws
- Power drill
- Measuring tape
- Pencil
- Screwdriver
- Clear storage bins or fabric boxes (optional)
- Labels and label maker
- Safety goggles
- Work gloves
To create functional rolling under-bed storage, start by measuring the height between your floor and bed frame, accounting for the height of the casters. Mark and attach the caster wheels to each corner of your storage crates, ensuring they’re securely fastened with appropriate screws.
Test the rolling mechanism on each crate before loading items. For optimal organization, divide your crates into categories: seasonal clothing, shoes, extra bedding, or hobby supplies. Use clear bins or fabric boxes within the crates to further compartmentalize items and prevent them from shifting during movement.
Group similar items together and create a labeling system that allows you to quickly identify contents without pulling out each crate. Position frequently accessed items in crates near the foot or sides of the bed for easier reach. Consider using dust covers or fitted sheets over the crates to protect stored items from dust accumulation.
Pro tip: Create a simple diagram or map of your under-bed storage layout and tape it to the inside of your closet door. This visual reference will help you quickly locate specific items without having to pull out multiple crates.
Additionally, schedule quarterly maintenance to clean the caster wheels and ensure smooth rolling, while simultaneously reviewing stored items for continued relevance and seasonal rotation.
Vertical String Art Organizer
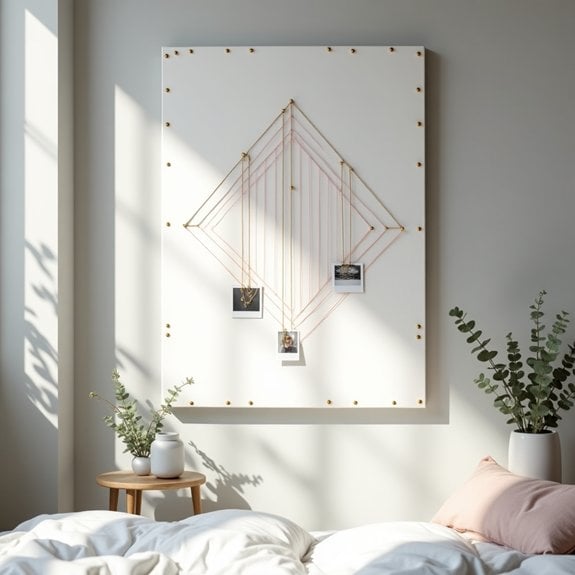
Maximizing vertical wall space is essential in modern bedrooms where floor space comes at a premium. A vertical string art organizer not only serves as a practical storage solution but also adds an artistic, personalized touch to your room decor, transforming an ordinary wall into a functional piece of art.
This versatile organization system allows you to display and organize lightweight items such as jewelry, photos, notes, and small accessories while keeping them easily accessible. The geometric pattern created by the strings adds visual interest and can be customized to match your room’s color scheme or style preferences.
Materials Needed:
- Wooden board (2’x3′ recommended)
- Small nails or pins
- String or thin rope
- Hammer
- Pencil
- Ruler
- Small hooks or clips
- Paint or wood stain (optional)
- Sandpaper
- Wall mounting hardware
- Level
Begin by sanding the wooden board and applying paint or stain if desired. Once dry, measure and mark points along the board’s perimeter at 1-2 inch intervals. Hammer nails partially into each marked point, leaving about 1/4 inch exposed.
Create your desired geometric pattern by wrapping string between the nails, ensuring sufficient tension to hold items. Secure the string ends with tight knots and trim excess. Install wall mounting hardware on the back of the board.
For optimal use of your vertical string art organizer, consider organizing items by category or color. Use small hooks or clips to attach heavier items directly to the nails rather than the string. Keep frequently used items at eye level for easy access, and arrange less-used items toward the top or bottom.
The pattern can be adjusted or recreated periodically to accommodate changing storage needs or refresh the design.
Additional Tips: Periodically check string tension and nail security to maintain the organizer’s functionality. Consider using clear fishing line for a more invisible support system, or mix different colored strings for added visual interest.
Install the organizer in a location away from direct sunlight to prevent string deterioration and protect displayed items from fading. Clean dust from strings and items regularly using compressed air or a soft brush.
Upcycled Ladder Bookshelf Display
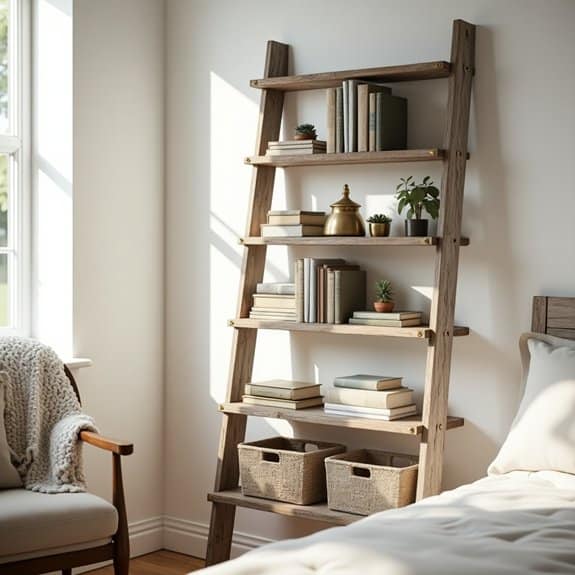
A well-organized bedroom requires smart storage solutions that maximize vertical space while adding visual interest. An upcycled ladder bookshelf display offers a perfect blend of functionality and style, transforming an old ladder into a versatile storage piece that can showcase books, decor items, and personal treasures.
Converting a ladder into a bookshelf not only contributes to sustainable living by repurposing materials but also creates a unique focal point in your bedroom. The varying rung heights provide natural divisions for organizing different-sized items, while the angled design keeps everything easily visible and accessible.
Required Items:
- Wooden ladder (6-8 ft)
- Sandpaper (medium and fine grit)
- Wood primer
- Paint or wood stain
- Paintbrush
- Wood planks for shelves
- Screws
- Power drill
- Level
- Wall anchors
- Safety goggles
- Dust mask
- Clean rags
Start by thoroughly cleaning the ladder and sanding all surfaces to remove any rough spots or old paint. Apply primer and allow it to dry completely before painting or staining the ladder in your desired finish.
Once dry, determine the ladder’s final position against the wall, ensuring it’s stable and level. Secure the top of the ladder to the wall using appropriate anchors for safety. Cut wooden planks to fit across the rungs, creating stable shelf surfaces. These can be attached using screws from underneath the rungs for added stability.
For optimal organization, place heavier items on the lower shelves and lighter objects toward the top. Arrange books by size or color, alternating horizontal and vertical stacking for visual interest. Incorporate decorative boxes or baskets on wider shelves to contain smaller items and maintain a clean appearance.
Additional Tips: Consider adding non-slip padding to the shelf surfaces to prevent items from sliding, especially if the ladder is positioned at an angle. Regularly dust and adjust items to maintain the display’s aesthetic appeal.
When organizing books and decorative pieces, follow the “rule of thirds” by creating groupings of varying heights and leaving some negative space to prevent the shelves from appearing cluttered.
Mason Jar Wall Storage System
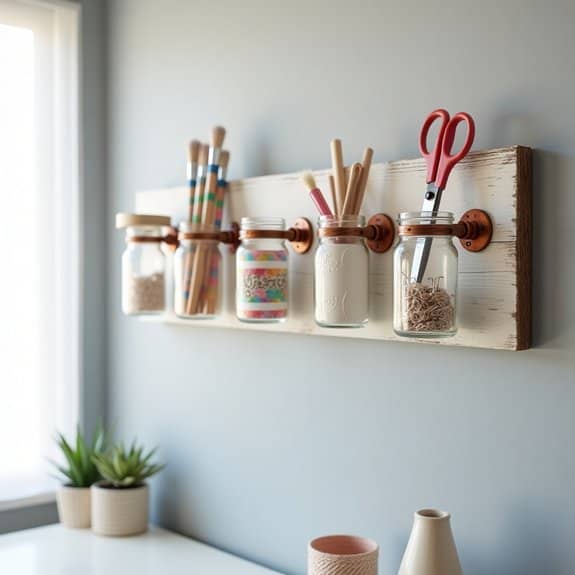
A well-organized bedroom storage system is essential for maintaining order and maximizing space efficiency. Mason jar wall storage offers a creative and practical solution for storing small items while adding a rustic, decorative element to your bedroom decor.
Mason jar wall organizers transform vertical wall space into functional storage areas, perfect for keeping everything from craft supplies to jewelry and small accessories within easy reach. This storage system is particularly effective for items that tend to get lost in drawers or create clutter on horizontal surfaces.
Required Items:
- Mason jars (various sizes)
- Heavy-duty wooden board or plank
- Pipe clamps or hose clamps
- Screws
- Wall anchors
- Power drill
- Screwdriver
- Level
- Pencil
- Measuring tape
- Sandpaper
- Wood stain or paint (optional)
Start by preparing your wooden board, sanding any rough edges and applying stain or paint if desired. Measure and mark spots for the pipe clamps, ensuring even spacing between jars. Pre-drill holes for the clamps, then secure them to the board with screws.
Attach the mason jars by sliding them through the clamps and tightening until secure. Mount the completed organizer to the wall using appropriate wall anchors and screws, ensuring it’s completely level.
For optimal functionality and safety, organize items by weight, keeping heavier items in lower jars and lighter items in higher ones. Consider labeling each jar for easy identification, and leave some space between jars for easy access. Clean jars thoroughly before use and ensure lids are easily removable if you plan to use them.
Woven Rope Basket Storage Solutions

Woven rope baskets offer a stylish and versatile storage solution that brings both functionality and aesthetic appeal to any bedroom space. These natural-looking containers can transform cluttered areas into organized, visually pleasing storage zones while maintaining a cohesive design element in your room.
The beauty of rope basket storage lies in its adaptability – baskets can be sized and styled to accommodate everything from small accessories to larger items like blankets and pillows. Their neutral appearance complements any décor style, making them perfect for long-term storage solutions that won’t clash with changing room designs.
Required Items:
- Assorted woven rope baskets (various sizes)
- Labels or tags
- Clear plastic containers (if storing small items)
- Measuring tape
- Drawer liner or fabric (optional)
- Storage dividers (optional)
- Dust covers (optional)
Begin by assessing your storage needs and categorizing items that will go into the baskets. Sort items by frequency of use, size, and category. Place daily-use items in easily accessible baskets at eye level or within arm’s reach. Organize seasonal or less frequently used items in larger baskets that can be stored on higher shelves or under the bed.
For smaller items, use clear plastic containers within the baskets to prevent items from getting lost or tangled. Line the bottom of each basket with drawer liner or fabric to protect items and extend the basket’s life. Create a labeling system that works for you – whether it’s hanging tags, adhesive labels, or a simple inventory list.
Stack baskets efficiently by placing larger ones at the bottom and smaller ones on top, ensuring stability and maximizing vertical space. For optimal organization maintenance, conduct monthly reviews of basket contents, removing items that are no longer needed or belong elsewhere.
Consider using dust covers for baskets storing delicate items or those placed in open areas. Rotate seasonal items to different baskets as needed, and regularly clean both the baskets and their contents to maintain freshness and prevent dust accumulation.
Magnetic Paint Strip Tool Organizer
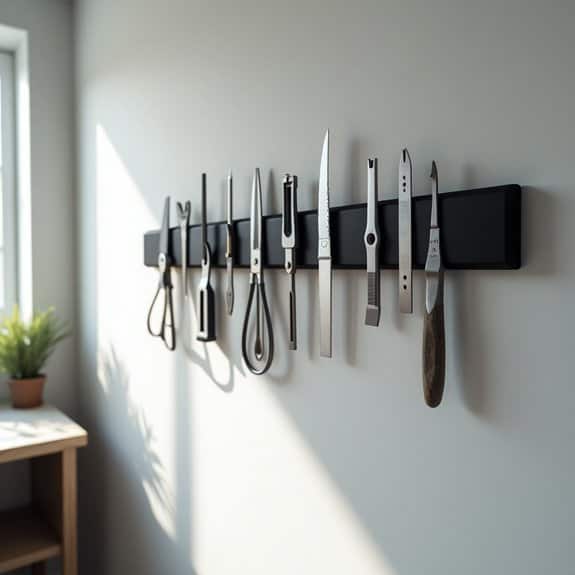
Keeping tools organized in a bedroom workspace is essential for maintaining a clutter-free environment and ensuring easy access to frequently used items. A magnetic paint strip organizer offers a space-saving solution that transforms vertical wall space into a functional storage area, perfect for metallic tools and accessories.
This organization method not only keeps tools visible and readily accessible but also adds a modern, industrial aesthetic to your bedroom. The magnetic strip system prevents tools from getting lost in drawers or toolboxes and makes it simple to maintain an organized workspace while maximizing available surface area.
Required Items:
- Magnetic paint strip or knife holder
- Mounting hardware (screws and wall anchors)
- Level
- Pencil
- Drill
- Screwdriver
- Measuring tape
- Stud finder
Mount the magnetic strip at a convenient height by first using a stud finder to locate wall studs. Mark the mounting points with a pencil and ensure the strip is level. If mounting into drywall, install wall anchors at the marked points. Secure the magnetic strip to the wall using appropriate screws, making sure it’s firmly attached and can support the weight of your tools.
For optimal organization, arrange tools by size or frequency of use. Heavier items should be placed directly over the mounting points for added stability. Test the magnetic hold of each tool before letting go completely to ensure secure placement.
To maintain the effectiveness of your magnetic tool organizer, periodically clean both the magnetic strip and tools with a dry cloth to remove dust and debris that could weaken the magnetic bond.
Consider adding small rubber or felt bumpers between the tools and the strip to prevent scratching, and regularly check that the mounting hardware remains tight and secure.
Hanging Canvas Storage Pockets
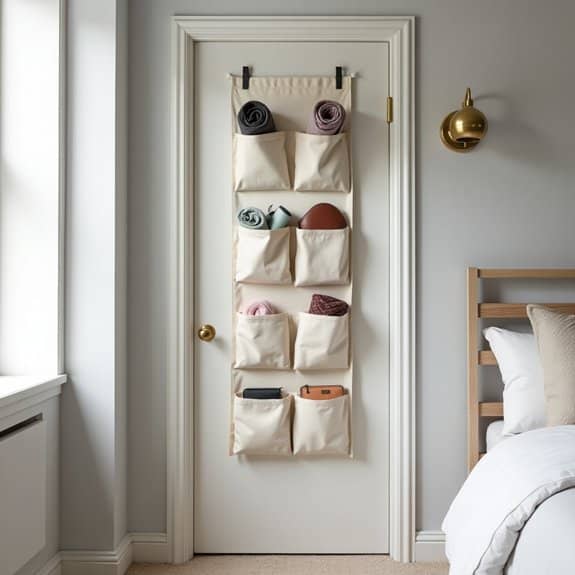
Maximizing vertical space in a bedroom is essential for maintaining an organized and clutter-free environment. Hanging canvas storage pockets provide an efficient solution for storing smaller items while keeping them easily accessible and visible, preventing the common “out of sight, out of mind” problem that occurs with traditional drawer storage.
Canvas storage pockets are particularly useful for storing accessories, shoes, craft supplies, or daily essentials. This versatile organization system can be installed on doors, walls, or inside closets, making it an ideal solution for bedrooms of any size, especially those with limited floor space.
Required Items:
- Over-the-door canvas organizer or hanging pocket organizer
- Measuring tape
- Pencil
- Level
- Wall anchors and screws (if mounting to wall)
- Command hooks or over-door hooks
- Labels (optional)
- Storage bins or baskets (optional)
Installation and Organization Process:
First, determine the ideal location for your hanging storage system, ensuring it won’t interfere with door movement or daily activities. If mounting on a wall, mark the mounting points with a pencil and use a level to ensure straight placement. Install wall anchors and screws or hanging hooks according to the weight capacity needed.
For door mounting, simply place the organizer over the door using the included hooks or purchased over-door hooks. Once mounted, assess your items and group similar objects together. Assign specific pockets for different categories of items, such as accessories in upper pockets for easy visibility and heavier items in lower pockets for stability.
Consider using clear storage bins or baskets that fit within the pockets for smaller items that tend to get lost.
Additional Tips:
To maintain the organization system’s effectiveness, label each pocket clearly and establish a routine for returning items to their designated spots. Regularly review and rotate seasonal items, and don’t overstuff pockets as this can strain the material and make items difficult to access.
Consider using transparent pockets or creating a pocket inventory list to quickly locate items when needed.
Vintage Suitcase Nightstand Storage
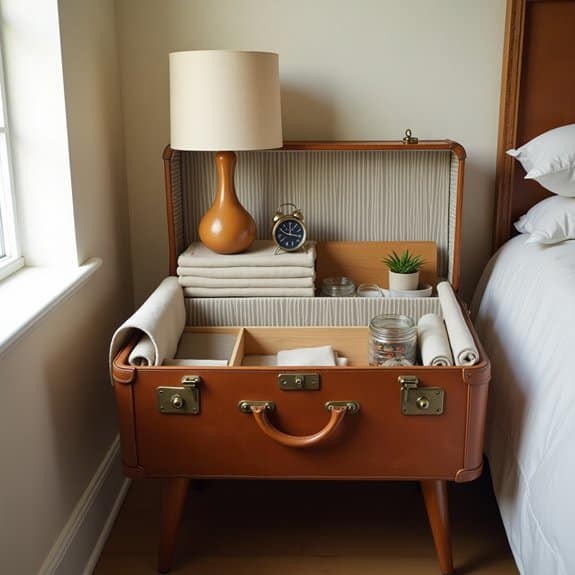
Transforming a vintage suitcase into a functional nightstand storage solution combines nostalgic charm with practical organization. This creative approach not only adds character to your bedroom but also provides a unique way to store bedside essentials while maintaining a clutter-free space.
The beauty of vintage suitcase storage lies in its versatility and hidden compartments. When properly organized, these repurposed pieces can hold everything from books and magazines to sleep accessories and personal items, all while serving as a stylish piece of furniture that enhances your bedroom’s aesthetic.
Required Items:
- Vintage suitcase in good condition
- Small organizing boxes or containers
- Fabric liner or contact paper
- Adhesive command strips
- Drawer organizers or dividers
- Cleaning supplies
- Measuring tape
- Scissors
- Clear sealant (if needed)
- Small furniture legs or risers (optional)
Begin by thoroughly cleaning the suitcase inside and out, paying special attention to corners and crevices. Line the interior with fabric or contact paper to create a fresh, clean surface.
Install small organizers or dividers to create designated spaces for different items – consider using shallow boxes in the bottom half for larger items and smaller compartments in the lid portion for frequently accessed items like reading glasses or hand cream.
If using the suitcase as a standalone nightstand, secure furniture legs to elevate it to an appropriate height. Arrange items by frequency of use, keeping essential items easily accessible.
Create zones within the suitcase: one for reading materials, another for personal care items, and a third for electronics or charging cables. Use command strips to secure any organizing containers that might shift when opening or closing the suitcase.
For optimal organization maintenance, conduct a monthly review of stored items, removing anything that hasn’t been used. Consider using sachet bags to keep the interior fresh, and periodically wipe down both the exterior and interior surfaces.
Weather-proof the exterior if the suitcase shows signs of wear, and ensure hinges remain well-maintained to preserve functionality while serving as both storage and decor.
Door-Mounted Creative Supply Station
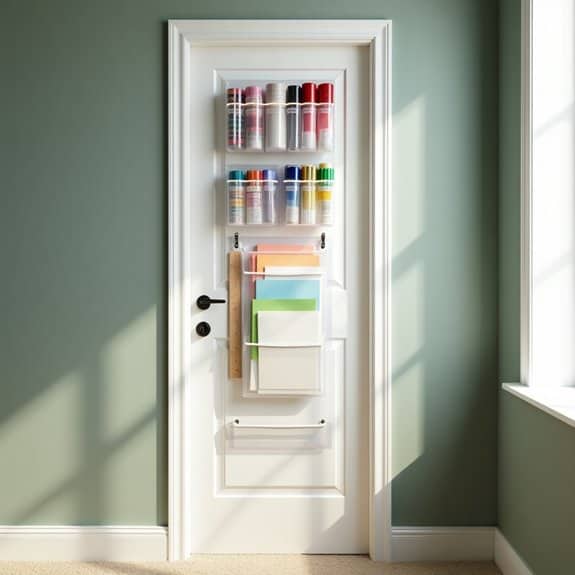
A well-organized creative supply station mounted on your bedroom door can transform an underutilized space into a functional storage solution. By taking advantage of vertical space, you can keep art supplies, crafting materials, and stationery items within easy reach while maintaining a clutter-free desk and floor area.
Door-mounted organization systems are particularly valuable for small bedrooms or shared spaces where maximizing storage is essential. This setup allows for quick access to frequently used items while keeping them contained and visible, preventing the common problem of forgotten supplies buried in drawers or boxes.
Required Items:
- Over-the-door organizer with clear pockets
- Command hooks or mounting brackets
- Measuring tape
- Level
- Small containers or pouches
- Label maker or labels
- Scissors
- Zip ties
- Door padding strips
Mount the over-the-door organizer at a comfortable height, ensuring it doesn’t interfere with door operation. Sort supplies by category (writing tools, adhesives, cutting tools, etc.) and assign specific pockets for each group. Use small containers within larger pockets to prevent items from getting mixed up or lost.
Create a logical flow by placing frequently used items at eye level and less-used supplies toward the bottom. Install additional command hooks on either side of the organizer for hanging scissors, rulers, or other tools that need to hang freely. Add padding strips where the organizer touches the door to prevent scratching and reduce noise when opening and closing.
Consider using clear pockets for better visibility or labeling each pocket clearly if using opaque materials.
Additional Tips: Regularly audit your supply station to remove dried-out markers, empty adhesive containers, or broken tools. Implement a “one-in-one-out” rule to prevent overcrowding, and rotate seasonal or project-specific supplies as needed.
Consider adding a small LED light strip if the door area tends to be poorly lit, ensuring you can always find what you need quickly.
Decorative Wall-Mounted Cubby System
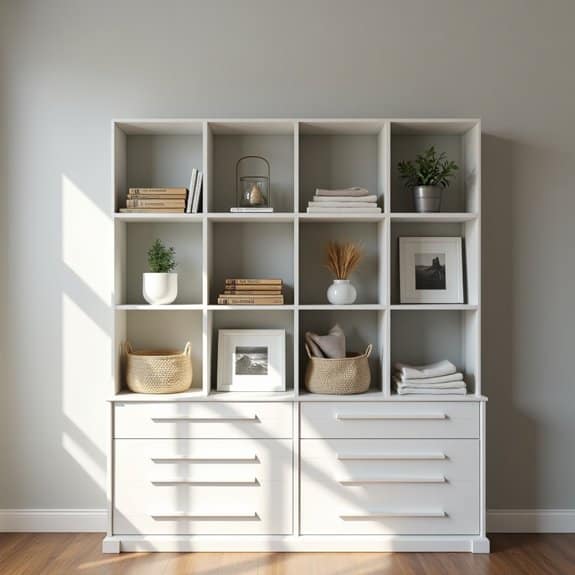
A well-organized wall-mounted cubby system transforms unused vertical space into a functional storage solution while adding architectural interest to any bedroom.
These versatile units provide dedicated spots for books, accessories, and decorative items, keeping them easily accessible yet neatly contained.
By implementing a decorative wall-mounted cubby system, you create a personalized storage solution that doubles as an artistic focal point.
This organization method prevents clutter from accumulating on horizontal surfaces like dressers and nightstands while maximizing your bedroom’s square footage.
Required Items:
- Wall-mounted cubby unit
- Stud finder
- Level
- Drill and drill bits
- Screwdriver
- Wall anchors
- Mounting screws
- Measuring tape
- Pencil
- Storage bins or baskets (optional)
- Decorative backing paper (optional)
Start by determining the ideal location for your cubby system, using the stud finder to locate wall supports.
Measure and mark the mounting points, ensuring they’re level. If the unit is particularly heavy, install additional wall anchors between studs for extra support.
Mount the cubby system according to manufacturer instructions, typically starting with a top support bracket followed by bottom supports.
Once secured, organize items by category, placing frequently used items at eye level and lesser-used items in higher or lower cubbies.
Consider using coordinating storage bins or baskets in some compartments to contain smaller items while maintaining a cohesive look.
Create visual balance by alternating between stored items and decorative elements.
Additional Tips:
Paint or wallpaper the cubby backs for added visual interest.
Rotate displayed items seasonally to keep the look fresh.
Consider installing small LED lights in select cubbies to highlight special pieces or create ambiance.
Label the bottom of bins or baskets to maintain organization long-term, and regularly assess stored items to prevent accumulation of unnecessary items.
Geometric Floating Corner Shelves
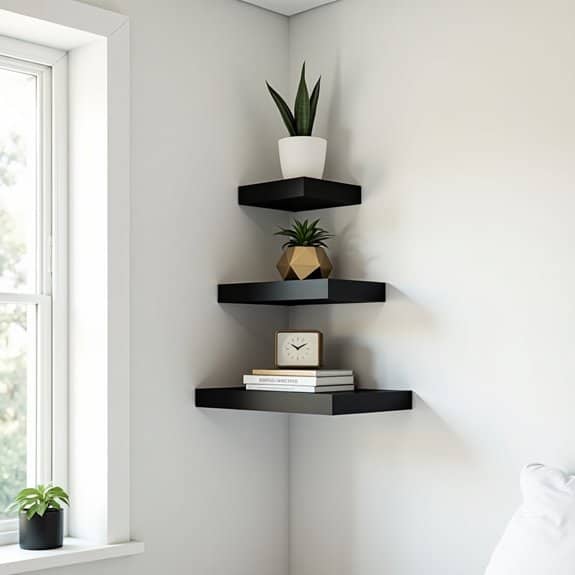
Corner spaces in bedrooms often become dead zones or cluttered catch-alls, wasting valuable storage potential. Geometric floating corner shelves not only maximize these overlooked areas but also create an artistic focal point that adds modern architectural interest to your room while keeping essentials organized and easily accessible.
Installing geometric corner shelves transforms awkward angles into functional storage space while maintaining a clean, contemporary aesthetic. These shelves can display books, plants, decorative items, or daily necessities while creating visual harmony through repeated angular shapes that draw the eye upward, making your room appear larger and more cohesive.
Required Items:
- Geometric corner shelf units (pre-made or DIY materials)
- Level
- Measuring tape
- Pencil
- Wall anchors
- Screws
- Power drill
- Stud finder
- Screwdriver
- Wall brackets
- Wood glue (if DIY)
- Safety goggles
- Dust mask
Begin by determining your ideal shelf placement, using the stud finder to locate wall supports. Measure and mark points for each shelf, ensuring they’re level and properly spaced – typically 12-18 inches apart vertically. Install wall anchors where studs aren’t available.
Mount brackets securely, double-checking level alignment before fully tightening screws. Place shelves onto brackets, ensuring they’re firmly attached and level in both directions.
For maximum visual impact and functionality, arrange items in descending size order, with larger pieces at the bottom. Group similar items together and maintain negative space between groupings. Consider the visual weight of objects, balancing heavier-looking items with lighter ones across different shelves. Keep frequently used items at easy-to-reach heights.
Additional Tips: Rotate displayed items seasonally to prevent dust accumulation and maintain fresh appeal. Use small adhesive grip pads on shelf surfaces to prevent items from sliding in corner angles. Consider installing LED strip lighting under shelves for ambient lighting and enhanced visibility. Clean shelves regularly with appropriate products for your shelf material to maintain their appearance and structural integrity.
Recycled Crate Desk Organizers
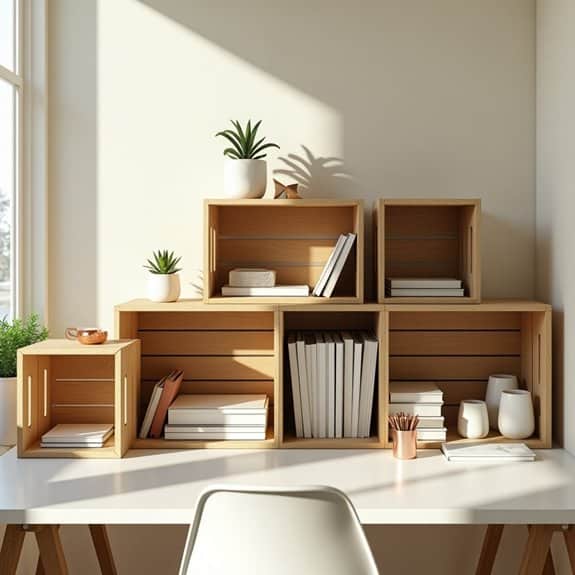
A well-organized desk is essential for productivity and mental clarity, especially in a bedroom workspace where the line between rest and work can easily blur. Recycled wooden crates offer an eco-friendly and aesthetically pleasing solution to desk organization, transforming cluttered surfaces into efficient workstations.
Repurposing wooden crates not only reduces waste but also creates customizable storage solutions that can be adapted to specific needs. These versatile organizers can be stacked, mounted, or arranged horizontally to accommodate everything from books and papers to electronic devices and craft supplies.
Materials Needed:
- Wooden crates (various sizes)
- Sandpaper (medium and fine grit)
- Wood stain or paint
- Paintbrush
- Wood glue
- Screws
- Screwdriver
- Level
- Measuring tape
- Wall anchors (if mounting)
- Clean cloth
- Protective gloves
- Drop cloth
Begin by thoroughly sanding each crate to remove splinters and rough edges, working first with medium-grit sandpaper, then finishing with fine-grit for a smooth surface. Clean the crates with a damp cloth and allow them to dry completely.
Apply your chosen wood stain or paint in thin, even coats, following the wood grain direction, and allow proper drying time between coats.
For desktop organization, arrange the crates based on your specific needs – vertically for files and folders, horizontally for books and supplies, or in combination for maximum versatility.
If mounting crates on the wall, use a level to mark precise locations and install proper wall anchors before securing the crates with screws. For stacked configurations, use wood glue between crates and reinforce with screws at connection points for stability.
Additional Tips: Consider adding small organizers or dividers within the crates for enhanced organization. Install LED strip lighting to illuminate the contents of wall-mounted crates.
Apply felt pads to the bottom of desktop crates to prevent scratching the desk surface. Regular dusting and occasional tightening of screws will maintain the integrity and appearance of your organizers long-term.
Multi-Purpose Ottoman Storage Bench
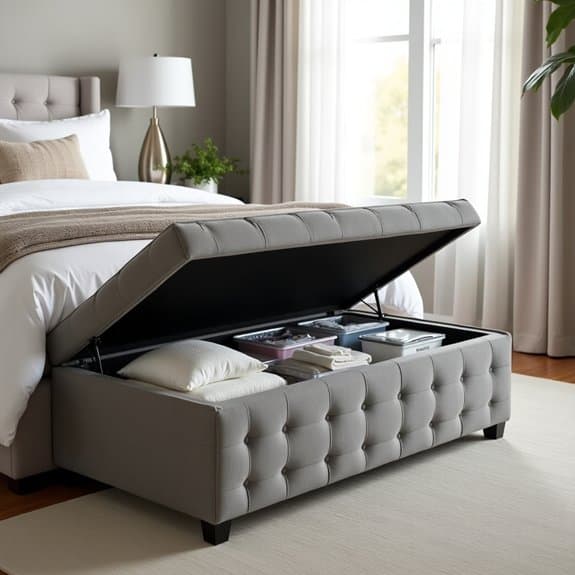
A well-organized ottoman storage bench serves as both a functional seating area and a clever storage solution for bedrooms where space is at a premium. This versatile piece of furniture can hide away seasonal items, extra bedding, or frequently used accessories while maintaining a clean, uncluttered appearance in your bedroom.
Making the most of your ottoman storage bench requires thoughtful organization and a strategic approach to categorizing items. When properly organized, this piece can reduce visible clutter, provide quick access to everyday items, and maximize storage space in even the smallest bedrooms.
Required Items:
- Storage bins or baskets
- Drawer organizers or dividers
- Labels or label maker
- Fabric storage bags
- Clear plastic containers
- Vacuum storage bags
- Measuring tape
- Shelf liner (non-slip)
- Small boxes or containers
Start by emptying the ottoman completely and measuring the interior space. Divide the storage area into zones based on the items you plan to store. Place frequently used items toward the front for easy access, while seasonal items can go toward the back.
Use clear containers or fabric storage bags to group similar items together, such as extra pillowcases with sheets or winter accessories with seasonal clothing. Install non-slip liner on the bottom to prevent containers from sliding around when opening and closing the ottoman.
For optimal organization, consider using vacuum storage bags for bulky items like extra blankets or winter clothing, which can reduce their volume by up to 75%. Stack containers and bags vertically when possible to maximize space and make items easier to locate.
Label everything clearly, including the contents and date of storage for seasonal items.
Additional Tips: Rotate items seasonally to ensure nothing gets forgotten at the bottom of the ottoman. Consider using compression bags for soft items and rigid containers for delicate ones. Review the contents every three months to prevent the accumulation of unnecessary items and maintain organization.
Keep a small inventory list taped inside the lid for quick reference of stored items.
Hanging Branch Jewelry Display
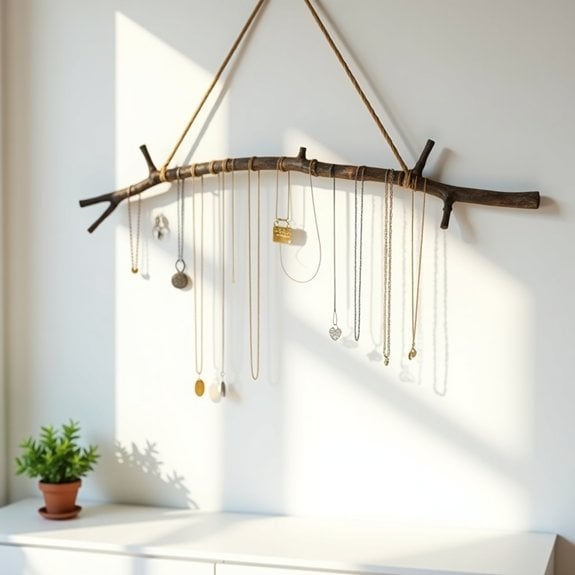
Jewelry organization can be both functional and aesthetically pleasing, transforming tangled necklaces and scattered earrings into an artistic display. A hanging branch jewelry organizer brings a natural, rustic element to your bedroom while keeping accessories visible, accessible, and tangle-free.
Creating a branch jewelry display not only solves storage problems but also adds a unique decorative element to your space. This eco-friendly solution prevents jewelry damage and makes selecting daily accessories more efficient, turning your collection into a practical art installation.
Required Materials:
- Sturdy tree branch (12-24 inches long)
- Strong twine or decorative rope
- Wall hooks or ceiling hooks
- Sandpaper
- Clear sealant or wood polish
- Level
- Drill (optional)
- Small screw eyes (optional)
- Command strips (optional)
Select a branch that’s naturally forked or has multiple smaller branches for hanging pieces. Clean the branch thoroughly with a dry brush and sand down any rough spots. Apply a clear sealant to protect the wood and prevent any deterioration.
Once dry, attach strong twine or rope to both ends of the branch, ensuring it’s balanced. Install wall hooks or ceiling hooks in your desired location, using a level to ensure proper alignment. Hang the branch securely, maintaining even weight distribution. For additional hanging options, install small screw eyes along the bottom of the branch.
Additional smaller branches can be positioned at different angles to create multiple levels for various jewelry types. Arrange necklaces on the main branch, while smaller branches can hold bracelets and dangling earrings. For stud earrings, consider adding a small piece of screen or mesh to one section of the branch.
For optimal organization, group similar pieces together and maintain adequate spacing between items to prevent tangling. Consider the height placement carefully – the display should be easily accessible but high enough to keep longer necklaces from touching furniture or surfaces below.
Regularly dust the branch and jewelry to maintain its natural beauty and prevent buildup that could affect your accessories.

