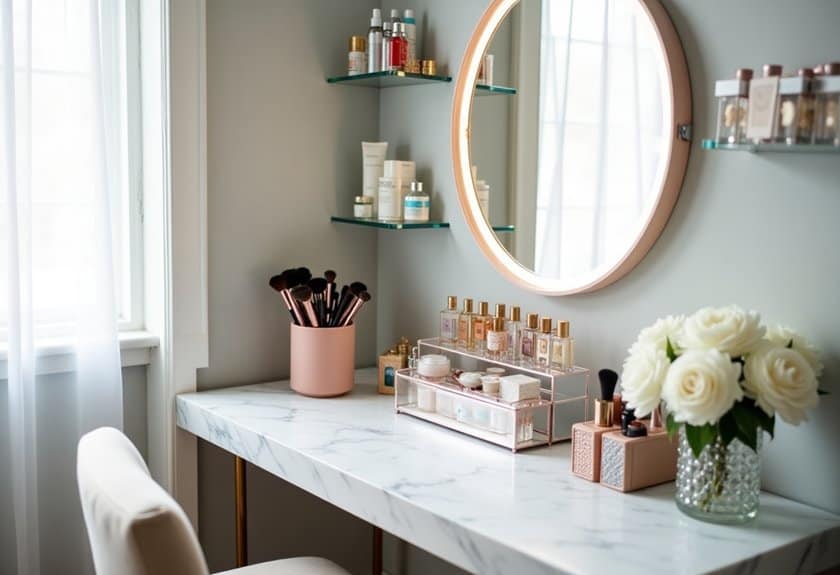
Have you ever wondered why some vanities look like they belong in a magazine while yours resembles organized chaos? You’re not alone! As someone who transformed my own cluttered vanity into a Pinterest-worthy space, I can tell you that the secret lies in smart organization solutions that actually work for your lifestyle. From clear acrylic organizers that display your daily essentials to genius space-saving hacks, you’ll discover how these 15 game-changing ideas can revolutionize your morning routine.

Clear Acrylic Organizers for Daily Essentials
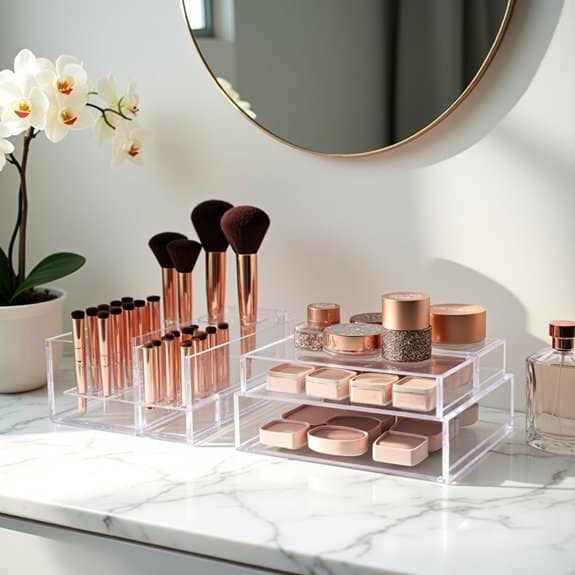
Clear acrylic organizers have revolutionized the way we store and access our daily essentials, combining functionality with aesthetic appeal.
These transparent solutions not only keep items visible and easily accessible but also add a modern, sophisticated touch to any vanity space.
When properly organized, clear acrylic containers transform cluttered surfaces into streamlined, efficient spaces that simplify morning and evening routines. The transparency allows for quick identification of items, while the durable material protects products from dust and maintains their integrity.
Required Items:
- Various sizes of clear acrylic organizers
- Drawer dividers
- Stackable containers
- Lipstick holders
- Brush holders
- Cotton swab/pad containers
- Measuring tape
- Cleaning cloth
- Label maker (optional)
Start by measuring your vanity space and determining the most frequently used items. Group similar products together: face products, eye makeup, lip products, and tools.
Select appropriately sized containers for each category, ensuring they fit within your space constraints. Position the most frequently used items at the front of the organizers, with less-used items toward the back.
For optimal organization, utilize different heights and depths of containers to maximize vertical space. Place taller items like brushes and bottles in deeper containers at the back, while keeping smaller items like lipsticks and compacts in shorter, easily accessible containers at the front.
Consider using stackable organizers to create additional levels of storage while maintaining visibility.
Additional Tips: Clean your acrylic organizers weekly with a soft, damp cloth to prevent dust buildup and maintain clarity. Rotate items seasonally to ensure frequently used products remain easily accessible.
Consider using drawer liners beneath the organizers to prevent sliding and protect surfaces. Regularly assess and declutter your collection to maintain an efficient organization system.
Magnetic Makeup Board Solutions
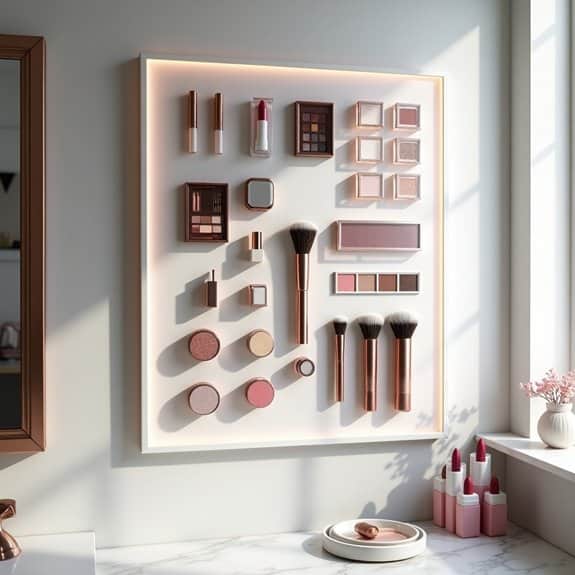
A magnetic makeup board system revolutionizes the way beauty enthusiasts store and access their cosmetics. By utilizing vertical space and magnetic technology, this organization method transforms cluttered bathroom counters and overflowing drawers into an efficient, visually appealing display that makes daily makeup routines smoother and more enjoyable.
Creating a magnetic makeup board not only saves valuable counter space but also allows you to see all your products at once, preventing forgotten items from expiring unused in the back of a drawer. This system is particularly beneficial for those with limited storage space or anyone who appreciates having their everyday items within arm’s reach.
Required Items:
- Large magnetic board or sheet metal
- Strong magnets (various sizes)
- Heavy-duty adhesive strips
- Magnetic tape
- Small magnetic containers
- Labels or label maker
- Mounting hardware
- Scissors
- Cleaning supplies
Start by selecting an appropriately sized magnetic board or sheet metal that fits your available wall space. Clean the wall surface thoroughly and mount the board securely using proper mounting hardware.
Sort through your makeup collection, disposing of expired products and identifying items used most frequently. Apply strong magnets to the backs of makeup products using heavy-duty adhesive or magnetic tape, ensuring the magnets can support the weight of each item.
For loose items like individual eyeshadows or small brushes, utilize magnetic containers to create organized groupings. Arrange products on the board by category, keeping frequently used items at eye level and grouping similar products together. Consider creating zones for daily essentials, special occasion items, and seasonal products.
To maintain the effectiveness of your magnetic makeup board, regularly check the strength of magnets and adhesive strips, replacing them as needed. Consider adding LED lighting around the board for better visibility, and rotate products seasonally to prevent cluttering the space with unused items.
Keep a small basket nearby for items that don’t work well with magnets, ensuring your entire collection remains organized and accessible.
Drawer Dividers and Compartments
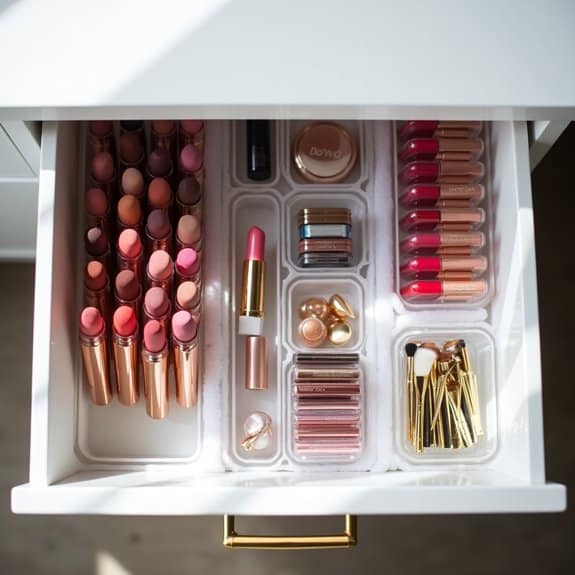
A well-organized vanity drawer system is essential for maintaining order in your daily beauty and grooming routine. When cosmetics, tools, and personal care items are properly sorted and compartmentalized, you can easily locate what you need, reducing morning stress and saving valuable time.
Drawer dividers and compartments transform chaotic spaces into efficient storage solutions, preventing items from sliding around and becoming mixed together. This organization method also helps extend the life of your beauty products by preventing damage from items bumping against each other, while making it easier to track expiration dates and inventory.
Required Items:
- Drawer dividers (adjustable or fixed)
- Small containers or bins
- Drawer liner material
- Measuring tape
- Scissors
- Labels or label maker
- Clear drawer organizers
- Small storage boxes
- Drawer space maximizers (tiered organizers)
Start by removing everything from your drawers and measuring the interior dimensions. Select dividers that fit your drawer depth and width, considering both adjustable and fixed options based on your needs.
Group similar items together: makeup brushes, lip products, eye products, and tools. Install drawer liners to prevent items from sliding and protect the drawer surface.
Position the larger dividers first to create main sections, then use smaller compartments or containers within these sections for detailed organization. Arrange items by frequency of use, keeping daily essentials in the most accessible spots.
For deeper drawers, implement tiered organizers to maximize vertical space and visibility.
For optimal maintenance and longevity of your organization system, regularly assess and adjust compartment sizes as your collection changes. Clean dividers monthly, and consider using clear containers to easily identify contents.
Implement a rotation system for seasonal items, keeping current products at the front while storing others in secondary storage areas. This systematic approach ensures your drawer organization remains functional and efficient long-term.
Rotating Carousel Storage Systems
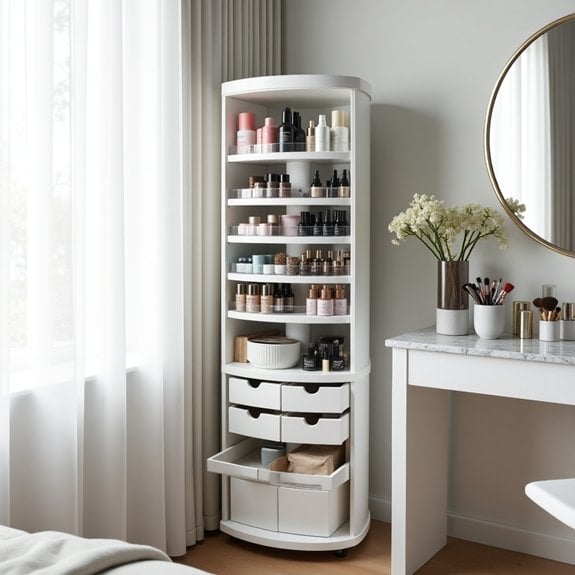
A well-organized rotating carousel storage system transforms cluttered vanity spaces into efficient, accessible storage areas that maximize vertical space while minimizing footprint.
These innovative systems allow quick access to cosmetics, skincare products, and beauty tools through a simple spinning motion, eliminating the need to dig through drawers or reach into deep cabinets.
The rotating design specifically addresses common vanity organization challenges by utilizing corner spaces and awkward areas that typically go unused.
When properly organized, carousel systems can reduce morning routine times, preserve product shelf life through proper storage, and create a more enjoyable beauty routine experience.
Required Items:
- Rotating carousel organizer
- Clear storage containers
- Label maker
- Measuring tape
- Cleaning cloths
- Storage bins of varying sizes
- Drawer dividers
- Anti-slip liner
- Small containment trays
- Product category separators
Begin by thoroughly cleaning the carousel system and measuring each shelf’s dimensions.
Sort all items into clear categories: daily essentials, occasional use products, and seasonal items.
Place frequently used products on middle shelves at eye level, with heavier items on bottom tiers for stability.
Arrange products by category, keeping skincare together, makeup in another section, and hair products in their designated area.
Use clear containers or bins to group smaller items together, preventing them from toppling during rotation.
Consider the motion of the carousel when placing items – taller products should be centered, with shorter ones toward the outer edges to maintain smooth rotation.
Install drawer dividers or small containment trays to prevent items from shifting during movement.
Label each section clearly to maintain organization long-term.
Enhancement Tips: Implement a regular maintenance schedule to review and rotate products based on expiration dates.
Install battery-operated LED lights to improve visibility in shadowed areas of the carousel.
Consider using adjustable shelf heights to accommodate products of varying sizes, and maintain a product inventory list to prevent overbuying.
Regular cleaning of both the carousel mechanism and storage containers will ensure smooth operation and extend the system’s longevity.
Decorative Glass Jars for Beauty Tools

Organizing beauty tools in decorative glass jars transforms a cluttered vanity into an elegant, boutique-inspired space while making daily routines more efficient. Clear containers allow for quick identification of items and create a visually appealing display that encourages maintaining organization long-term.
When beauty tools are properly organized in designated containers, they remain protected from dust, moisture, and other environmental factors that can affect their performance and longevity. Glass jars also provide the flexibility to adjust organization systems as needs change, while maintaining a cohesive aesthetic that enhances the overall appearance of your vanity space.
Required Items:
- Assorted decorative glass jars with lids
- Glass cleaner
- Microfiber cloth
- Labels or label maker
- Decorative filler (glass beads, sand, or rice)
- Small organizing bins or dividers
- Beauty tools and accessories
- Cotton swabs and cotton balls
- Measuring tape
Start by measuring your vanity space and selecting appropriately sized glass jars that will fit comfortably while allowing easy access to tools. Clean all jars thoroughly with glass cleaner and allow them to dry completely.
Pour a layer of decorative filler into tall jars intended for makeup brushes, ensuring brushes will stand upright without tipping. For items like cotton swabs and beauty sponges, choose jars with airtight lids to prevent dust accumulation.
Group similar tools together and assign them to specific jars based on frequency of use and size requirements. Place frequently used items in easily accessible containers at the front of your vanity. Create clear labels for each jar to maintain organization and consider using drawer dividers or small bins within larger jars to separate items like hair clips or bobby pins.
Additional Tips:
Review and declutter your beauty tool collection quarterly, removing damaged or unused items. Rotate seasonal tools to maintain organized spaces and prevent overcrowding.
Consider using jar risers or tiered displays to maximize vertical space and improve visibility of items stored in back rows. Clean jars monthly to maintain clarity and hygiene, and adjust filler levels as needed to keep tools properly positioned.
Wall-Mounted Floating Shelves
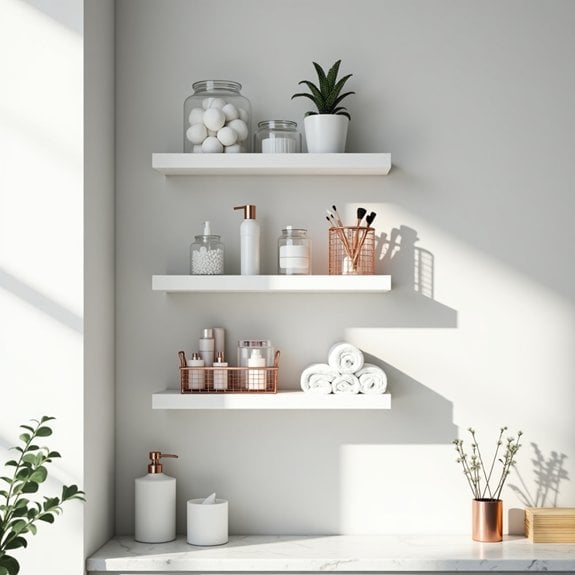
Wall-mounted floating shelves represent a modern and space-efficient solution for organizing bathroom essentials while maintaining a clean, minimalist aesthetic. These versatile storage solutions create the illusion of more space by utilizing vertical wall areas that would otherwise go unused.
When properly organized, floating shelves transform cluttered vanity countertops into streamlined spaces while keeping frequently used items within easy reach. This organizational method not only improves functionality but also adds a decorative element to your bathroom, allowing you to display items in an aesthetically pleasing manner.
Required Items:
- Level
- Measuring tape
- Pencil
- Wall anchors
- Screwdriver
- Floating shelves
- Decorative containers
- Small baskets
- Clear acrylic organizers
- Labels
- Glass jars
- Shelf liner (non-slip)
Start by determining optimal shelf placement by measuring the available wall space and marking where each shelf will be mounted. Install the floating shelves according to manufacturer instructions, ensuring they’re level and securely anchored.
Group similar items together (skincare, hair products, makeup) and assess which items are used daily versus occasionally to determine their placement on the shelves. Arrange items by frequency of use, placing daily essentials at eye level and occasional-use items on higher or lower shelves.
Utilize decorative containers and baskets to corral smaller items, preventing them from becoming disorganized. Clear acrylic organizers work well for makeup and smaller toiletries, while glass jars can store cotton balls, q-tips, and other bathroom essentials.
For maximum organization efficiency, implement a regular maintenance schedule to prevent clutter accumulation. Consider rotating seasonal items, regularly check expiration dates on products, and adjust shelf arrangements based on changing needs.
Using clear containers makes it easy to monitor product levels, while adding labels ensures everyone in the household can maintain the organizational system effectively.
Under-Vanity Storage Baskets
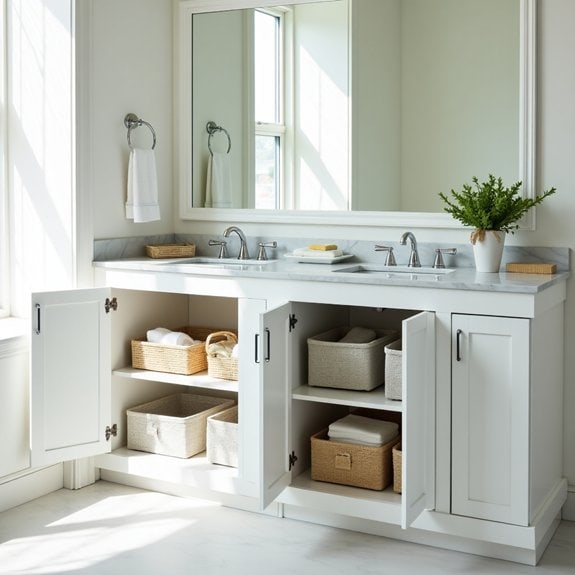
The space beneath a bathroom vanity often becomes a chaotic catch-all for toiletries, cleaning supplies, and various bathroom essentials. Without proper organization, this valuable storage area can quickly transform into a cluttered maze where items become lost or forgotten, leading to unnecessary duplicate purchases and daily frustration.
Implementing an effective under-vanity storage system using baskets creates designated spaces for different categories of items, making them easily accessible and visible. This organization method not only maximizes the available space but also protects your belongings from moisture and maintains a clean, orderly appearance that simplifies your daily routine.
Required Items:
- Measuring tape
- Storage baskets of various sizes
- Label maker or labels
- Drawer liner or shelf liner
- Pull-out organizers (optional)
- Clear storage containers
- Cleaning supplies
- Sorting bins for categorizing
Start by completely emptying the under-vanity space and thoroughly cleaning all surfaces. Measure the available space, accounting for plumbing fixtures and any permanent obstacles. Select appropriately sized baskets that maximize vertical and horizontal space while allowing easy access to items.
Group similar items together, such as cleaning supplies, backup toiletries, or hair care products. Assign each category to a specific basket, positioning frequently used items toward the front and occasional-use items toward the back.
Place moisture-resistant liner on the bottom of the cabinet to protect both the surface and your belongings. Arrange the filled baskets in their designated spaces, ensuring handles or openings face outward for easy access. For deep cabinets, consider using pull-out organizers to prevent items from getting lost in the back. Label each basket clearly to maintain the organization system long-term.
Additional Tip: Review and rotate your under-vanity storage contents quarterly, discarding expired products and reorganizing based on seasonal needs or changing usage patterns. Consider using clear containers for frequently accessed items and implementing a “one-in-one-out” rule to prevent future clutter accumulation.
Stackable Jewelry Organizers
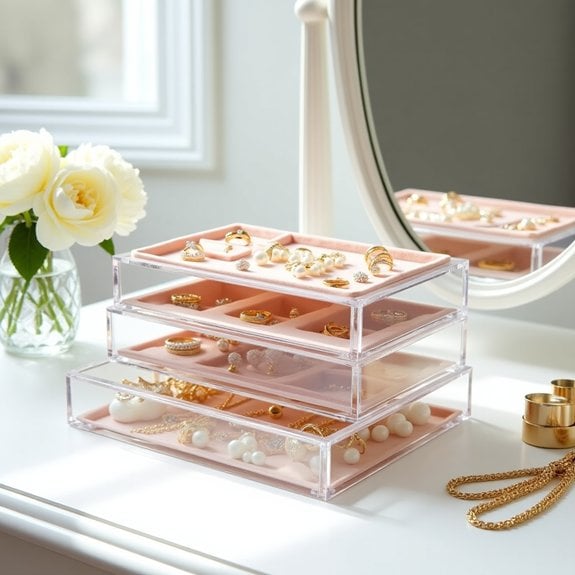
A well-organized jewelry collection not only preserves your precious pieces but also transforms your daily routine into a seamless experience. When jewelry is properly stored in stackable organizers, you eliminate the frustration of tangled necklaces, mismatched earrings, and the time-consuming search for specific pieces.
Stackable jewelry organizers maximize vertical space while keeping items visible and accessible. This systematic approach to jewelry storage prevents damage, tarnishing, and loss while creating an aesthetically pleasing display that can turn your vanity into a boutique-like experience.
Required Items:
- Stackable jewelry trays
- Velvet or felt liner
- Ring rolls
- Earring holders
- Necklace hooks
- Clear dividers
- Drawer measurement tape
- Cleaning cloth
- Jewelry cleaning solution
- Small storage boxes for overflow
Start by measuring your drawer or vanity space to determine the appropriate size and number of stackable trays needed. Sort your jewelry by category: rings, necklaces, bracelets, and earrings. Place the most frequently worn pieces in the top trays for easy access. Line each tray with velvet or felt to prevent scratching and sliding.
Configure the trays with appropriate inserts based on your collection. Use ring rolls for rings, vertical slots for necklaces, and compartmented sections for earrings and smaller pieces. Stack the trays from largest items at the bottom to smallest at the top, ensuring each layer can be easily lifted without disturbing others.
For optimal organization maintenance, regularly assess your collection, removing pieces you no longer wear. Clean each item before placing it in its designated spot, and consider using silica gel packets in each tray to prevent tarnishing. Rotate seasonal pieces to top trays during their respective seasons, and keep special occasion jewelry in lower trays when not in use.
LED-Lit Mirror Storage Cabinets
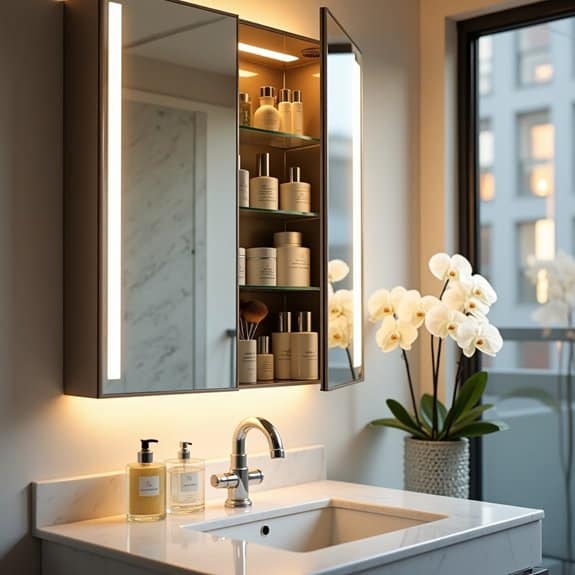
LED-lit mirror storage cabinets represent a perfect fusion of functionality and modern design in bathroom organization.
These innovative storage solutions not only provide excellent lighting for grooming tasks but also offer valuable space to keep toiletries, medications, and beauty products organized and easily accessible.
The combination of proper lighting and storage makes these cabinets particularly effective for maintaining an organized bathroom routine.
When properly organized, these cabinets can transform a cluttered vanity into a streamlined space while providing optimal visibility for daily grooming tasks, regardless of ambient lighting conditions.
Required Items:
- Clear acrylic organizers
- Small storage bins
- Adhesive shelf liners
- Label maker
- Measuring tape
- Microfiber cleaning cloth
- Glass cleaner
- Small hooks or adhesive hangers
- Drawer dividers
- Battery-operated motion sensor lights (if needed)
Begin the organization process by completely emptying the cabinet and cleaning all surfaces thoroughly.
Group similar items together: daily essentials, occasional-use products, medications, and backup supplies.
Install shelf liners to protect the interior surfaces and provide grip for stored items.
Position frequently used items at eye level, with less-used items stored higher or lower.
Utilize clear organizers to separate different categories of items, ensuring all products remain visible and accessible.
For optimal functionality, arrange items based on usage patterns and maintain clear zones for different purposes.
Keep everyday items in the middle shelves, emergency supplies on top shelves, and cleaning supplies on bottom shelves.
Install additional motion-sensor lights in darker corners if needed, and use adhesive hooks on the cabinet doors for hanging smaller items like tweezers or dental tools.
To maintain the organized system, implement a quarterly review schedule to check expiration dates, clean shelves, and reassess item placement.
Consider installing humidity-control packets to protect sensitive items, and maintain a list of inventory on the inside of the cabinet door to track supplies and replacement needs.
Regular maintenance will ensure the cabinet remains both functional and organized over time.
Makeup Brush Holders and Stands
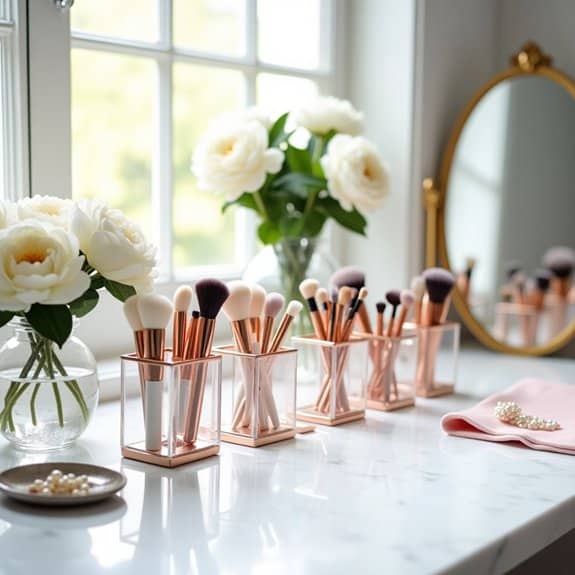
Organizing makeup brushes is essential for maintaining their quality and extending their lifespan. Properly stored brushes retain their shape, prevent bacterial growth, and remain easily accessible for daily use. When brushes are organized thoughtfully, they’re protected from dust, debris, and cross-contamination, ensuring a more hygienic makeup application process.
A well-organized brush storage system not only protects your investment but also streamlines your beauty routine. Having brushes displayed in an organized manner allows you to quickly identify and select the right tool for each application, saving valuable time during your makeup routine while creating an aesthetically pleasing vanity setup.
Required Items:
- Makeup brush holders or organizers
- Acrylic dividers
- Glass jars or containers
- Brush cleaning mat
- Measuring tape
- Drawer liner or non-slip mat
- Clean microfiber cloth
- Brush cleaner or gentle soap
- Clear elastic bands
- Labels or label maker
Start by thoroughly cleaning all makeup brushes using appropriate brush cleaner or gentle soap. Once dry, sort brushes by category (face, eyes, lips) and size. Measure your vanity space to determine the best placement for your brush holders. Position taller holders toward the back of your vanity and shorter ones in front for easy access.
For brushes stored upright, place them handle-down in containers to prevent moisture from seeping into the ferrules and damaging the glue. For drawer storage, use acrylic dividers to create designated sections for different brush types. Line the drawer with non-slip material to prevent holders from sliding.
Consider implementing a rotating system where frequently used brushes are placed in easily accessible spots while specialty brushes can be stored in secondary locations.
Additional Tips: Implement a regular cleaning schedule and rotate brush positions periodically to ensure even wear. Use clear containers to easily identify brushes and consider color-coding or labeling systems for different brush categories. Keep brushes away from direct sunlight and bathroom humidity to prevent deterioration.
Consider seasonal reorganization to accommodate changing makeup routines and new brush additions.
Hidden Cable Management Systems
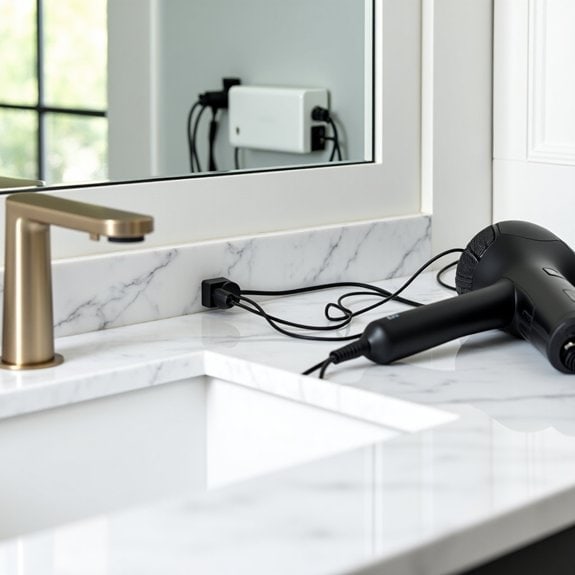
In today’s digitally connected world, the tangle of cables beneath our vanities can quickly become an unsightly and frustrating mess. From hair styling tools to charging devices, these necessary cords can create visual clutter and make it difficult to access and use our daily essentials efficiently.
Implementing a hidden cable management system not only creates a cleaner aesthetic but also protects your electronic devices and extends their lifespan. A well-organized cable system prevents wire damage, reduces fire hazards, and makes it easier to clean around your vanity area while maintaining a spa-like atmosphere in your personal space.
Required Items:
- Cable clips or adhesive cord holders
- Cable ties or velcro straps
- Power strip or surge protector
- Cord concealment raceway
- Command hooks
- Cable management box
- Drill and screws (if mounting)
- Measuring tape
- Wire labels
- Scissors
Start by unplugging all devices and laying out your cables to assess their lengths and determine the most efficient routing paths. Install a power strip in an accessible location, preferably mounted to the back or side of your vanity cabinet.
Create a main cable pathway using a cord concealment raceway, which can be mounted along the cabinet’s interior walls or under the countertop. Group similar cables together using cable ties or velcro straps, maintaining loose enough bundles to prevent strain on the wires.
Install cable clips at strategic points to guide the cords along your planned route, ensuring they stay hidden from view while remaining accessible for device use. For frequently used items like hair tools, position cord holders near the front of the cabinet for easy access while keeping excess cord length organized in the back.
To maximize your cable management system’s effectiveness, label each cord for quick identification, and leave a small amount of slack in the cables to prevent tension when devices are in use.
Consider installing a dedicated cable management box to house power strip and excess cord lengths, and periodically inspect your cable system to ensure all components remain secure and undamaged. Maintain flexibility in your system to accommodate new devices or changes in your vanity setup.
Space-Saving Corner Shelf Units
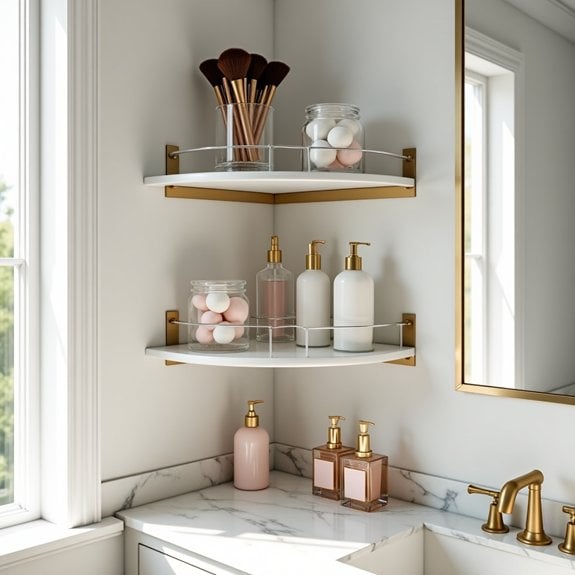
Corner shelf units represent one of the most underutilized yet valuable storage solutions in vanity organization. These strategic pieces transform dead corner space into functional storage areas, maximizing every inch of your vanity while maintaining easy access to daily essentials.
Their tiered design allows for vertical storage, effectively multiplying your available space without expanding your footprint. When properly organized, corner shelf units create designated zones for different categories of items, from skincare products to makeup collections, while keeping everything visible and within reach.
This systematic approach not only streamlines your daily routine but also helps maintain order and prevent product overflow, ultimately leading to better space management and reduced clutter.
Required Items:
- Corner shelf unit (2-3 tiers recommended)
- Clear storage containers
- Label maker or labels
- Non-slip shelf liner
- Measuring tape
- Cleaning supplies
- Small organizing bins
- Clear drawer dividers
- Dust-proof containers
Start by thoroughly cleaning the corner area and measuring the space to ensure proper fit of your shelf unit. Install the corner shelf unit according to manufacturer instructions, ensuring it’s level and secure.
Apply non-slip liner to each tier to prevent items from sliding. Categorize your items into groups: daily essentials, occasional use, and seasonal items. Position the most frequently used items on the middle shelf at eye level, heavier items on the bottom tier, and lighter, less-used items on top.
Create zones within each tier using clear containers or dividers to maintain organization. Store similar items together, such as facial products, hair accessories, or makeup tools. Consider using stackable containers to maximize vertical space within each tier.
Ensure proper spacing between items to maintain air circulation and prevent product damage. For optimal maintenance, implement a monthly review system to rotate products, check expiration dates, and reassess your organization system.
Use clear containers to easily identify contents, and maintain a “one-in-one-out” policy to prevent overcrowding. Consider adding small LED strips under each tier for better visibility, and keep a small notepad nearby to track items that need replenishing.
Pull-Out Storage Trolleys
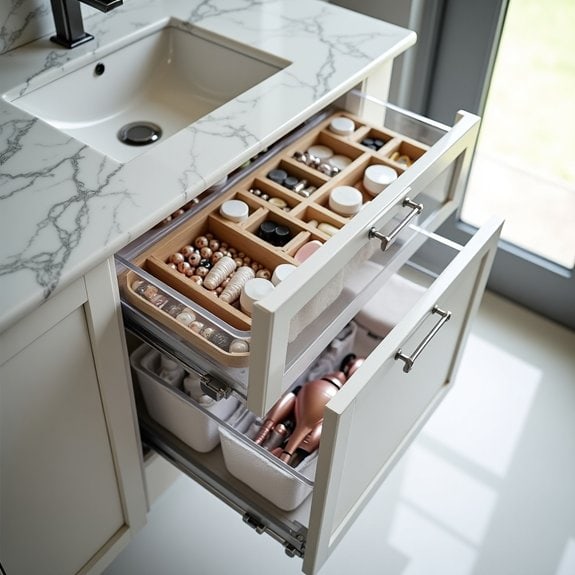
Pull-out storage trolleys represent a game-changing solution for maximizing the often-underutilized space beneath vanities and in bathrooms. These versatile units transform dead space into accessible, organized storage areas that can accommodate everything from beauty products to cleaning supplies.
The key to successful pull-out storage lies in creating designated zones within the trolley while maintaining easy access to frequently used items. When properly organized, these mobile units can significantly reduce morning routine time and maintain a clutter-free bathroom environment.
Required Items:
- Pull-out storage trolley
- Clear storage containers
- Drawer dividers
- Labels
- Measuring tape
- Shelf liner
- Small bins or baskets
- Cleaning supplies
- Drawer organizers
- Clear adhesive hooks
Start by measuring your vanity space and selecting an appropriately sized pull-out trolley. Clean the area thoroughly and install shelf liner to protect against moisture.
Divide the trolley into zones based on frequency of use: daily items on top, weekly items in the middle, and occasional-use items at the bottom. Use clear containers and drawer organizers to create designated spaces for different categories of items, such as skincare, hair care, and makeup.
Label each container clearly and position items so that the most frequently used products are at the front of each drawer or shelf. Implement a system where items are returned to their designated spots immediately after use.
Consider using stackable containers to maximize vertical space within each drawer, and ensure that heavier items are stored in lower sections for stability.
For optimal organization maintenance, conduct a monthly review of stored items, discarding expired products and reassessing the arrangement based on changing needs.
Install small adhesive hooks on the sides of the trolley for hanging items like hair tools or washcloths, and consider using drawer stops to prevent the unit from rolling too far out. Regular cleaning of both the trolley and containers will help maintain organization and extend the life of your storage solution.
Multi-Tier Desktop Organizers
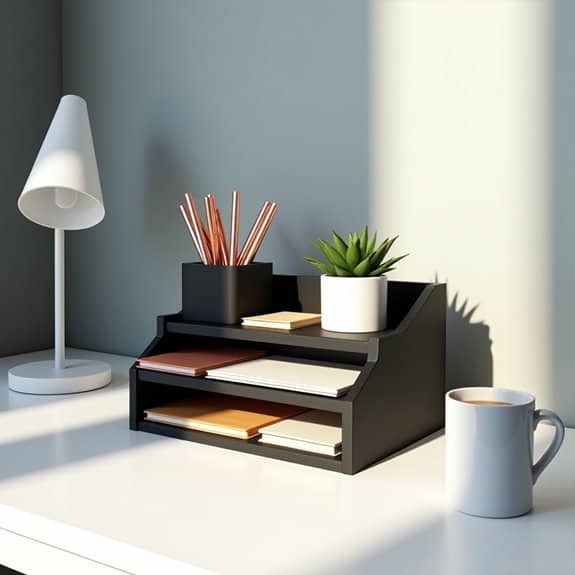
A well-organized desktop is essential for maintaining productivity and mental clarity in any workspace. Multi-tier desktop organizers maximize vertical space while keeping frequently used items visible and easily accessible, transforming cluttered surfaces into efficient, functional areas.
The strategic use of multi-tier organizers creates designated zones for different categories of items, preventing the daily accumulation of scattered supplies and papers. This systematic approach not only enhances workflow but also contributes to a more professional and aesthetically pleasing environment.
Required Items:
- Multi-tier desktop organizer
- Label maker or labels
- Drawer dividers or small containers
- Document trays
- Pen/pencil holders
- File folders
- Small storage boxes
- Cable management clips
- Cleaning supplies
- Measuring tape
Begin by clearing the entire desktop surface and measuring the available space to determine the optimal placement of your multi-tier organizer. Sort items into categories: frequently used items, occasional-use supplies, and archive materials. Position the organizer in a spot that allows easy access while maintaining clear sightlines across your workspace.
Assign specific functions to each tier of the organizer. The top tier should house daily essentials like writing implements, notepads, and sticky notes. The middle tier works well for current projects and active files, while the bottom tier can accommodate less frequently accessed materials or reference documents. Implement a color-coding system or clear labels to maintain organization long-term.
Additional Tips:
Review and adjust your organizational system every few weeks to ensure it continues meeting your needs. Remove any items that haven’t been used in three months, and consider implementing a one-in-one-out rule for new supplies.
Position the most frequently used items within arm’s reach, and maintain clear zones around the organizer for temporary workspace. Regular maintenance of your system will prevent the gradual return of desktop clutter.
Customizable Drawer Label Systems
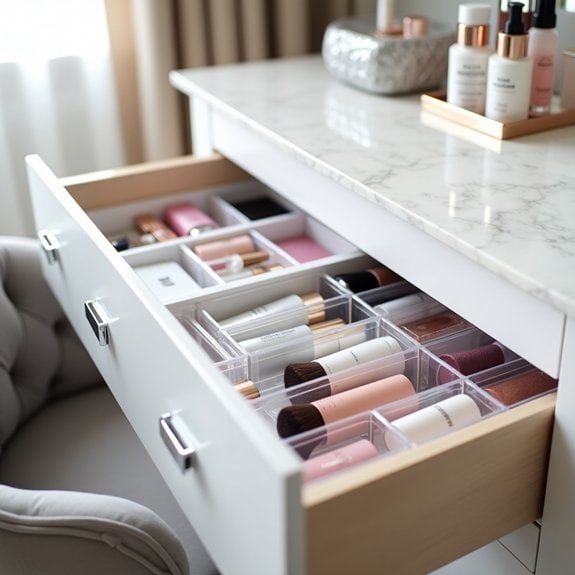
Creating an effective labeling system for vanity drawers transforms a cluttered, chaotic space into an efficient, easy-to-maintain organizational system. When everything has a designated spot and clear identification, daily routines become streamlined, and maintaining order becomes second nature rather than a constant struggle.
Customizable drawer labels not only help maintain organization but also create a personalized system that works specifically for your needs and preferences. Whether managing makeup, skincare products, hair accessories, or general toiletries, a well-planned label system ensures items return to their proper places and makes it simple for everyone in the household to maintain order.
Required Items:
- Label maker or printer
- Clear label tape
- Measuring tape
- Scissors
- Clean microfiber cloth
- Rubbing alcohol
- Template paper
- Pen and paper
- Clear drawer organizers
- Adhesive label holders (optional)
- Water-resistant clear tape (optional)
Start by completely emptying all drawers and grouping similar items together to determine necessary categories. Measure each drawer’s dimensions and create a preliminary layout sketch, noting where different categories will be stored.
Clean all drawer surfaces thoroughly with rubbing alcohol and allow them to dry completely. Create labels that clearly identify each category, ensuring the font is easily readable and the size is proportionate to the drawer or organizer space.
Apply labels consistently, either on the front of drawer organizers or along the top edge of each drawer section, maintaining a uniform height and alignment throughout. Always include a buffer zone in each labeled section to accommodate new items or seasonal changes in your storage needs.
If using clear drawer organizers, place labels on both the container and the drawer itself to maintain organization when removing containers for cleaning.
Additional Tips: Consider using color-coding or symbols alongside text labels for quick visual recognition. Implement a review system every three months to adjust labels and categories based on changing needs. Use waterproof labels in areas prone to moisture, and keep extra labels on hand for quick replacements.
Consider incorporating inventory counts on labels for frequently replenished items to maintain optimal stock levels.

