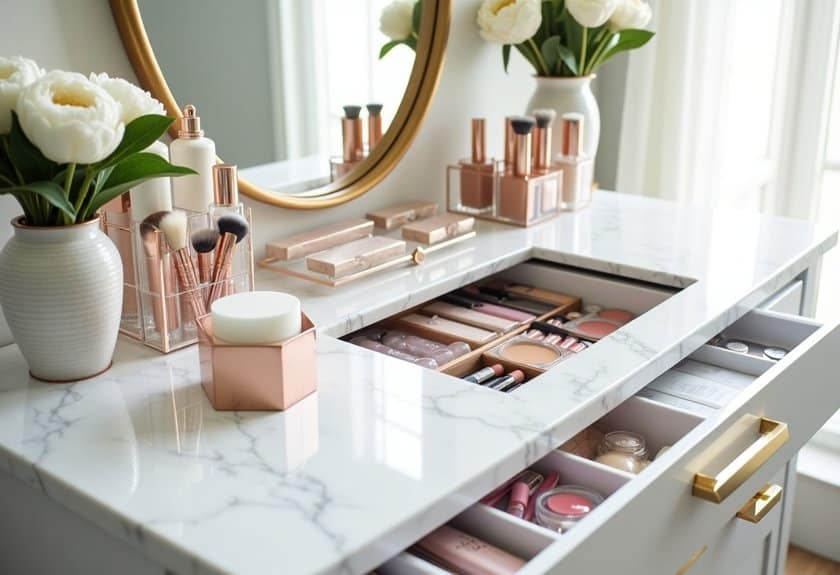
You’ve probably experienced that frustrating moment when you can’t find your favorite lipstick among the chaos of your vanity setup. Trust me, I’ve been there! But transforming your space from cluttered to chic doesn’t have to be overwhelming. Whether you’re working with a compact corner or a spacious dressing area, these 15 brilliant organization ideas will help you create a stunning and functional vanity that makes getting ready feel like a luxury experience. Let’s explore how to turn your beauty station into an Instagram-worthy space.

Clear Acrylic Drawer Organizers for Makeup Storage
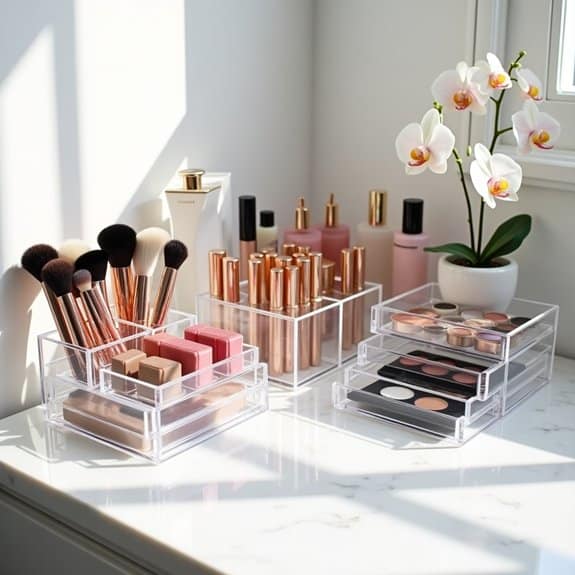
A well-organized makeup collection can transform your daily beauty routine from chaotic to streamlined, saving valuable time and ensuring you actually use the products you own. Clear acrylic organizers specifically designed for makeup storage offer an elegant solution that keeps items visible, accessible, and protected from dust and debris.
The transparency of acrylic organizers allows you to instantly locate items while maintaining a clean, sophisticated aesthetic. These organizers prevent the common frustration of forgotten products buried at the bottom of makeup bags or scattered across countertops, while their durability ensures long-lasting organization.
Required Items:
- Clear acrylic drawer organizers in various sizes
- Measuring tape
- Drawer dimensions
- Paper and pen for planning
- Cleaning supplies
- Labels (optional)
- Drawer liner (optional)
Start by removing all makeup items from their current storage and sorting them into categories: face products, eye products, lip products, and tools. Measure your drawer space and plan the arrangement of acrylic organizers to maximize storage capacity. Select organizers with appropriate compartment sizes for your specific products – larger spaces for palettes and foundations, smaller divisions for lipsticks and mascaras.
Consider stacking or nesting options to utilize vertical space effectively.
Position the organizers in your drawer, starting with the most frequently used items in the front and occasional-use products toward the back. Group similar items together, ensuring that all product labels are visible. If using multiple drawers, dedicate each drawer to specific categories or steps in your makeup routine.
For optimal organization maintenance, wipe down acrylic organizers monthly with a gentle cleanser, avoiding harsh chemicals that could cloud the material. Consider using drawer liners underneath organizers to prevent sliding, and implement a regular decluttering schedule to remove expired products.
Label compartments if needed, and adjust the arrangement seasonally based on your changing makeup preferences and usage patterns.
Vintage-Inspired Decorative Trays and Stands
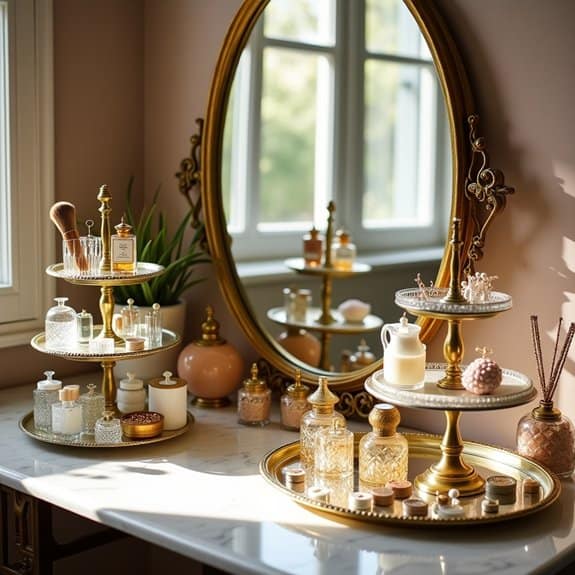
Vintage-inspired decorative trays and stands bring both functionality and timeless elegance to vanity organization. These classic pieces transform everyday beauty items into sophisticated displays while keeping essential items within easy reach. The combination of practical storage and aesthetic appeal creates an organized space that feels more like a luxury boutique than a cluttered bathroom counter.
The key to successful vintage-inspired vanity organization lies in selecting pieces that complement your existing décor while providing adequate space for your daily essentials. Antique-style trays and stands not only add character to your space but also help establish designated zones for different categories of items, making your morning routine more efficient and enjoyable.
Required Items:
- Tiered vintage-style cake stands
- Mirrored vanity trays
- Antique perfume trays
- Glass apothecary jars
- Decorative small dishes
- Metal or ceramic stands
- Vintage jewelry holders
- Antique-inspired makeup brush holders
- Pearl or crystal-adorned containers
- Brass or copper organizing racks
Start by sorting your vanity items into categories: daily essentials, occasional use items, and decorative pieces. Place your most frequently used items on easily accessible vintage trays at the front of your vanity. Utilize tiered stands for vertical organization, placing taller items on the bottom tier and smaller items on upper tiers.
Position mirrored trays strategically to reflect light and create the illusion of more space while displaying perfume bottles and decorative containers. Arrange makeup brushes in ornate holders toward the back of the vanity, ensuring they’re still within reach but not taking up prime real estate. Use small vintage dishes for organizing daily jewelry or hair accessories.
Consider incorporating apothecary jars for cotton balls, swabs, and other bathroom essentials, maintaining the vintage aesthetic while providing practical storage solutions.
Additional Tip: When selecting vintage-inspired pieces, choose items with protective feet or add felt pads to prevent scratching your vanity surface. Regularly dust and clean your organizational pieces to maintain their luster, and periodically reassess your arrangement to ensure it continues to serve your needs effectively.
Consider rotating seasonal items to keep your vanity functional and prevent overcrowding of your beautiful vintage displays.
Rotating Carousel Display for Daily Essentials
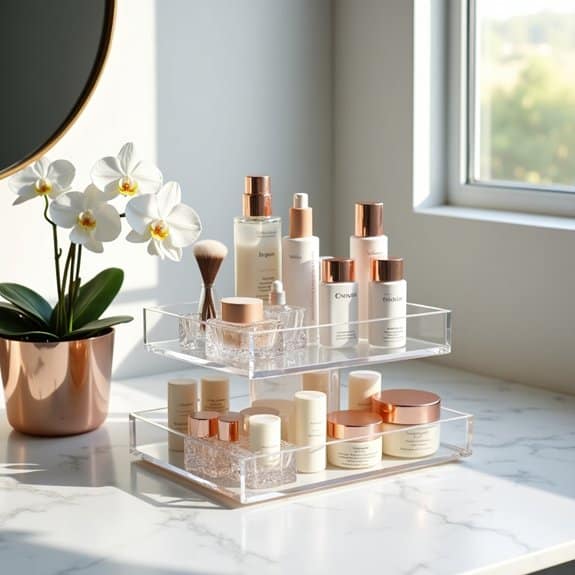
A well-organized rotating carousel display transforms your daily beauty and skincare routine from chaotic to streamlined. By keeping frequently used items within arm’s reach and visible at all times, you eliminate the frustration of digging through drawers or knocking over products while searching for what you need.
The rotating carousel concept maximizes vertical space while providing easy access to products you use daily. This organizational method not only saves time during your morning routine but also helps track product usage, prevents items from expiring unused in the back of cabinets, and creates an aesthetically pleasing display that enhances your vanity’s overall appearance.
Required Items:
- Multi-tier rotating carousel organizer
- Clear organizing containers or dividers
- Adhesive non-slip grips
- Label maker or labels
- Measuring tape
- Cleaning supplies
- Small risers or platforms
- Container for overflow items
Position your carousel in an easily accessible spot on your vanity, ensuring adequate clearance for rotation. Categorize your daily essentials into groups: skincare, makeup, hair products, and tools. Place the most frequently used items on the middle tier for optimal reach, heavier items on the bottom tier for stability, and lighter items on top.
Use small containers or dividers within each tier to prevent items from falling during rotation and create designated spaces for different product categories. Consider height variations when arranging products, using risers to elevate shorter items for visibility. Install non-slip grips on each tier to prevent containers from sliding, and apply clear labels to maintain organization.
Group similar items together and arrange them by frequency of use, keeping your daily essentials front and center. To maintain optimal functionality, regularly assess your carousel’s contents and remove items you no longer use daily. Clean the carousel monthly to prevent product residue buildup, and adjust product placement based on seasonal changes in your routine.
Consider keeping a backup organizer for less frequently used items, allowing your carousel to remain dedicated to true daily essentials without becoming overcrowded.
Magnetic Board Systems for Metal Palettes
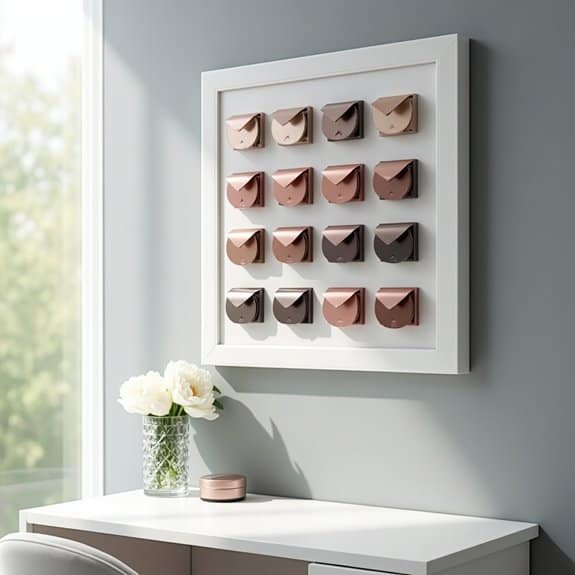
Organizing makeup palettes can be a constant challenge for beauty enthusiasts, often resulting in cluttered vanities and forgotten products buried in drawers. Magnetic board systems offer an innovative solution that transforms storage into an accessible, visible display while maximizing vertical space and keeping products within easy reach.
A well-organized magnetic palette system not only protects your investment in cosmetics but also streamlines your daily routine. When metal palettes are arranged vertically on magnetic boards, you can instantly see your collection, assess your inventory, and select products efficiently without rummaging through stacks of containers.
Required Items:
- Magnetic board or sheet metal
- Strong mounting hardware
- Magnetic strips or dots
- Metal makeup palettes
- Level
- Pencil
- Drill and screws
- Wall anchors
- Measuring tape
- Cleaning supplies
The installation process begins with selecting an appropriate wall space and measuring the area needed for your magnetic board. Mount the board securely using wall anchors and screws, ensuring it’s perfectly level.
Clean both the board surface and the back of your metal palettes thoroughly. Apply magnetic strips or dots to palettes that aren’t already magnetic, spacing them evenly to distribute weight. Arrange palettes on the board, starting with larger items at the bottom and working upward with medium and smaller pieces. Test the magnetic hold of each palette before finalizing its position.
For optimal organization and safety, maintain at least one inch of space between palettes to prevent scratching and allow easy removal. Consider grouping products by type, brand, or color story to create an intuitive system.
Regularly dust both the board and palettes to maintain magnetic strength and product cleanliness. Create a rotation system where frequently used items are placed at eye level, while special occasion products can be stored higher or lower.
Check mounting hardware periodically to ensure the system remains secure and stable.
LED-Lit Mirror Storage Solutions
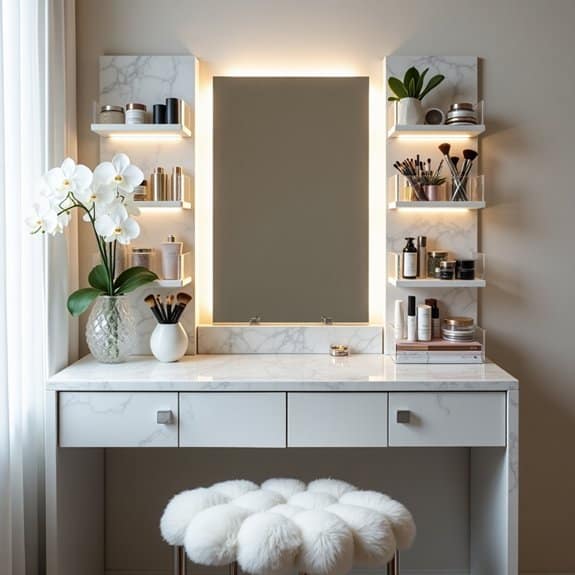
Proper organization of LED-lit mirror storage spaces combines functionality with aesthetics, creating an efficient and luxurious vanity experience. The right storage solution not only keeps cosmetics and beauty tools easily accessible but also maximizes the benefits of built-in lighting for perfect makeup application and grooming.
LED-lit mirrors with storage have become increasingly popular in modern vanity setups, offering both practical illumination and space-saving solutions. When properly organized, these units can transform a cluttered vanity into a streamlined, professional-grade beauty station while providing optimal lighting conditions for any time of day.
Required Items:
- Clear acrylic organizers
- Drawer dividers
- Small storage containers
- Cable management clips
- Microfiber cleaning cloths
- Adhesive hooks
- Battery organizer (if applicable)
- Anti-slip drawer liners
- Label maker
- Measuring tape
Begin by thoroughly cleaning the mirror and storage areas, ensuring all LED components are dust-free and functioning correctly. Measure the available storage space, including any cabinets or drawers integrated into the mirror unit, and plan zones for different categories of items: daily essentials, occasional-use products, and backup supplies.
Install drawer dividers or small containers to create designated spaces for each category, keeping frequently used items at eye level and within easy reach of the lit mirror area. For mirrors with side storage, utilize adhesive hooks and clear organizers to maximize vertical space while maintaining visibility.
Arrange products by frequency of use and ensure they don’t interfere with the LED lighting distribution. If the unit includes drawer storage, implement a system of clear containers that allows you to see all contents while protecting them from dust and damage.
To maintain organization long-term, regularly clean LED components, replace batteries if necessary, and conduct monthly audits of stored items. Keep cleaning supplies nearby for quick touch-ups, and consider installing additional lighting strips in darker storage areas to maintain visibility.
Remember to position heat-sensitive products away from LED components and ensure proper ventilation around all electrical elements for safety and longevity.
Stackable Beauty Product Containers
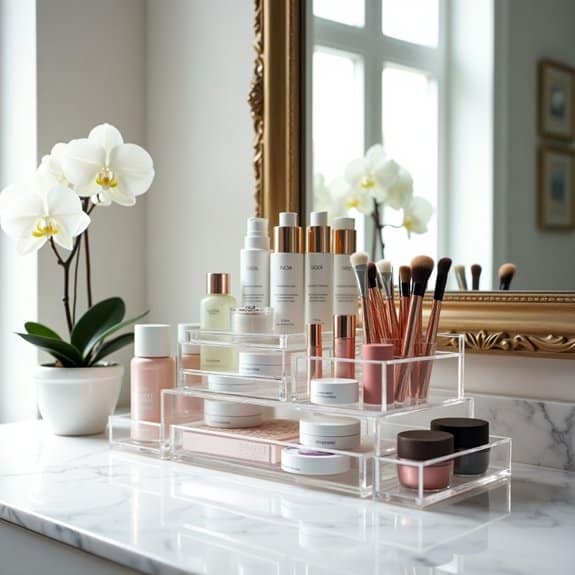
Organizing beauty products with stackable containers transforms a cluttered vanity into an efficient, aesthetically pleasing space. When products are properly stored and easily visible, you’re more likely to use them regularly and before their expiration dates, maximizing your investment in skincare and cosmetics.
Stackable containers create vertical storage solutions that maximize limited counter space while keeping products protected from dust and environmental factors. This systematic approach to organization not only streamlines your daily beauty routine but also helps maintain product integrity and makes inventory management effortless.
Required Items:
- Clear acrylic stackable containers
- Container dividers
- Label maker or labels
- Measuring tape
- Cleaning cloth
- Storage bins for backup products
- Small drawer organizers
- Container risers
- Anti-slip drawer liners
Start by measuring your vanity space and selecting appropriately sized stackable containers that fit within these dimensions. Sort beauty products by category (skincare, makeup, tools) and frequency of use, placing daily items in easily accessible top containers.
Arrange products vertically with taller items at the back of each container and shorter ones in front for visibility. Use drawer organizers or small bins within larger stackable containers to prevent items from sliding around and maintain organization.
For optimal organization, implement a top-to-bottom system where heavier items and backup products occupy bottom containers, while lighter and frequently used items stay in top containers. Ensure each container has adequate ventilation if storing natural or organic products.
Label each container clearly with its contents and consider using clear containers to easily identify products at a glance.
Additional Tips: Regularly audit your stackable container system every three months to remove expired products and reassess your organization needs.
Consider using drawer liners to prevent containers from sliding and invest in containers with removable dividers for flexibility as your collection changes. Keep a small amount of empty space in each container to accommodate new products and maintain the system’s functionality over time.
Pull-Out Drawer Dividers and Compartments
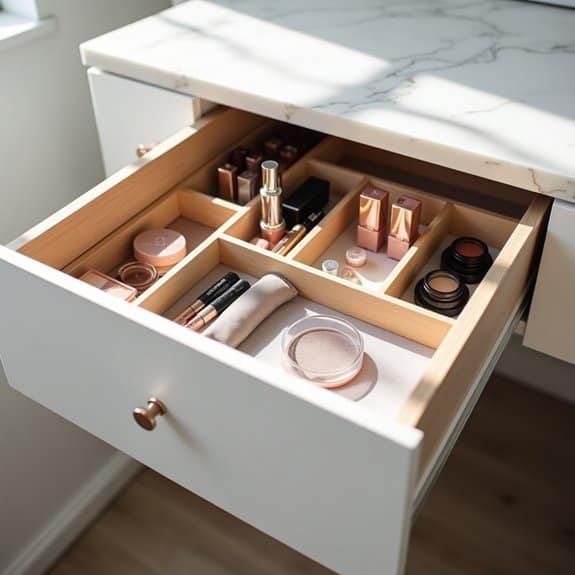
Organizing vanity drawers with proper dividers and compartments transforms a chaotic space into an efficient, easy-to-navigate storage system. When makeup, skincare products, and grooming tools each have designated spaces, morning routines become streamlined, and items remain better preserved and easily accessible.
Pull-out drawer organization maximizes vertical space while keeping items visible and within reach. This system prevents products from getting lost in the back of drawers and eliminates the frustration of digging through layers of items to find what you need, ultimately saving time and reducing stress during daily preparation routines.
Required Items:
- Drawer dividers (adjustable or fixed)
- Drawer liner material
- Storage containers or bins
- Measuring tape
- Labels
- Cleaning supplies
- Small organizing trays
- Drawer stops
- Drawer slides (if needed)
Start by removing everything from the drawer and thoroughly cleaning the interior. Measure the drawer dimensions carefully, accounting for both width and depth, and plan your compartment layout based on the sizes of items you regularly use.
Install drawer slides if needed to ensure smooth operation, then place non-slip liner material at the bottom of each drawer to prevent items from sliding.
Position larger dividers first to create main sections based on category (makeup, skincare, hair products, etc.). Within these sections, use smaller compartments or organizing trays to separate individual items.
Consider the height of products when selecting containers to ensure the drawer will close properly. Install drawer stops if necessary to prevent containers from shifting.
For optimal organization maintenance, implement a system where frequently used items are placed toward the front of pull-out sections, while occasional-use products can be stored toward the back.
Regular assessment of stored items helps maintain organization and prevents accumulation of expired products. Consider using clear containers or labels to quickly identify contents, and periodically clean both containers and drawer surfaces to maintain hygiene and functionality.
Glass Apothecary Jars for Cotton and Tools
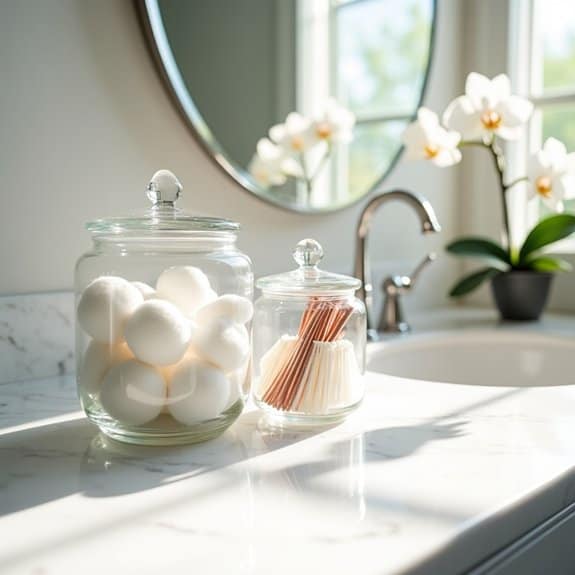
An organized vanity space not only creates a luxurious, spa-like atmosphere but also streamlines your daily beauty and hygiene routines. Glass apothecary jars offer an elegant storage solution while keeping essential items visible and easily accessible, eliminating the frustration of digging through drawers or containers.
The transparent nature of glass apothecary jars transforms everyday bathroom necessities into decorative elements while protecting them from moisture and dust. This classic storage method has stood the test of time, combining functionality with aesthetic appeal that enhances any vanity’s appearance.
Required Items:
- Glass apothecary jars (various sizes)
- Cotton balls
- Cotton swabs
- Makeup brushes
- Beauty tools
- Label maker or decorative labels
- Cleaning cloth
- Glass cleaner
- Small organizing trays (optional)
- Drawer liner or felt pads
Thoroughly clean each apothecary jar with glass cleaner before use. Sort items by category, considering frequency of use and size requirements for each container. Place daily-use items like cotton balls and swabs in larger jars positioned at the front of the vanity. Reserve medium-sized jars for makeup brushes, ensuring they stand upright for proper maintenance. Dedicate smaller jars to specific tools such as tweezers, scissors, or nail implements.
Arrange jars in descending height order from back to front for a visually appealing display that maintains easy access to all items. To maintain optimal organization, regularly assess the contents of each jar and refill as needed. Consider using drawer liner or felt pads underneath jars to prevent scratching on vanity surfaces.
Label the bottom of each jar discretely to maintain consistent organization when cleaning or rearranging. For items sensitive to moisture, add silica gel packets at the bottom of jars to preserve contents’ quality.
Wall-Mounted Floating Shelves Above Vanity
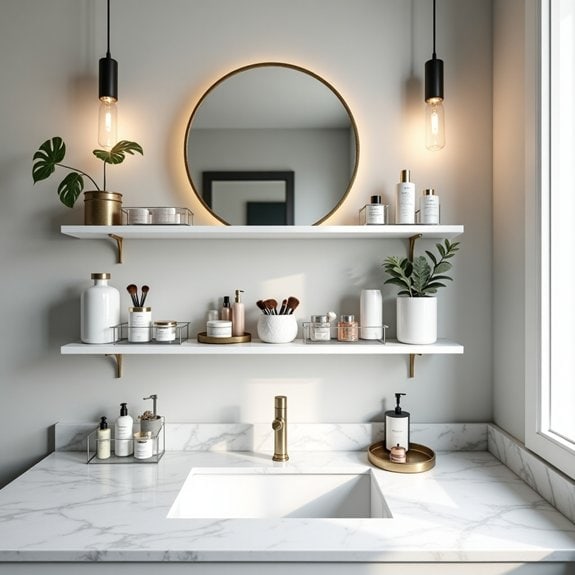
Wall-mounted floating shelves above your vanity create a sleek, modern storage solution that maximizes vertical space while keeping essential items within arm’s reach.
These shelves not only provide practical storage but also serve as an opportunity to display decorative items, creating an aesthetically pleasing bathroom environment.
Proper organization of floating shelves can transform your morning routine by ensuring frequently used items are easily accessible while maintaining a clutter-free vanity counter below. This setup is particularly valuable in smaller bathrooms where space optimization is crucial.
Required Items:
- Floating shelves (2-3 depending on wall space)
- Level
- Drill and drill bits
- Wall anchors and screws
- Measuring tape
- Pencil
- Small decorative containers or baskets
- Clear acrylic organizers
- Glass jars
- Shelf liner (optional)
Start by measuring the wall space above your vanity and marking the desired placement of each shelf, ensuring they’re level and properly spaced.
Install the floating shelves according to manufacturer instructions, using appropriate wall anchors for your wall type. Once secured, group similar items together in attractive containers: daily essentials on the lowest shelf for easy access, less frequently used items on middle shelves, and decorative items on top shelves.
Arrange items by frequency of use and maintain a balance of practical storage and aesthetic appeal. Place daily skincare products and cosmetics in clear organizers on the lowest shelf. Reserve middle shelves for backup supplies and seasonal items in decorative containers.
Top shelves can showcase plants, candles, or artwork while storing rarely-used items behind them.
To maintain organization long-term, implement a regular cleaning schedule and assess items monthly. Use drawer liners to prevent damage to shelf surfaces, and consider adding small labels to containers for easy identification.
Keep heavier items closer to the wall for better weight distribution, and leave some open space between items for a clean, uncluttered appearance.
Space-Saving Corner Organizer Systems
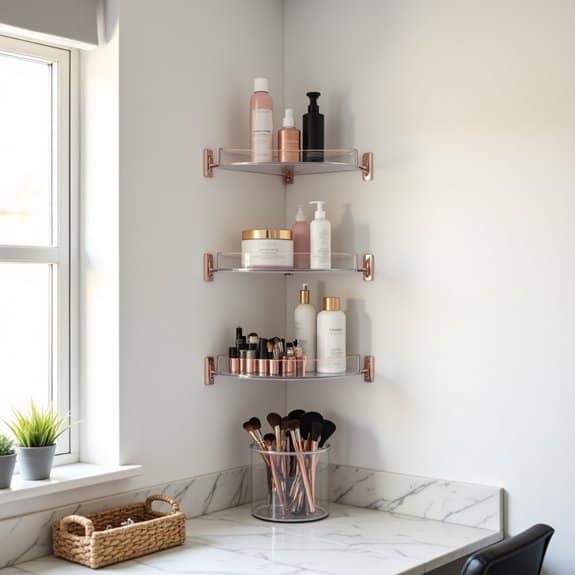
Making the most of corner spaces in your vanity area is crucial for maximizing storage potential in what’s often considered awkward or wasted space. Corner organizers can effectively double your storage capacity while maintaining easy access to everyday items, transforming previously unused angles into functional storage solutions.
Corner organization systems are particularly valuable in smaller bathrooms or vanity areas where space optimization is essential. These systems utilize vertical space and clever angular designs to accommodate everything from makeup and skincare products to hair tools and daily essentials, all while maintaining a clean, organized appearance.
Required Items:
- Corner shelf units or lazy Susan organizers
- Clear acrylic containers
- Drawer dividers
- Tension rods
- Command hooks
- Label maker
- Measuring tape
- Level
- Cleaning supplies
- Storage bins with varying heights
- Small organizing baskets
Install corner shelving units at appropriate heights, ensuring adequate space between shelves for taller items. Group similar items together using clear containers or baskets, placing frequently used products at eye level and less-used items on higher or lower shelves. Utilize lazy Susan organizers in deep corners to prevent items from getting lost in the back.
For under-sink spaces, implement a two-tier sliding system that works around plumbing while maximizing corner space. Arrange products by frequency of use and category, keeping daily essentials easily accessible. Install small tension rods in vertical spaces to hang spray bottles or tools. Use clear containers to maintain visibility of products while protecting them from bathroom moisture and dust.
Implement drawer dividers in adjacent drawers to create designated spaces for smaller items that complement your corner organization system.
Additional Tips: Regularly review and rotate products based on seasonal needs or expiration dates. Consider installing battery-operated LED strips to illuminate dark corners, making items easier to locate. Maintain the organization system by immediately returning items to their designated spots after use and conducting monthly quick reviews to adjust the system as your needs change.
This proactive approach ensures your corner organization system remains functional and efficient long-term.
Minimalist Makeup Brush Holders
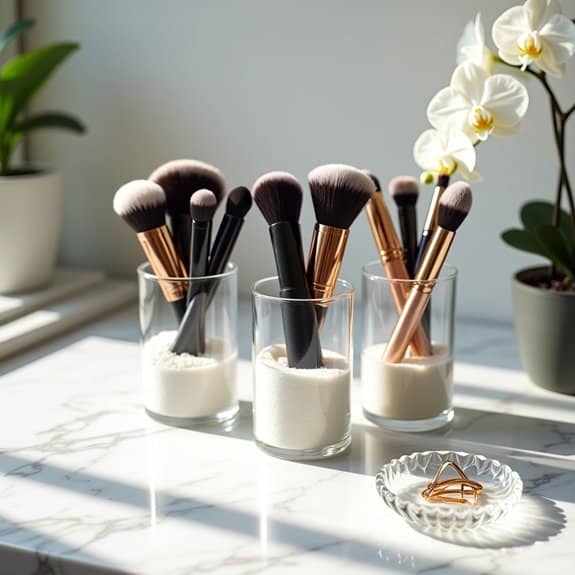
A well-organized makeup brush collection is essential for maintaining the longevity of your tools and streamlining your daily beauty routine. When brushes are properly stored, they maintain their shape, stay clean longer, and remain easily accessible, reducing the time spent searching for the right tool during makeup application.
Minimalist makeup brush organization specifically focuses on creating clean, uncluttered spaces that not only look aesthetically pleasing but also serve a practical purpose. This approach helps prevent overcrowding, makes cleaning easier, and ensures that each brush has its designated spot, promoting better hygiene and extending the life of your makeup tools.
Required Items:
- Clear acrylic containers or holders
- Glass jars or vessels
- Drawer dividers
- Measuring tape
- Clean cloth
- Rubber bands or hair ties
- Labels or label maker
- Rice or glass beads (for weighted holders)
- Cleaning solution
- Paper towels
Start by thoroughly cleaning all makeup brushes and sorting them by size and function. Place taller brushes in higher containers and shorter ones in smaller vessels to maintain visual balance.
For drawer organization, use dividers to create designated sections for different brush types. Fill container bases with rice or glass beads to provide stability and keep brushes upright, ensuring bristles don’t touch each other or the container walls.
Position frequently used brushes in easily accessible spots, while keeping special-occasion brushes in secondary locations.
Pro Tips: Rotate brush positions periodically to prevent dust accumulation on one side. Consider using clear containers to easily identify brushes and maintain the minimalist aesthetic.
Always store brushes vertically with bristles pointing up to maintain their shape and prevent damage. Clean containers monthly and replace filler materials every three months to maintain hygiene standards. Avoid overcrowding holders, as this can lead to misshapen bristles and reduced brush performance.
Multi-Tier Rolling Cart Organization
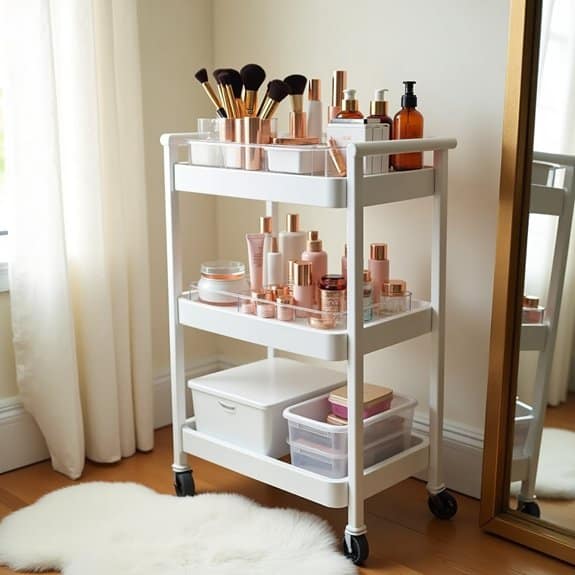
A well-organized multi-tier rolling cart transforms your vanity space from chaotic to streamlined, creating an efficient system for accessing beauty products, skincare items, and daily essentials.
The mobility of a rolling cart allows you to move your items wherever needed while maintaining organization and preventing cluttered counter spaces.
The tiered approach enables logical grouping of products by category or frequency of use, making your morning and evening routines more efficient. When properly organized, each tier serves a specific purpose, eliminating the frustration of searching for items and ensuring products remain visible and accessible.
Required Items:
- Multi-tier rolling cart
- Clear organizing containers
- Label maker or labels
- Drawer dividers
- Small storage bins
- Clear makeup organizers
- Acrylic risers
- Measuring tape
- Cleaning supplies
Begin by thoroughly cleaning your rolling cart and measuring each tier to determine appropriate container sizes.
Sort all items into categories such as daily essentials, makeup, skincare, hair products, and tools. Assign each category to a specific tier, placing frequently used items on the top level for easy access. The middle tier works well for occasional-use products, while the bottom tier can store backup supplies and less-frequently used items.
Use clear containers and organizers within each tier to create designated spaces for specific products. Implement drawer dividers or small bins to prevent items from shifting when moving the cart. Position taller items at the back of each tier and shorter items in front to maintain visibility.
Consider using acrylic risers to maximize vertical space and create multiple levels within each tier.
For optimal organization maintenance, regularly review and declutter your cart contents, removing expired products and items you no longer use.
Consider implementing a rotation system for seasonal products, and always return items to their designated spots after use. Adding labels to containers and sections helps maintain organization and makes it easier for others to help keep the system intact.
Custom-Built Vanity Storage Solutions
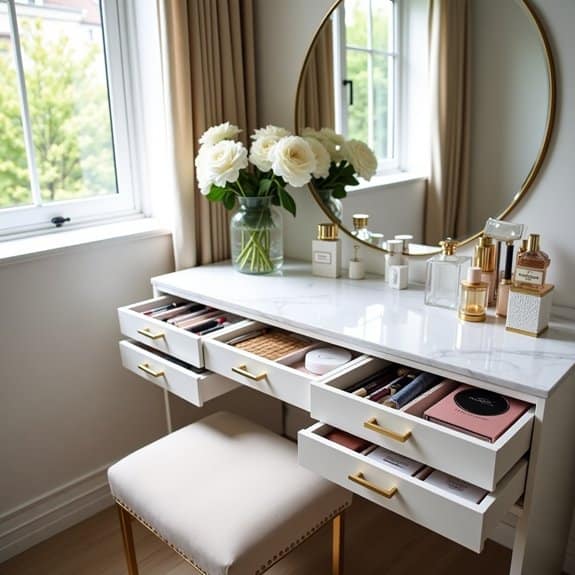
Custom-built vanity storage solutions represent a significant investment in both bathroom functionality and personal comfort. By creating storage specifically tailored to your needs and space, you can maximize every inch while ensuring all your personal care items have a designated home.
A well-designed custom storage system transforms your daily routine from chaotic to streamlined, reducing stress and saving valuable time each morning. Custom solutions allow you to account for specific items like hair tools, makeup collections, or skincare products while maintaining an aesthetic that complements your bathroom’s design.
Required Items:
- Measuring tape
- Graph paper
- Pencil
- Level
- Power drill
- Screwdriver set
- Wood or acrylic materials
- Drawer slides
- Cabinet hinges
- Handles or knobs
- Wood glue
- Sandpaper
- Paint or finish
- Storage dividers
- Mounting brackets
Begin by measuring your vanity space thoroughly, including depth, width, and height, accounting for plumbing and electrical outlets. Sketch your design on graph paper, planning for different zones based on frequency of use and item categories. Consider incorporating features like pull-out shelves, divided drawers, or vertical storage solutions for items like hair tools and brushes.
Install the framework of your custom storage system, starting with the main cabinet structure if building from scratch. Add drawer slides and shelving supports, ensuring everything is level and secure. Create custom dividers and organizers for drawers and shelves, sized specifically for your items. Install doors and hardware last, making sure all components move smoothly and align properly.
For optimal results, consider implementing adjustable elements in your design, such as movable dividers or modular components that can be reconfigured as your needs change. Use water-resistant materials and finishes to protect against moisture, and include adequate ventilation to prevent mildew.
Regular maintenance of sliding mechanisms and hinges will ensure your custom storage solution remains functional and efficient for years to come.
Drawer-Top Jewelry Display Systems

A well-organized jewelry display system on your vanity drawer top not only protects your valuable pieces but also transforms them into an elegant, functional display. When jewelry is properly arranged and visible, you’re more likely to wear and enjoy your collection, rather than letting pieces become tangled or forgotten in traditional jewelry boxes.
Drawer-top organization maximizes the often-underutilized horizontal space above your vanity drawers while keeping frequently worn pieces easily accessible. This system works particularly well for necklaces, rings, and bracelets that you wear regularly, preventing tangling and making your morning routine more efficient.
Required Items:
- Acrylic jewelry organizers
- Ring holders
- Bracelet T-bars
- Necklace stands
- Velvet-lined trays
- Small dish for daily wear items
- Drawer liner or non-slip mat
- Microfiber cleaning cloth
- Clear dividers
- Stacking organizers
Start by measuring your drawer top space and selecting appropriately sized organizers that fit without overcrowding. Place a non-slip mat underneath all display pieces to prevent sliding and protect the surface.
Position taller items like necklace stands toward the back, with graduated heights moving forward. Arrange ring holders and bracelet displays in the middle section, keeping frequently worn pieces in the front for easy access.
Create distinct zones for different types of jewelry, grouping similar items together. For example, dedicate one area to rings, another to bracelets, and a separate section for necklaces. Consider your natural reaching patterns and place items accordingly. Ensure adequate space between pieces to prevent scratching and tangling.
Additional Tips: Rotate your displayed pieces seasonally to protect them from dust and excessive exposure to light. Clean your organizing tools monthly with a microfiber cloth, and consider using small silica gel packets near your displays to prevent tarnishing.
Keep more delicate or special occasion pieces in closed storage, displaying only items you access regularly to maintain a clean, uncluttered appearance.
Hidden Storage Mirror Cabinets
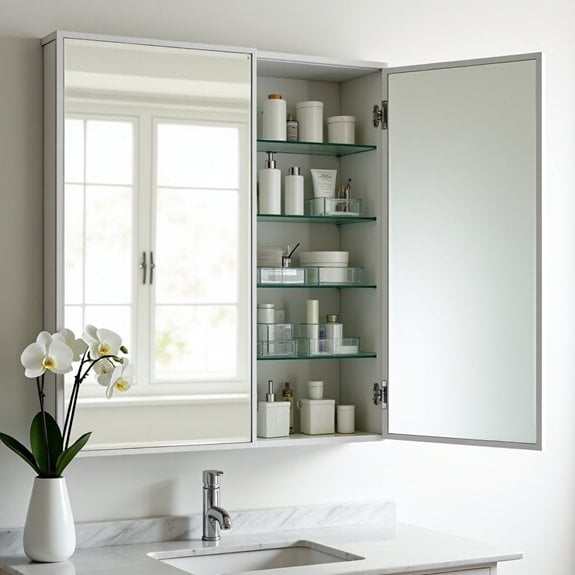
A well-organized hidden storage mirror cabinet transforms your daily routine by providing quick access to essential items while maintaining a clutter-free bathroom space. These versatile fixtures combine functionality with space-saving design, making them invaluable for bathrooms of any size.
Maximizing the potential of your mirror cabinet storage requires thoughtful organization and strategic placement of items. When properly arranged, these cabinets can store a surprising amount of daily essentials while keeping them protected from humidity and dust, all while maintaining easy accessibility.
Required Items:
- Clear storage containers or bins
- Adhesive shelf liners
- Drawer dividers or small organizers
- Labels and label maker
- Measuring tape
- Cleaning supplies
- Small hooks or adhesive holders
- Glass cleaner
- Microfiber cloth
Begin by completely emptying the cabinet and cleaning all surfaces thoroughly. Measure the interior shelves and install shelf liners to protect against moisture and make cleaning easier.
Group similar items together: daily essentials on middle shelves, less frequently used items on top or bottom shelves, and first-aid supplies in a designated area.
Create zones within the cabinet using small organizers or dividers. Position frequently used items at eye level, and store items in clear containers to maintain visibility.
Install small hooks on the cabinet door’s interior for hanging items like tweezers or dental tools. Ensure all containers and items are properly labeled for quick identification.
Consider implementing a rotation system for products with expiration dates, placing newer items at the back and older ones in front. Leave some open space for future purchases, and regularly review contents to prevent overcrowding.
For optimal organization, avoid storing oversized items that could prevent the cabinet from closing properly, and maintain a regular cleaning schedule to keep the mirror and storage areas spotless.

