Garage floors can be or become uneven for a variety of reasons. This article will tell you in detail how to level a concrete garage floor.

Fixing damage to a foundation caused by the differential settlement is not a DIY project. If you have an older house with unlevel floors, the problem is likely differential settlement. That means you’ll need to have the home inspected by an experienced foundation repair contractor or a structural engineer.
During renovation work on the floor, you often come across substrates that make it impossible to simply apply a new floor covering. For example, massive damage comes to light under the old carpet or the floor in the garage has to be replaced because it is damaged.
Sometimes you have already removed the old terrace planking in order to make space for something nicer and then discover that the subsurface is so uneven that you cannot lay any new slabs or tiles on it. Or you followed the constant puddles of water on the floor and notice that it is simply slanted and that the water is therefore collecting in a corner.
In all of these cases, you have to level the floor before you beautify it.
There are several options. Which one you need depends on several factors:
- Only a few spots need to be touched up
- The entire subsurface must be leveled
- The subsurface is flexible (for example old floorboards or parquet)
- Level the floor indoors or outdoors
Depending on the requirements of your floor, you should use different leveling compounds. We will briefly discuss the various requirements.
Leveling a Concrete Garage Floor with Minor Unevenness
If there are only small areas with unevenness or damaged areas on the floor, leveling with filler or mortar is usually sufficient. Pouring out the entire floor is then not necessary and the new floor can be laid. In our instructions, we go into more detail in the preparatory steps for eliminating such damage.
Leveling a Concrete Garage Floor with Severe Damage or Inclination
Garage floor temperatures above 90 degrees Fahrenheit can cause the epoxy coating to become tacky and difficult to apply. Professionals will have to pour and spread the epoxy coating quicker in order to counter the heat. Additionally, hotter temperatures can decrease the epoxy’s pot life, causing the coating to cure while still in the bucket.

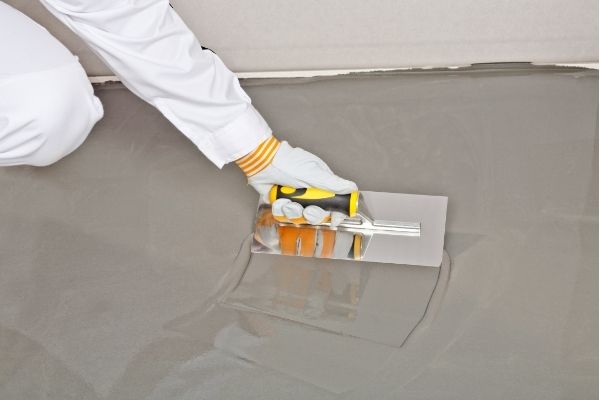
If the entire floor is affected, then you have to pour it over the entire surface with a leveling knife. Here it is important to pay attention to the substrate material. Cement or concrete screeds can be straightened with a simple leveling compound that does not contain any special additives.
However, heated screeds or mastic asphalt require special additives in the leveling compound that make them flexible. Some of them are even suitable for leveling dry screed or natural wood floors, on which another floor covering is to be applied later.
Always pay attention to the instructions on the manufacturer’s packaging. Basically, unevenness of up to 30 millimeters can be removed with a leveling compound.
Leveling Compound or Screed?
In contrast to leveling compound for leveling the floor throughout the room, there is also the option of leveling the floor with screed. Here we briefly explain the difference between leveling compound and screed.
Leveling compound has a great advantage in that it can be applied very thinly, but unevenness disappears. However, you should use the screed if it is not just about making the floor even, but also more stable.
Screed requires a higher construction, which can lead to restrictions in rooms with low ceilings. But baseboards and doors can also speak against the use of screed and make the leveling compound more attractive.
How to Level a Concrete Garage Floor: Instructions
You don’t want the soil beneath your slab to be made of too much clay. That type of dirt expands when it gets wet and shrinks when it dries, causing the soil to shift and uneven concrete slab. Concrete leveling is the process to lift and level an uneven concrete slab.
If your floors are sloping and your foundation is unlevel, you most likely need your foundation underpinned to lift and level the garage floors back to a more desirable level. Sunken concrete slabs are both a safety and a liability issue. However, they can easily be lifted again via a minimally-invasive procedure known as foundation leveling.
In our instructions for leveling the concrete garage floor, we include preparatory repair work on cracks and holes, so the list of materials is quite long. The substrates are not always badly damaged, just crooked, and you can do without filler mortar and trowel. That depends entirely on the conditions of your floor. For the sake of completeness, we want to describe all the steps.
Materials
For Preparation and Repair
- Leveling mortar
- Notched trowel
- Finishing trowel
- Straight edge
- Trowel
- Bucket
- Paint roller
- Brush
- Primer
- Possibly edge insulation strips
For Ground Leveling
- Leveling compound
- Bucket
- Agitator
- Drilling machine
- Spiked roller
- Spiked shoes
Preparation
To level the floor, it must of course be properly cleaned beforehand. When grease-free, dust-free, and free of all loose materials, you can get to work. Make sure to seal all the spots that you don’t want to level with the leveling compound, because it paves its way through even the smallest cracks.
Apply Primer
Before applying the leveling mortar to a few damaged or uneven areas or leveling the entire floor, it is essential to apply a primer to the floor. For this, you need a special primer, which is enriched with quartz sand.
Applying it to the floor with a brush and roller creates an adhesive bridge. It enlarges the subsurface and ensures an optimal bond between leveling compound and substrate.
Repair Damaged Areas
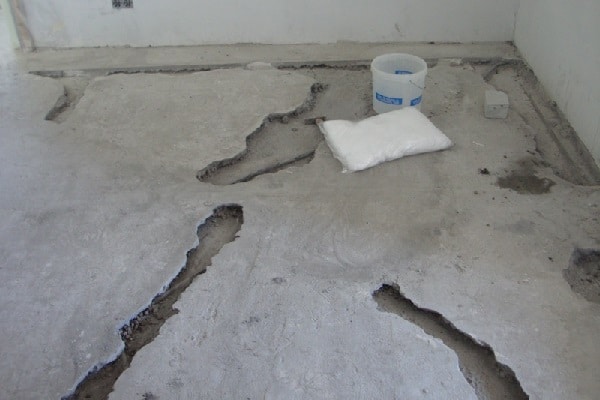
If your floor is only damaged in a few places, you do not need to level it over the entire surface with leveling compound. It is often sufficient to carefully fill in the relevant areas with leveling mortar and repair them.
But even if there are some rough cracks and damage such as holes in your floor, you should even repair them with a leveling spatula before the floor.
The exact orientation of the leveling is important when repairing individual spots in the ground. A straight edge of a suitable size (at least as long as the diameter of the damaged area) will help you. Finishing trowel, trowel, and notched trowel are other utensils that you will need.
Now apply the leveling mortar in generous portions to the damaged areas with a trowel. Then fill everything well with a finishing trowel. Rub off everything with a straight edge. This will remove the excess material. Your floor won’t be completely level the first time, so repeat the process.
This time, use the notched trowel and not the finishing trowel to distribute. Through the teeth, you can see exactly where the mortar is still missing and you can rework it here again. Repeat with the straightedge.
If there are still small holes and ridges, then carefully work again with the finishing trowel. This step can be omitted if you distribute the leveling compound over the entire floor again after the first repair.
Apply Leveling Compound
If you want or have to level the entire floor, then you need leveling compound. When mixed, this is significantly thinner than leveling mortar.
The advantage of the leveling compound or self-leveling compound is that it aligns itself, i.e. it flows and spreads on the floor by itself. So you cannot create a gradient with it, because the mass is distributed over a wide area and evenly, following the laws of gravity.
A complete leveling of the floor raises it by a few millimeters, but as already mentioned, not as high as the screed.
It is advisable to provide the edge with insulation strips so that no sound or moisture can be transferred from the walls. Some people also work with a silicone joint, but insulation strips are clearly the better choice.
In order to work quickly and efficiently, you need really large and many buckets, so ideally construction buckets or large mortar tubs and, best of all, a helping person. Once you have started, the leveling compound has to be further mixed and distributed as a whole.
It is best to start in a hard-to-reach corner and work your way to the exit, as when applying the primer. With the help of a notched trowel, you can stimulate the flow of the leveling compound. It is not distributed, only initiated.
After the Floor Leveling
If you have successfully distributed the leveling compound and have not concreted yourself in, then it comes to drying. The drying times are of different lengths. So look at the manufacturer’s information.
But before you close the door and wait to continue treating the substrate, there is one more important step you need to take – the floor needs to be vented.
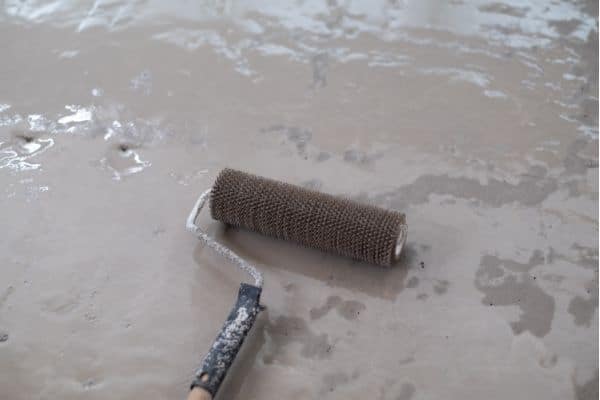
This is quite easy by wearing spiked shoes and equipping yourself with a spiked roller. So shoes and armed you go with the roller on the floor and get the last of the air out of the mass. Do not shuffle, but always lift your feet well, otherwise, you may create furrows.

We advise you to use a spiked roller with a splash guard to prevent splashes on your walls. After sufficient drying, you can then apply the new flooring later.

